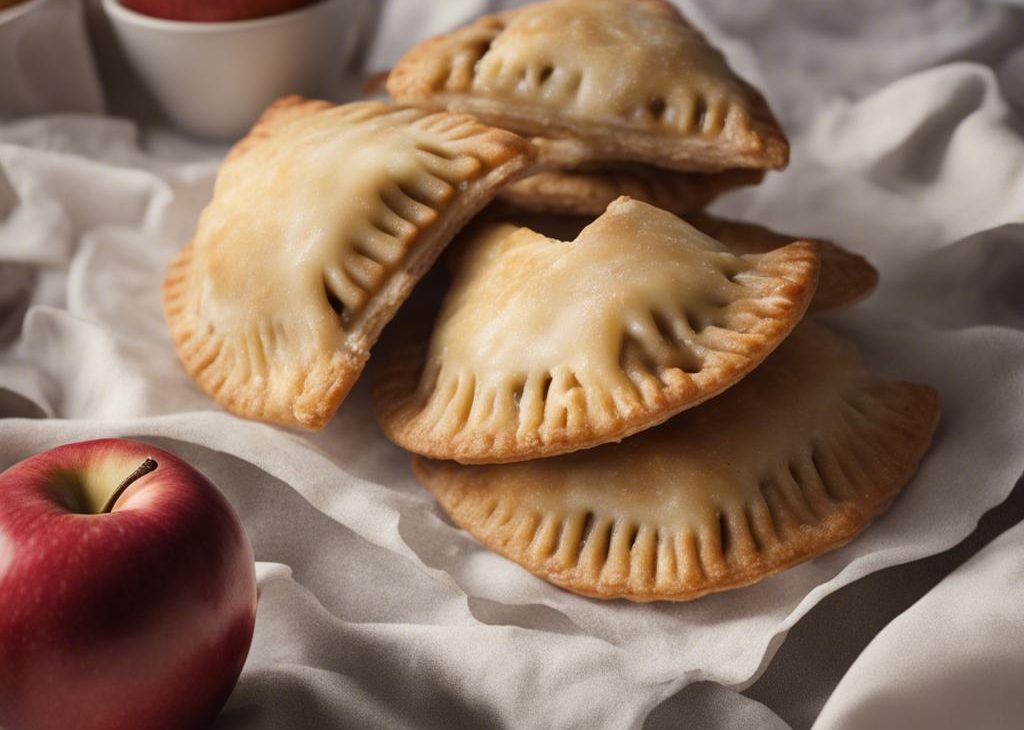
Apple hand pies are my casual apple pie. I can hand one to someone without a plate, and the ratio of crust to filling is exactly what crust people want.
The only mistake I still have to guard against is overfilling. Two Tablespoons looks stingy until the top crust goes on, and then it suddenly makes sense.
Because the dough chills for 2 hours, I treat this as a plan-ahead dessert. The actual shaping is simple once the filling is cool and the circles are cold.
Why I keep coming back to this
- It keeps the main apple flavor clear instead of hiding it under too many extras.
- The method is practical for a home kitchen, with clear stopping points if I need to pause.
- The texture has contrast, whether that means flaky crust, soft cake, crisp pastry, or a chilled sip.
- Most of the ingredients are easy to recognize and measure.
- It is flexible enough for a small tweak without losing the point of the recipe.
- Leftovers, when there are any, still feel worth saving.
What you need (and what each one is doing)
- Homemade Pie Crust (makes 2 crusts, use both).This is the structure of the recipe, so I keep it cold and handle it lightly. Warm pastry is harder to shape and never bakes as flaky for me.
- 3 medium apples, peeled and diced into small bite-size pieces (about 2 and 1/2 cups, or 300g, diced).The apples are the main flavor. I cut them as evenly as I can so the pieces soften at the same pace and the finished hand pies does not have hard bites.
- 1/3 cup granulated sugar (70g).Sugar is not only sweetness here; it helps draw juice from fruit and gives the crumb or frosting the right texture. I measure it instead of guessing.
- 2 Tablespoons unsalted butter (28g).This brings tenderness and richness. I pay attention to whether it should be melted, softened, or cold because that changes the final texture.
- 1 teaspoon ground cinnamon.The spice is small but noticeable.
- 1/4 teaspoon ground nutmeg.The spice is small but noticeable.
- 1/4 teaspoon ground allspice.The spice is small but noticeable.
- 1 large egg beaten with 1 Tablespoon milk, for egg wash (15ml milk).Eggs bind, enrich, or brown depending on the step. I use room temperature eggs in batter and a light hand with egg wash.
- optional: homemade salted caramel for topping.Having the small ingredients lined up keeps me from rushing once pans or pastry are involved.
How I make it
Step 1 — Chill dough
Prepare pie crust through step 5 and chill at least 2 hours.
Step 2 — Cook filling
Simmer apples, sugar, butter, cinnamon, nutmeg, and allspice over low-medium heat for 2 minutes, then cool uncovered for 30 minutes.
Step 3 — Cut circles
Roll each dough disc to about 12 inches and 1/8-1/4-inch thick. Cut circles, reroll scraps, and chill cut circles at least 15 minutes.
Step 4 — Prepare oven
Preheat to 375°F (191°C). Line two large baking sheets.
Step 5 — Fill and seal
Place half the circles on pans, cut vents in the rest, add about 2 Tablespoons filling, top, seal, crimp, and brush with egg wash.
Step 6 — Bake
Freeze 10 minutes if the pies feel warm. Bake 28-32 minutes, rotating halfway, then cool 5 minutes on the sheets before moving to a rack.
Tips from my kitchen
- Measure before starting.I set out the small ingredients first because pastry, batter, and hot sugar all punish last-minute searching.
- Trust the visual cues.Ovens vary, so I look for bubbling fruit, golden pastry, set centers, or thickened frosting instead of blindly following the timer.
- Give it the rest it needs.Cooling is not dead time; it is when filling thickens, crumb sets, and frosting becomes easier to handle.
- Keep edges tidy.Clean borders on pastry and evenly spread batter make the finished recipe easier to slice or serve.
Variations I have actually tried
- Drizzle warm salted caramel after baking.:Drizzle warm salted caramel after baking.
- Sprinkle coarse sugar over the egg wash.:Sprinkle coarse sugar over the egg wash.
- Swap one apple for a firm pear.:Swap one apple for a firm pear.
- Use only cinnamon for a simpler filling.:Use only cinnamon for a simpler filling.
- Make larger half-moon pies with bigger circles.:Make larger half-moon pies with bigger circles.
What I watch for
- Texture tells me more than the clock.I start checking early and keep baking or chilling until the recipe looks and feels right.
- Even pieces cook evenly.Apples that are close in size give a better bite and prevent random firm chunks.
- Small leaks are normal.Fruit desserts often bubble over a little; I care more about flavor and doneness than a spotless pan.
- I avoid rushing hot sugar or hot fruit.Both hold heat longer than they look like they should.
Storing and reheating
Pastry and crumb toppings soften with time, but a brief oven warm-up brings back some texture.
For reheating baked desserts, I prefer 325°F (163°C) to 350°F (177°C) for a few minutes. The microwave is faster, but it usually softens crusts and toppings.
What I serve with it
I serve this in the simplest way that fits the recipe: coffee with cake, vanilla ice cream with pie, or a small drizzle when the dessert already has enough sweetness. I do not like burying apple flavor under too many toppings.
Frequently asked questions
Can I make the filling ahead?
Yes. Cook and chill it a day ahead; cold filling is easier to use.
Can I freeze them?
Yes. Freeze shaped unbaked pies until firm, then bake from frozen with extra time.
Why did they open?
They were probably overfilled, too warm, or not crimped firmly.
Can I use store-bought crust?
Yes. Keep it cold and use the same filling and baking method.
How long do leftovers keep?
Cover and refrigerate up to 5 days, then reheat in the oven.
If you make this, leave a comment with the apple variety or small change you used. I always like seeing which details work in another kitchen.