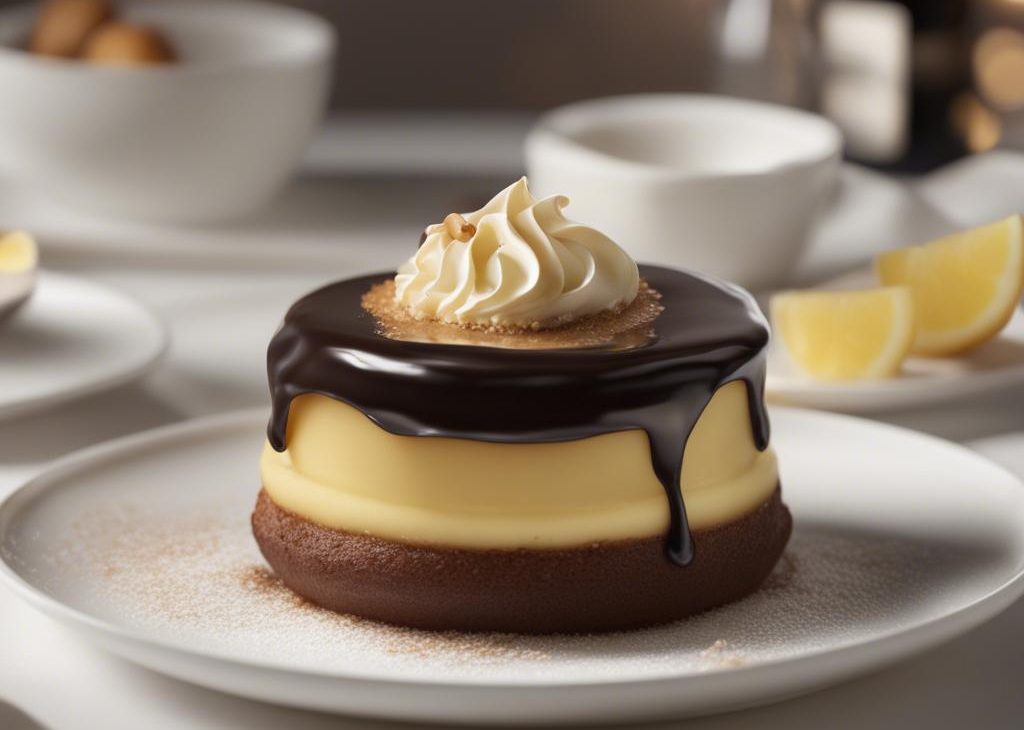
I started making Boston Cream Pie after I wanted the flavor of the original without the thin, rushed feeling a lot of copycat recipes have. My first pass was not tidy: I had one bowl too many on the counter, I tasted too early, and I had to correct the seasoning at the end. That test was useful, though, because it showed me where the recipe needed patience.
This cake is easiest when I treat it as three small projects: pastry cream, sponge, and glaze. The pastry cream needs time to chill, the cake layers need to cool, and the glaze needs a cold cake so it drips instead of flooding the plate.
I wrote this the way I actually cook it, with the small visual cues I watch for. A timer is helpful, but it cannot tell whether your pan is crowded, your cheese is melting smoothly, or your fish is cold from the refrigerator. I use the listed times, then I look, smell, and taste before I call it done.
Why I keep coming back to this
- The ingredient list is short enough that every item has a clear job.
- The method gives me practical checkpoints instead of asking me to guess.
- It works for a small table without turning into a sink full of dishes.
- The flavors are familiar, but there is still room to adjust heat, herbs, or richness.
- Leftovers are easy to use the next day, which matters in my kitchen.
- It feels homemade in a good way: not fussy, not bland, and not overworked.
What you need (and what each one is doing)
- 2 cups half-and-half (480ml).This is the pastry cream base.
- 6 large egg yolks (at room temperature).Yolks thicken the cream.
- 1/2 cup granulated sugar (100g).Sugar sweetens the cream.
- 1/8 teaspoon salt.Salt balances custard.
- 1/4 cup all-purpose flour (31g).Flour thickens pastry cream.
- 1/4 cup unsalted butter (4 Tablespoons; 56g).Butter makes it glossy.
- 1 1/2 teaspoons pure vanilla extract (for pastry cream).Vanilla is the main aroma.
- 1 1/2 cups all-purpose flour (188g).Flour builds the sponge.
- 1 1/2 teaspoons baking powder.Baking powder lifts the cake.
- 3/4 teaspoon salt.Salt sharpens the cake.
- 3/4 cup whole milk (180ml).Hot milk helps the batter.
- 6 Tablespoons unsalted butter (85g).Butter enriches the sponge.
- 1 1/2 teaspoons pure vanilla extract (for cake).Vanilla ties layers together.
- 3 large eggs (at room temperature).Whipped eggs give volume.
- 1 1/2 cups granulated sugar (300g).Sugar stabilizes the foam.
- 1/2 cup heavy cream (120ml).Cream makes ganache.
- 2 Tablespoons light corn syrup.Corn syrup adds shine.
- 4 ounces semi-sweet chocolate (113g; chopped).Chocolate finishes the cake.
How I make it
Step 1 — Start pastry cream
Heat half-and-half until simmering. Whisk yolks, sugar, salt, and flour, temper with hot half-and-half, then whisk back into the pan.
Step 2 — Thicken custard
Cook, whisking constantly, about 5 minutes, then increase heat and whisk until bubbles burst on the surface, about 1 minute. Off heat, whisk in butter and vanilla.
Step 3 — Chill it
Strain into a bowl, press plastic wrap on the surface, and chill at least 2 hours and up to 24 hours.
Step 4 — Prepare pans
Preheat oven to 325°F (163°C). Grease two 9-inch pans, line with parchment, and grease again.
Step 5 — Mix sponge batter
Whisk flour, baking powder, and salt. Heat milk and butter until melted, stir in vanilla, then whip eggs and sugar on high about 4 minutes. Whisk in hot milk mixture and dry ingredients by hand.
Step 6 — Bake layers
Divide batter between pans and bake 20-22 minutes. Cool completely in the pans.
Step 7 — Assemble
Layer cake with pastry cream, then refrigerate while making the glaze.
Step 8 — Glaze and chill
Heat cream and corn syrup until simmering, pour over chocolate, rest 5 minutes, whisk smooth, pour over cake, and chill at least 2 hours before slicing.
Tips from my kitchen
- Prep before heating.I measure the small seasonings first because the cooking moves faster once the pan is hot.
- Watch texture, not only time.I look for bubbling sauce, crisp edges, tender centers, or a glossy glaze before I stop.
- Season in layers.A little salt early and a final taste at the end gives me more control.
- Use the right size pan.Crowding traps steam, while a pan that is too large can dry things out.
- Let it rest when needed.A few quiet minutes often makes slicing, serving, or saucing cleaner.
Variations I have actually tried
- Dark chocolate:use bittersweet chocolate.
- Espresso:add instant espresso to the glaze.
- Orange:add zest to the pastry cream.
- Mini cakes:bake as cupcakes and fill.
- Extra vanilla:use vanilla bean paste.
How I serve and store it
I slice this cold with a hot knife wiped between cuts. Coffee is my favorite pairing because the cake, custard, and chocolate are sweet enough on their own.
Keep refrigerated up to 5 days. If chilled longer than 2 hours before serving, let slices sit briefly at room temperature so the cake softens.
What I learned while testing it
Pastry cream that is too cold can tear the cake as it spreads. I take it out about 20 minutes before assembling and stir until smooth.
I also learned not to chase restaurant flavor by adding more of everything. Usually the better fix is a calmer one: brown the food a little more, let the sauce reduce for another minute, chill the candy fully, or taste for salt after the main ingredient has had time to absorb it.
My timing notes for a better result
I give myself a little buffer around the listed times because home kitchens vary more than recipe cards admit. A cold baking dish, a thin skillet, a crowded sheet pan, or ingredients pulled straight from the refrigerator can all change the finish by a few minutes. I keep the original timing as the roadmap, then I use the doneness signs in the steps as the final call.
For stovetop recipes, I lower the heat before I think I need to. That keeps garlic from scorching, dairy from breaking, and sugar-heavy glazes from turning sticky before the main ingredient is ready. For oven recipes, I check early but do not keep opening the door every two minutes. One careful check near the low end of the range tells me more than nervous peeking.
The serving window matters too. Crisp chicken, wings, cookies, and seared salmon are best soon after cooking. Beans, roast, cake, and candy reward patience because resting or chilling changes the texture. I plan the rest of the meal around that rhythm so the main recipe is not sitting at its worst moment while I finish a side dish.
When I cook from these notes again, I write one quick sentence on the printed page or in my phone: whether the pan was too full, whether I wanted more pepper, or whether the sauce thickened faster than expected. Those tiny notes are why the second batch is usually calmer than the first. They also keep me from changing three things at once and never knowing which change actually helped.
I keep the plating simple for the same reason. A recipe with a creamy sauce, crisp coating, glossy glaze, or tender crumb does not need a crowded plate. I would rather serve it hot, neat, and seasoned correctly than add garnishes that distract from the work already done in the pan, especially when people are already waiting.
Frequently asked questions
Can I make this ahead?
Yes. I do the prep ahead when possible, then cook or finish close to serving so the texture stays fresh.
Can I double it?
Yes, but I use a larger pan or cook in batches. Crowding is the fastest way to lose browning and crispness.
How should I reheat leftovers?
I reheat gently. Crisp recipes do better uncovered in an oven or air fryer, while creamy or saucy recipes need low heat and sometimes a splash of liquid.
Can I change the seasoning?
Yes. I make the base version once, then adjust heat, herbs, salt, or sweetness after I know how the recipe behaves.
What should I serve with it?
I pick a side that balances the dish: something crisp with creamy food, something fresh with fried food, and something starchy with saucy food.
If you make Boston Cream Pie, leave a comment with what you changed. I always like hearing which small adjustments work in other kitchens.