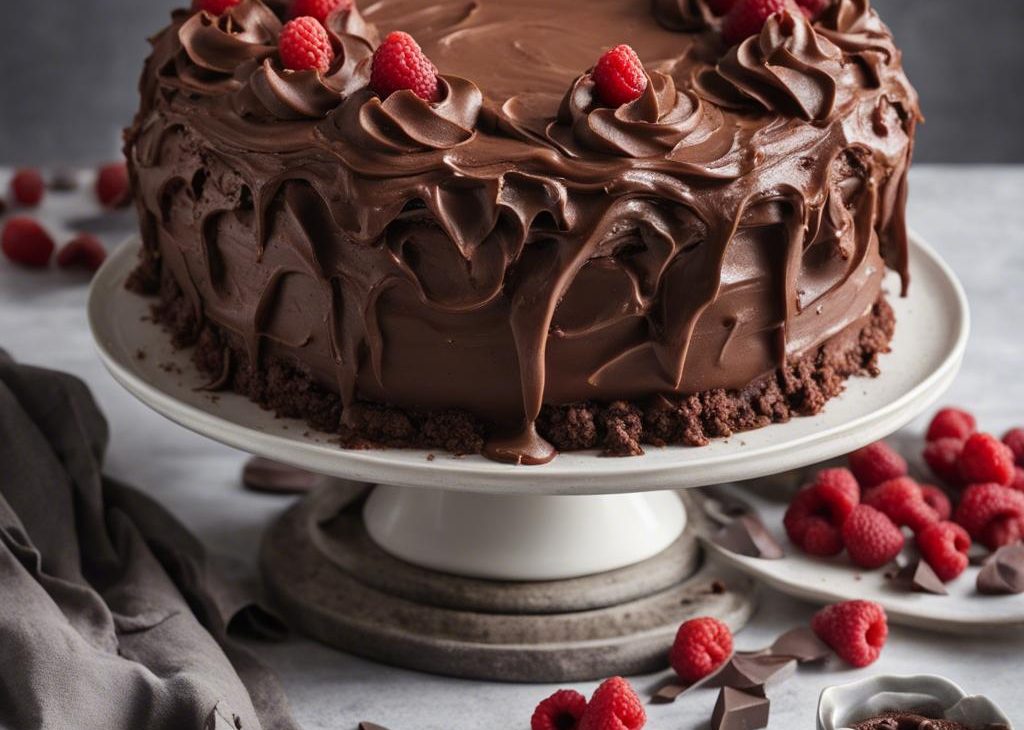
Chocolate Layer Cake is the kind of recipe I make when I want chocolate to be the main point, not a quiet background note. I make it the way I would talk someone through it across my own counter: what I measure carefully, what I do not rush, and where the texture can go wrong if I get distracted.
I measure the amounts carefully because the balance matters here. When an ingredient seems minor, I still give it its place; chocolate recipes have a way of showing every shortcut.
What I like about Chocolate Layer Cake is that it gives a clear payoff for the work. Some steps are quick, some need patience, but none of them are there just to make the recipe look longer.
Why I keep coming back to this
- I can taste the main chocolate flavor clearly instead of just sweetness.
- The quantities are specific enough that I do not have to guess in the middle of cooking.
- I can make parts of it ahead when the recipe needs chilling or cooling.
- The texture gives me a useful cue: set edges, glossy chocolate, thick filling, or a clean skewer.
- The recipe is flexible enough for small variations without losing its identity.
- I like that leftovers store predictably when I cool and cover them properly.
What you need (and what each one is doing)
- 1 3/4 cups all-purpose flour (219g). I use it because it gives structure so the finished recipe holds together after cooling.
- 3/4 cup unsweetened natural cocoa powder (62g).
- 1 3/4 cups granulated sugar (350g).
- 2 teaspoons baking soda.
- 1 teaspoon baking powder.
- 1 teaspoon salt.
- 2 teaspoons espresso powder (optional).
- 1/2 cup vegetable oil (120ml).
- 2 large eggs, at room temperature. I use it because it binds the batter and helps the texture set.
- 2 teaspoons pure vanilla extract.
- 1 cup buttermilk (240ml).
- 1 cup hot coffee or hot water (240ml).
- 1 1/4 cups unsalted butter, softened (282g).
- 3 1/2 cups confectioners sugar (420g).
- 3/4 cup unsweetened cocoa powder (65g).
- 3-5 Tablespoons heavy cream or milk (45-75ml). I use it because it adds moisture and softens the stronger chocolate and nut flavors.
- 1/4 teaspoon salt.
- 1 teaspoon pure vanilla extract.
- optional decoration: semi-sweet chocolate chips.
How I make it
Step 1 — Preheat and prepare
Preheat oven to 350°F (177°C). Grease two 9-inch cake pans, line with parchment paper rounds, then grease the parchment paper. Parchment paper helps the cakes seamlessly release from the pans.).
Step 2 — Whisk the dry ingredients
Whisk the flour, cocoa powder, sugar, baking soda, baking powder, salt, and espresso powder (if using) together in a large bowl. Set aside. Using a handheld or stand mixer fitted with a whisk attachment (or you can use a whisk) mix the oil, eggs, and vanilla.
Step 3 — Bake and check
Divide batter evenly between pans. Bake for 23-26 minutes or until a toothpick inserted in the center comes out clean. Baking times vary, so keep an eye on yours. The cakes are done when a toothpick inserted in the center comes out clean.
Step 4 — Cool completely
Remove the cakes from the oven and set on a wire rack. Allow to cool completely in the pan.
Step 5 — Beat until smooth
With a handheld or stand mixer fitted with a paddle attachment, beat the butter on medium speed until creamy—about 2 minutes. Add confectioners’ sugar, cocoa powder, 3 Tablespoons heavy cream, salt, and vanilla extract. Beat on low speed for 30 seconds, then increase to high speed.
Step 6 — Assemble
If cooled cakes are domed on top, use a large serrated knife to slice a thin layer off the tops to create a flat surface. This is called "leveling" the cakes. Discard or crumble over finished cake. Place 1 cake layer on your cake stand.
Step 7 — Chill
Refrigerate uncovered cake for at least 30-60 minutes before slicing to help set the shape. After that, you can serve the cake or continue refrigerating for up to 4-6 hours before serving. Cake can be served at room temperature or chilled.
Step 8 — Store leftovers
Cover leftover cake tightly and store in the refrigerator for 5 days. I like using a cake carrier for storing and transporting.
Tips from my kitchen
- Read the full recipe first. I do this before starting because several chocolate recipes move quickly once heat is involved.
- Measure before mixing. Small amounts like salt, extract, cocoa, and leavening change the final flavor more than they look like they will.
- Watch texture, not just time. I use the clock as a guide, but I trust visual cues more.
- Let it cool when the recipe says to cool. Warm chocolate, warm cake layers, or warm bars can undo careful work.
- Use an oven thermometer if bakes run odd. A few degrees can change chocolate cakes and cookies quickly.
Variations I have actually tried
- Darker chocolate: I use bittersweet chocolate when I want less sweetness and a stronger cocoa edge.
- Salted finish: A few flakes of salt on top make the chocolate taste deeper.
- Nut swap: When nuts are part of the recipe, I keep the same amount and swap only for a similar chopped nut or butter.
- Fruit note: Raspberries, strawberries, banana, or orange zest can brighten rich chocolate if the base recipe suits it.
- Mini portions: I make smaller pieces for trays, but I start checking doneness earlier.
Storing and making ahead
I cool everything completely before storing. Trapped warmth creates condensation, and condensation is how crisp edges soften, chocolate blooms, and bars get sticky.
For make-ahead planning, I separate the components when possible: cake layers wrapped on their own, fillings chilled in a bowl, or candies stored between sheets of parchment. It makes serving day calmer.
How I like to serve it
I serve Chocolate Layer Cake in the portion size listed in the recipe card, then let the texture decide the temperature. Creamy desserts taste best cold, cakes taste better after a short sit at room temperature, and crisp snacks need an airtight container until the last minute.
If I am serving this with other desserts, I keep the plate simple. Chocolate already brings plenty of flavor, so coffee, milk, berries, whipped cream, or a salty crunch is usually enough.
Frequently asked questions
Can I make this ahead?
Yes, and I often do. I follow the cooling or chilling cues in the recipe, then store it covered so the texture stays close to freshly made.
Can I change the chocolate?
Usually yes, as long as I use the same amount and a chocolate I like eating. Very sweet chocolate makes the final recipe sweeter, while bittersweet chocolate makes it more intense.
What is the most common mistake?
Rushing the rest time is the mistake I see most. Chocolate and baked goods need time to set, cool, or firm up before they cut, dip, or stack neatly.
How do I know it is done?
I look for the cue in the instructions: set edges, a clean skewer, a thickened filling, a dry macaron shell, or chocolate that has fully set. The timer gets me close, but the cue decides.
Can I freeze it?
Many chocolate cakes, bars, and candies freeze well when wrapped tightly. Creamy mousse and some fresh garnishes do not thaw as nicely, so I freeze only the sturdy parts.
If you make Chocolate Layer Cake, I would genuinely like to know which variation you tried and what texture cue helped you most.