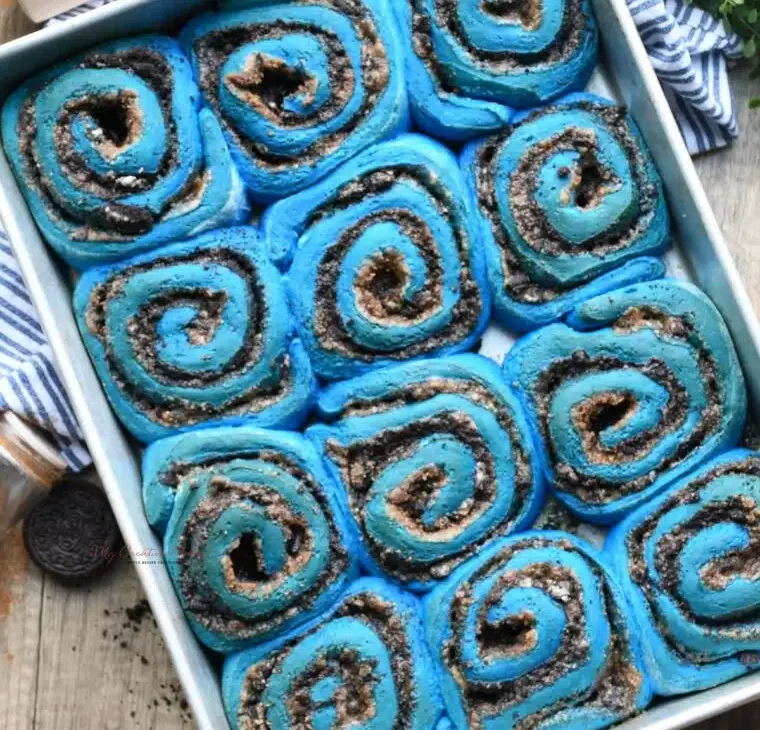
Cookie Monster cinnamon rolls are silly in the best way: blue dough, crushed Oreos, cinnamon sugar, and cream cheese icing. I make them when I want a baking project that feels more fun than a regular pan of rolls.
The dough still behaves like a classic yeast dough. Warm milk wakes up the yeast, kneading builds structure, and two rises give the rolls their soft texture. The blue color and Oreo filling are the playful part.
I keep the method practical: prep the pieces, follow the heat and timing, and do not rush the cooling or resting step when the recipe asks for it. That small bit of patience is usually the difference between blue Oreo-filled cinnamon rolls with cream cheese icing and a batch that feels hurried.
Why I keep coming back to this
- The dough is soft but sturdy enough to roll.
- Crushed Oreos make the filling taste like cookies and cream.
- The blue color makes the rolls fun for a themed breakfast.
- Cream cheese icing balances the sweet filling.
- The rolls bake in a compact 8x8-inch pan.
- The recipe makes 12 pieces, which I serve generously.
What you need (and what each one is doing)
- 1/2 cup warm milk.
- 1 1/4 teaspoons instant yeast.
- 1/4 cup white sugar.
- 2 cups all-purpose flour.It gives structure, or in savory recipes, thickens the sauce without making it pasty.
- 1/4 cup melted butter.The note I keep with it is: cooled to room temperature.
- 2 tablespoons brown sugar.
- 1/2 tablespoon blue food coloring.Gel color gives me a stronger color without thinning the dough or frosting.
- 1 beaten egg.It helps bind the batter or dough so the center sets instead of crumbling.
- 1 tablespoon cinnamon.
- 1/2 cup crushed Oreos.I fold it in gently so the pieces stay visible and the flavor lands in little pockets.
- 1/4 cup heavy whipping cream.
- 1/4 cup softened butter.The note I keep with it is: for icing.
- 1 cup powdered sugar.
- 4 ounces cream cheese.
How I make it
Step 1 — Start the yeast dough
In the stand mixer bowl, I combine warm milk, yeast, and sugar. Then I add the beaten egg, melted butter, and blue food coloring and mix on low with the dough hook for 2 minutes.
Step 2 — Add flour and knead
I add the flour one cup at a time until the dough pulls from the sides. It should be slightly sticky, not wet. I knead for 5 minutes, adjusting with flour or warm milk 1 tablespoon at a time if needed.
Step 3 — Let the dough rise
I transfer the dough to an oiled bowl, cover it, and let it rise 1-2 hours, or until doubled. I do not rush this step because under-risen rolls bake up tight.
Step 4 — Roll and fill
Once doubled, I punch the dough down and roll it on a lightly floured surface into an 18x12-inch rectangle. I spread softened butter over the dough, then sprinkle with crushed Oreos, cinnamon, and brown sugar.
Step 5 — Shape and rise again
I roll the dough tightly like a jelly roll, pinch the seam, and slice it into 12 equal pieces. The rolls go into a greased 8x8-inch pan, slightly apart, for a second 30-60 minute rise.
Step 6 — Bake and ice
I preheat the oven to 375°F (190°C) and bake the rolls 25-30 minutes, until golden. While they bake, I beat softened butter, cream cheese, and powdered sugar until creamy, then spread the icing over warm rolls.
Tips from my kitchen
- Check the milk temperature.Warm is good; hot can hurt the yeast.
- Keep the dough slightly sticky.Too much flour makes dry rolls.
- Roll tightly.Loose rolls lose filling as they bake.
- Ice while warm.The icing melts into the spirals.
Variations I have actually tried
- Regular color:I skip the blue food coloring for classic Oreo rolls.
- Chocolate drizzle:I add melted chocolate over the icing.
- More cookie:I sprinkle extra Oreo crumbs on top.
- Vanilla icing:I use butter, powdered sugar, cream, and vanilla instead of cream cheese.
- Mini rolls:I roll from the long side and cut smaller pieces, watching the bake time.
Storing and reheating
I store leftover rolls covered in the refrigerator for up to 3 days because of the cream cheese icing. I reheat one roll at a time for 15-20 seconds in the microwave.
What I serve with it
I serve these warm with coffee or cold milk. If I am making them for a morning party, I bake them shortly before serving so the icing is still soft.
A few small details I do not skip
I read through the whole recipe once before I start, especially when I am making cookie monster cinnamon rolls on a busy day. It keeps me from discovering a cooling step, a second pan, or a chilling time after the counter is already covered with bowls.
I also measure the seasonings and small add-ins first. That sounds fussy, but it lets me pay attention to texture while I cook. If a dough looks dry, a sauce thickens too fast, or a frosting needs another spoonful of liquid, I can fix it while the mixer or pan is still in front of me.
The other detail I watch is temperature. Ovens, stovetops, mixers, and refrigerators all have personalities, so I use the listed times as a guide and then check the real signs in front of me. For cookie monster cinnamon rolls, that means I look for the texture described in the steps before I move on.
I would rather pause for 5 minutes than push ahead and fight the recipe later. A short rest can firm a bar, settle a roast, cool a cupcake, or thicken a sauce. That kind of quiet step rarely looks exciting, but it makes the finished food easier to serve.
Frequently asked questions
Can I use active dry yeast?
I can, but I make sure it is fresh and give the dough enough time to rise.
Can I replace Oreos?
Yes. I use another crisp cookie, crushed finely enough that the rolls still slice cleanly.
Why did my rolls not rise?
The milk may have been too hot, the yeast old, or the room too cool. I move the covered bowl to a warm spot and give it more time.
Can I make them less blue?
Yes. I use less gel color or skip it entirely; the flavor does not depend on the color.
How do I know they are baked through?
I look for golden tops and set centers. A toothpick inserted into a center roll should come out without raw dough.
If you bake these, tell me whether you kept the blue dough or made them classic.