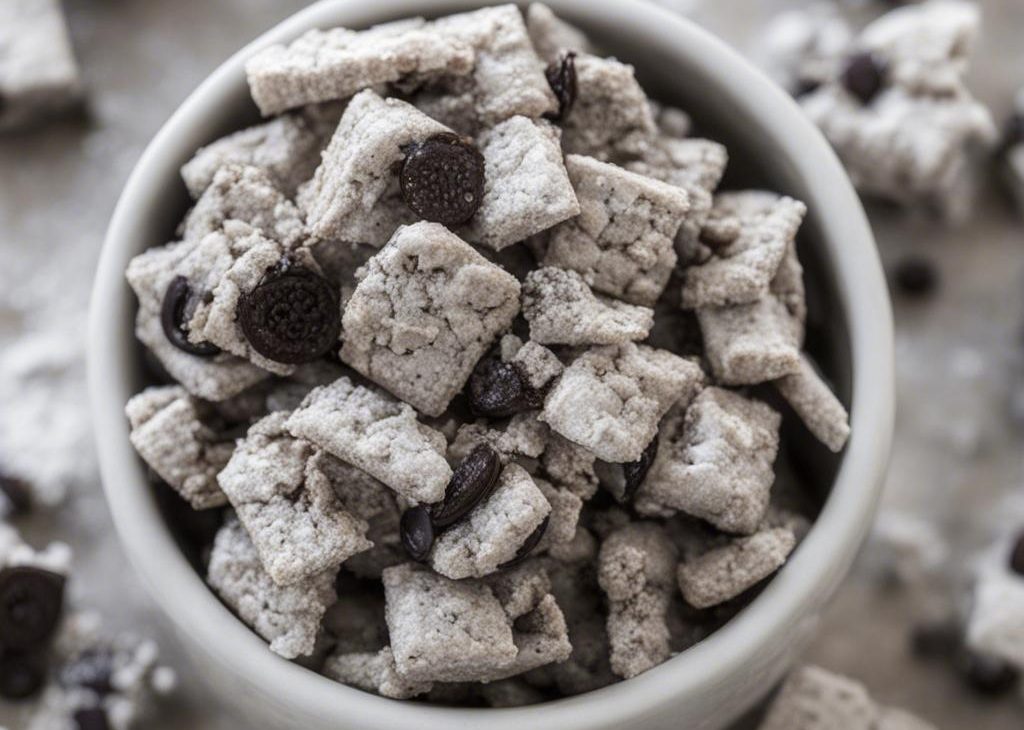
It is the same crunchy, powdered snack idea, only split into a chocolate side and a white chocolate side with crushed Oreos in both.
This is the bowl I make for movie nights because it takes 15 minutes and does not ask for the oven. The only part that needs attention is the chocolate: I melt it slowly, stir often, and stop heating before it scorches.
I like the two-color mix because every handful is a little different. Some pieces taste like dark cookie crumbs, some taste like sweet cream, and the cereal stays light enough that the whole bowl disappears faster than I expect.
Why I keep coming back to this
- Two separate coatings give the snack mix a real cookies-and-cream look instead of one flat color.
- The Oreo crumbs go into the sugar coating, so they cling to every ridge of the cereal.
- Vegetable oil loosens the chocolate just enough for easy stirring without making it greasy.
- No oven means I can make it even when the kitchen is already busy.
- It keeps at room temperature for a week, which makes it useful for gifting and lunch treats.
- I can scale it up without changing the method; I just use bigger bags or containers.
What I use and why it matters
I like to line up the ingredients for Cookies and Cream Puppy Chow before I start. It keeps me from rushing, and it also makes the small texture cues easier to notice.
- 4 whole Oreos. for the cookies batch coating
- 2/3 cup confectioners' sugar. 80g; for the cookies batch
- 3 cups Rice Chex cereal. 80g; for the cookies batch
- 6 ounces semi-sweet chocolate. 170g
- 1 teaspoon vegetable oil. for the semi-sweet chocolate
- 4 whole Oreos. for the cream batch coating
- 2/3 cup confectioners' sugar. 80g; for the cream batch
- 3 cups Rice Chex cereal. 80g; for the cream batch
- 6 ounces white chocolate. 170g
- 1 teaspoon vegetable oil. for the white chocolate
How I make it
Step 1 — Crush the cookies
I crush all 8 Oreos into fine crumbs in a food processor. Then I divide the crumbs between two large zip-top bags or lidded containers and add 2/3 cup confectioners' sugar to each. I shake the dry coating first so the cookie crumbs do not clump.
Step 2 — Set up the cereal
I put 3 cups Chex cereal in one large bowl and 3 cups in a second bowl. Having both bowls ready matters because melted chocolate waits for nobody, and I want to coat the cereal while it is still fluid.
Step 3 — Microwave
I melt the semi-sweet chocolate with 1 teaspoon vegetable oil in one heatproof bowl, then the white chocolate with the second teaspoon oil in another. I use 20-second microwave bursts and stir between each one until smooth.
Step 4 — Coat and shake
I pour semi-sweet chocolate over one bowl of cereal and white chocolate over the other. I fold gently so the cereal does not shatter, then transfer each batch to its own sugar-cookie bag, seal it, and shake until coated.
Step 5 — Mix and store
I discard the excess powder, combine the two finished batches, and let them sit uncovered for a few minutes so the coating sets. Then I store the mix airtight at room temperature or in the refrigerator.
The cues I watch for
The cereal should look glossy before it goes into the sugar mixture. If there are dry patches, I fold a few more times before shaking, because the powder only sticks where chocolate has touched.
The finished mix should feel dry to the touch after a short rest. If it still feels tacky, I spread it on a sheet pan for 10 minutes before packing it up.
Tips from my kitchen
- Use big bags. A crowded bag crushes the cereal before it coats evenly.
- Melt gently. White chocolate scorches faster than semi-sweet, so I stir it more often.
- Shake over the sink. Powder finds a way out of the bag if the seal has even a tiny gap.
- Let it set. A few minutes uncovered keeps the pieces from sticking in one big clump.
- Discard extra powder. I do not dump it back into the bowl because it makes the mix dusty.
Variations I have actually tried
- All white chocolate: I use white chocolate for both batches when I want a sweeter cream-heavy mix.
- All semi-sweet: I use semi-sweet for both batches when I want stronger cocoa flavor.
- Peppermint: I add a tiny drop of peppermint extract to the white chocolate during the holidays.
- Sprinkle bowl: I toss in 2 Tablespoons sprinkles after the coating sets.
- Extra cookie crumbs: I add a handful of chopped Oreos at the end for bigger cookie pieces.
Storing and reheating
I keep puppy chow in an airtight container at room temperature for up to 1 week. If the kitchen is warm, I move it to the refrigerator because white chocolate can soften quickly.
For gifting, I let it set completely before bagging. If I pack it while the coating is even a little tacky, the cereal sticks together and loses the loose snack-mix feel I want.
How I like to serve it
I serve this in a wide bowl with a scoop so people are not digging through it by hand. It is sweet, so I like it next to salty popcorn, pretzels, or a bowl of roasted nuts.
Frequently asked questions
Is puppy chow dog food?
No. This is a sweet cereal snack for people. I keep it away from pets because it contains chocolate.
Can I use a different Chex cereal?
Yes. Rice Chex gives the lightest crunch, but corn Chex works. Wheat Chex has a stronger flavor and a heavier bite.
Why did my cereal break?
It was probably stirred too hard or shaken in a container that was too small. I fold gently and use oversized bags.
Can I make only one chocolate flavor?
Yes. Use the same total amounts and choose either semi-sweet or white chocolate. The method stays the same.
How long does it keep?
I keep it 1 week at room temperature or 2 weeks in the refrigerator. The cereal is crunchiest in the first few days.
If you make this, I would like to know whether the white chocolate pieces or the semi-sweet pieces went first.
A few extra notes from my testing
When I write this kind of recipe down for myself, I include the small things that are easy to forget: how the mixture should look, when the pan should be turned down, and what I would do differently if the ingredients were slightly different. Those notes are not fancy, but they are what help me repeat the dish on a busy night.
I also try to leave a little room for judgment. Ovens run hot, skillets heat unevenly, and produce changes from week to week. I use the listed times as my starting point, then I look for the color, aroma, thickness, or tenderness described above before I call the recipe done.