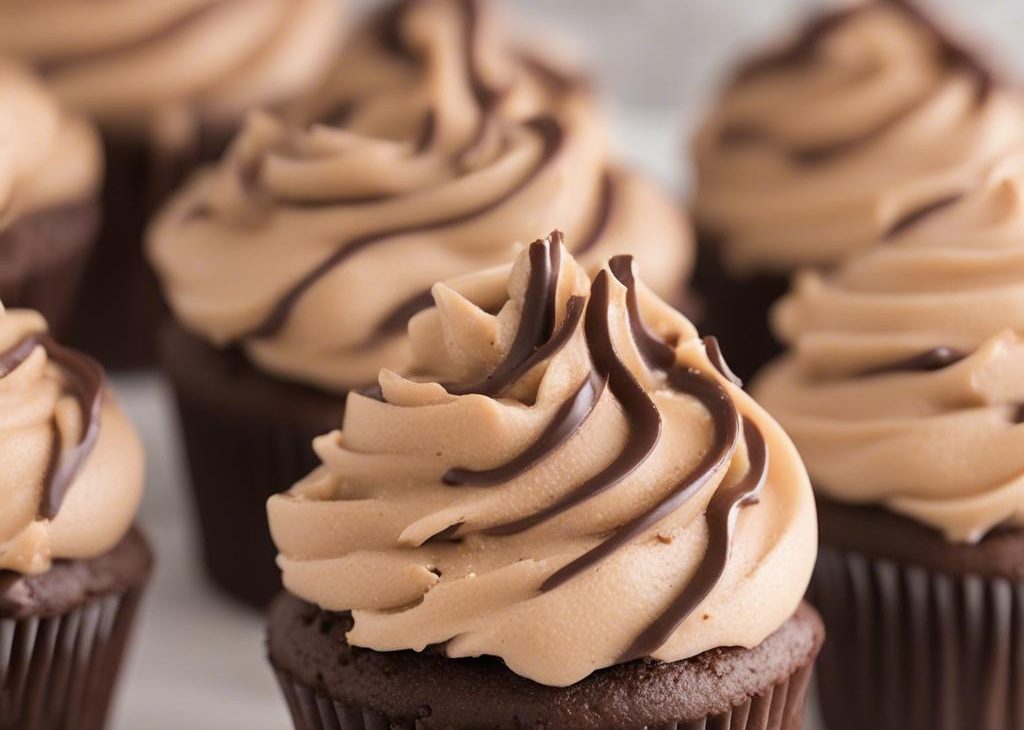
I make Creamiest Peanut Butter Frosting when I want something that tastes considered but still fits into a normal kitchen day.
What I like about this version is the balance. Unsalted butter, softened sets the base, and the small seasonings matter more than they look on paper. I learned quickly not to rush the quiet parts, especially cooling, chilling, simmering, or letting the texture tell me when it is ready.
If you have made creamiest peanut butter frosting before, this will feel familiar. If you have not, I would rather give you a few extra kitchen notes than pretend every batch behaves exactly the same. Ovens run hot, fruit can be juicy, pans vary, and I would rather you know what I look for than only follow the clock.
Why I keep this recipe in my rotation
- It uses a straightforward ingredient list and keeps the original prep time of 5 min and cook time of the listed cook min.
- The texture gives me clear cues: I watch the texture, not just the timer.
- It can be made for company without needing fussy restaurant equipment.
- Most of the work is measuring and mixing, which is exactly the kind of recipe I trust on a busy day.
- The leftovers hold up well when I store them properly instead of leaving them uncovered.
- The flavor is flexible enough for small swaps, but the core quantities stay steady.
What you need and why it matters
- unsalted butter, softened, 5 Tablespoons.(71g) This carries flavor and keeps the finished bite from feeling dry.
- creamy peanut butter, 1 cup.(250g) This carries flavor and keeps the finished bite from feeling dry.
- confectioners sugar, 1 cup.(120g) This sweetens, but it also affects browning and tenderness.
- heavy cream, 1/3 cup.(80ml) This controls moisture, so I add it the way the recipe specifies.
- pure vanilla extract, 1 teaspoon.
- &#; salt, 188 teaspoon.
How I make it
Step 1 — Mix the base carefully
I follow this step: With a handheld or stand mixer fitted with a paddle or whisk attachment, beat the butter on medium speed until creamy, about 2 minutes. Add the peanut butter, confectioners' sugar, heavy cream, vanilla extract, and salt with the mixer running on low. Increase to high speed and beat for 3 full minutes. Add up to 1/4 cup more confectioners' sugar if frosting is too thin or another Tablespoon of cream if frosting is too thick. I keep the bowl close before I start because stopping mid-step is where mistakes creep.
Step 2 — Give it time to firm up
I cover tightly and store for up to 1 week in the refrigerator. I scrape the bowl once during this part so the mixture is even from top to bottom.
Tips from my kitchen
- Measure before heating.I set out the ingredients first, especially when the recipe moves quickly after the first mix.
- Trust the listed time, then verify.I start checking near the end of the cook time minutes because my oven and pans do not always behave the same way.
- Do not overwork the mixture.Once flour, crumbs, pasta, or dairy is involved, rough mixing can make the final texture heavy.
- Use the right temperature cue.If the recipe says chilled, softened, melted, or room temperature, I follow that because it changes how everything blends.
- Season at the end when it is savory.Salt tastes different after simmering, baking, or chilling, so I adjust after the flavors settle.
Variations I have actually tried
- Sharper flavor:I add a little more lemon juice or vinegar after chilling if it tastes muted.
- Extra crunch:Nuts, seeds, celery, or crackers keep the texture lively.
- Herb swap:Cilantro, parsley, basil, or thyme all work depending on the main ingredients.
- Less sweet:I reduce the sweetener slightly and taste before adding more.
- Party version:I portion it into smaller servings so it stays neat on a buffet table.
Storing and reheating
I store this covered in the refrigerator and give it a stir before serving. Chilled recipes can taste flatter straight from the fridge, so I taste again after 10 minutes at room temperature and adjust salt, citrus, or sweetness if needed.
What I serve with it
I serve this cold or slightly cool, depending on the recipe. Crackers, cut vegetables, toasted bread, grilled chicken, fruit, or a plain cake are all useful partners. I keep the garnish separate until serving so it still looks fresh.
Frequently asked questions
Can I make this ahead?
Yes. I do as much prep as the recipe allows, then store it covered. For baked recipes, I usually bake the same day if crisp edges matter. For chilled or saucy recipes, making it ahead often helps the flavor settle.
Can I double the recipe?
Usually, but I do not automatically double the pan depth. Two pans are safer than one crowded pan because the center can lag while the edges overcook.
What should I watch for near the end?
I start checking before the listed cook time minutes if my kitchen smells done early. I look for the visual cues in the steps first, then use the timer as backup.
Can I change the sweetness or seasoning?
I make small changes, taste, and then adjust again. Sugar, salt, acid, and spice all become more noticeable after baking, simmering, or chilling, so I avoid big changes on the first try.
Why did my texture turn out different?
The usual reasons are ingredient temperature, overmixing, pan size, or oven heat. I check those before blaming the recipe because one small change can make the texture softer, drier, or thicker.
If you make Creamiest Peanut Butter Frosting, leave a comment with what you changed or what worked especially well in your kitchen — I read those notes before I retest recipes.
Small details that make the batch better
I pay attention to the small details because they are usually what separate a steady home recipe from a frustrating one. I set ingredients out in order, keep a towel nearby, and clear a landing spot for the hot pan or finished bowl. That sounds basic, but it keeps me from overcooking something while I search for a rack, foil, or serving spoon.
I also write down any change I make the first time. If I use a different pan, swap a fruit, add more seasoning, or shorten the bake time, I note it before I forget. The next batch is always better when I have real notes instead of a vague memory.