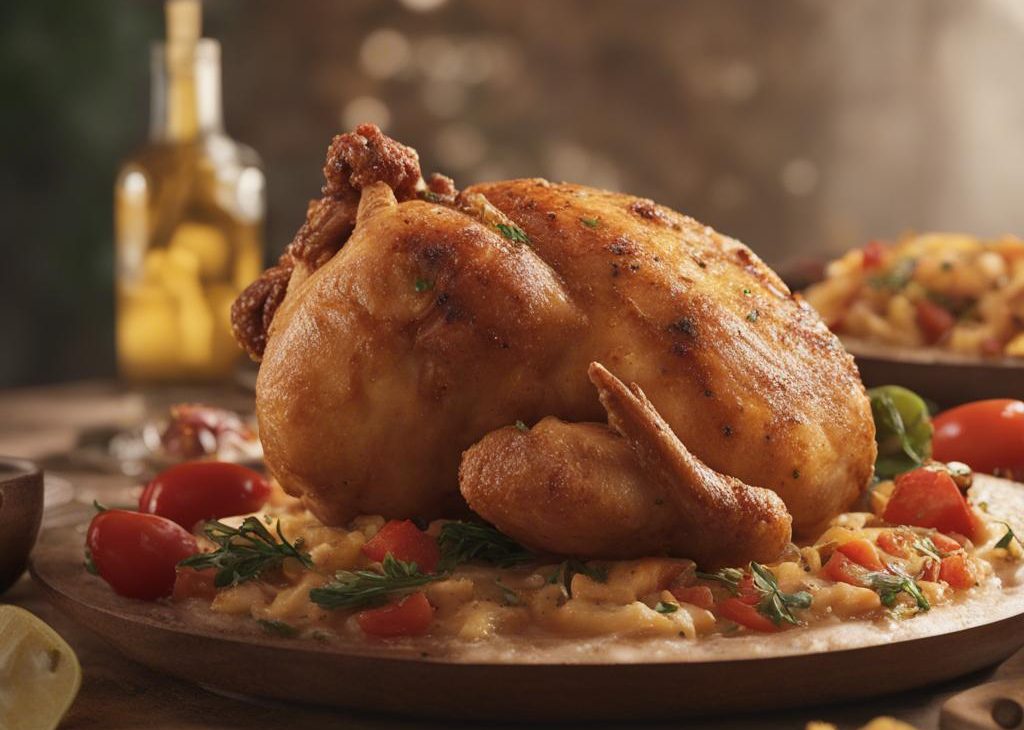
I keep Juan Pollo Chicken in my notes because it solves a very specific craving: familiar food that still tastes like I cooked it myself. The recipe is simple on paper, but the little choices matter — how firmly I mix, when I stop cooking, and whether I give it a minute to settle before serving.
The first time I made it, I treated the timing too casually and learned quickly that chicken reward attention. Now I set out every ingredient before I begin, keep the heat steady, and taste or check texture at the same points every time. That routine makes the recipe feel relaxed instead of rushed.
I cook it in a practical home-kitchen rhythm, with the small warnings I wish every recipe card included.
Why I keep coming back to this
- It gives me the comfort of chicken without a fussy list of steps.
- Most of the work is measuring, mixing, and paying attention to texture.
- The ingredients are easy to prep before heat is involved, which keeps the kitchen calmer.
- It scales well for family meals, snacks, or leftovers when I do not want to cook twice.
- The flavors are familiar enough for picky eaters but still worth serving to guests.
- I can tell when it is ready by sight and smell, not only by the timer.
What I use and why it matters
- 1/2 Chicken.I pat it dry before seasoning because surface moisture gets in the way of browning.
- 1/2 tablespoon Finely Ground Black Pepper.
- 2 tablespoons lime or lemon juice.
- 1/2 tablespoon white vinegar.
- 1/4 cup pineapple juice.
- 1/2 tablespoon paprika.
- 1/2 tablespoon garlic powder.
- 1/2 tablespoon salt.
- 1 tablespoon extra virgin olive oil.
- 1/2 tablespoon white pepper.
- 1/2 tablespoon mild chili flakes or cayenne.
- 1 tablespoon oregano.
How I make it
Step 1 — Rinse the chicken with cold water
I rinse the chicken with cold water and pat it dry.
Step 2 — Mix together pineapple juice lime
I mix together pineapple juice, lime or lemon juice, vinegar, salt, white pepper powder, black pepper, oregano, garlic powder, mild chilli peppers flakes (or cayenne pepper), and extra virgin olive oil in a bowl.
Step 3 — Place the chicken in large bowl
I place the chicken in a large bowl or resealable bag, and pour the marinade over the chicken.
Step 4 — Massage the marinade into the chicken
I massage the marinade into the chicken by hand. Cover it with cling wrap or seal the bag and let it sit in the refrigerator for at least 2 hours, preferably overnight.
Step 5 — Preheat the oven to 350°F
I preheat the oven to 350°F.
Step 6 — Place the marinated chicken in roasting
I place the marinated chicken in a roasting pan and bake for 40 minutes to 1 hour or until the internal temperature reaches 165°F.
Step 7 — Remove from the oven and let
I remove from the oven and let rest for 10 minutes before serving.
The texture and timing checks I trust
I use the timer as a guardrail and the food as the final answer. For chicken, I look for steady heat, browned edges when browning is part of the method, and a finished texture that feels intentional rather than rushed.
If something looks ready early, I check it. If it looks pale or watery at the listed time, I give it a few more minutes and stay nearby. That kind of small adjustment is normal home cooking, not a mistake.
Tips from my kitchen
- Read the recipe once first.I do this with chicken because the quiet step is usually the one that decides the texture.
- Prep before heat.Once the pan or oven is ready, I want the ingredients measured and close by.
- Use your senses.Timers matter, but I also watch color, aroma, and how the center feels.
- Rest when the recipe says rest.Five minutes can be the difference between clean slices and a messy plate.
Variations I have actually tried
- Extra heat:I add cayenne, chili flakes, or hot sauce near the end so I can control it.
- More citrus:I finish with lime or lemon when the dish tastes rich but needs lift.
- Vegetable boost:I add peppers, onions, celery, or greens if the pan has room.
- Rice or noodle bowl:I serve leftovers over rice, noodles, or potatoes with a spoonful of sauce.
- Herb finish:I add parsley, cilantro, basil, or mint after cooking for a fresher edge.
How I store and reheat it
I cool leftovers quickly, pack them in shallow containers, and refrigerate. When reheating, I use gentle heat and add a splash of water, broth, or sauce if the pan looks dry. Meat and seafood dishes should be reheated until hot all the way through.
What I serve with it
I like Juan Pollo Chicken with something that catches the sauce or juices: rice, noodles, bread, potatoes, tortillas, or a crisp salad. If the dish is rich, I add citrus or pickled vegetables on the side.
Frequently asked questions
Can I make Juan Pollo Chicken ahead?
Yes. I usually make the components ahead and keep them covered, then finish or rewarm close to serving. For the best texture, I keep crisp toppings and fresh herbs separate until the end.
What should I do if it tastes flat?
I start with a small pinch of salt, then add acid if the recipe includes lemon, lime, or vinegar. I taste after each addition because it is easier to add more than to fix too much.
Can I double the recipe?
Usually yes, as long as I use a wider pan or work in batches. Crowding traps steam, so doubled savory recipes often brown better in two rounds.
How do I know when it is done?
I use the listed timing as my first guide, then check the visual signs: golden edges for baked items, a steady simmer for stews, and firm, opaque protein for meat or seafood.
Can I change the seasoning?
Yes, but I change one thing at a time. That way I can tell whether the salt, heat, herb, or acid is doing the work.
If you make Juan Pollo Chicken, leave a comment with the change you tried or the part that surprised you. I read those notes because they often become my next test batch.