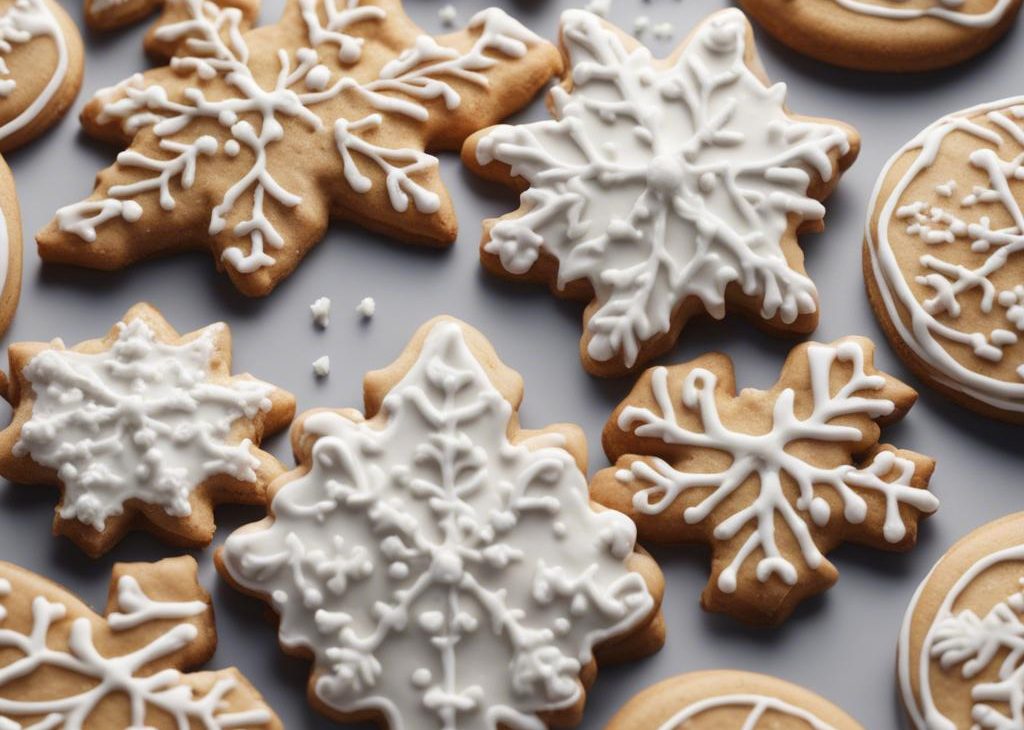

These are fan-favorite cut-out Christmas sugar cookies! My recipe for sugar cookies promises flavorful cookies with soft and thick centers, slightly crisp edges, and flat tops for decorating. The dough comes together with 7–8 simple ingredients, and the cookies hold their cookie cutter shape in the oven. Decorate them with my easy glaze cookie icing, a wonderful alternative to royal icing. Get out your rolling pin and favorite cookie cutters and have fun!
How to Make Christmas Sugar Cookies
You need 7–8 ingredients for the dough. With so few ingredients, it’s important to follow the recipe closely, because each one has an important job. Creamed butter and sugar form the base of the dough. Egg and flour provide structure, and vanilla adds flavor. I almost always add a touch of almond extract for additional flavor, and highly recommend that you try it too! You could also use peppermint extract or another flavor extract instead. Baking powder adds lift, and salt balances the sweet.
So many little ingredients doing big jobs to create a perfect cookie:
Success Tip: Make sure you start with proper room temperature butter. Room temperature butter is cool to the touch and about 65°F (18°C), which may be cooler than your kitchen. To test the butter to make sure it’s ready to cream, poke it with your finger. Your finger should make an indent without sinking down into the butter. The butter should not be shiny or greasy.
Also, the icing recipe below needs at least 24 hours to dry/set (but you can certainly eat them prior to the icing drying!). This is much longer than royal icing, which usually dries in 2 hours. So even though we’re not messing with finicky royal icing, we do have to wait longer to stack/transport the cookies.
After you make the cookie dough, divide it in half:
And then roll out each portion of dough before chilling:
After the rolled-out dough chills for at least 1–2 hours, use cookie cutters to cut out shapes, and re-roll your scraps. Remember, you have two slabs of dough.
Arrange cookies on a lined baking sheet. I usually get about 2 dozen 3-inch cookies from this recipe. Here’s some of the cookies before baking:
Use My Easy Cookie Icing
My easy cookie icing recipe below is a great alternative to traditional royal icing. It’s like a very thick opaque glaze and comes together quickly with a fork and a mixing bowl. This is one of my favorite ways to decorate sugar cookies because it’s low maintenance, but still delivers pretty (and tasty) results. I have a separate cookie icing page dedicated to it, and it can be used on pretty much any cookie cutter cookies like gingerbread cookies, brown sugar cut-out cookies, chocolate sugar cookies, Valentine’s Day cookies, or Easter cookies.
(I also have a recipe for thick cookie buttercream, if you’d like that option!)
Christmas Sugar Cookies with Easy Icing Recipe
Description
Cut-out Christmas sugar cookies with crisp edges and soft centers. This icing recipe is so simple, making decorating hassle-free!
Ingredients You’ll Need
Instructions
- Make sure you have allotted enough time (and enough counter space!) to make these cookies. The cookie dough needs to chill, the cookies need to cool completely, and the icing needs 24 hours to completely set. If enjoying right away and hardened icing isn’t a concern, you’ll only need about 3–4 hours to make these.
- Whisk the flour, baking powder, and salt together in a medium bowl. Set aside.
- In a large bowl using a handheld or a stand mixer fitted with a paddle attachment, beat the butter and sugar together on high speed until completely smooth and creamy, about 2 minutes. Add the egg, vanilla, and almond extract (if using), and beat on high speed until combined, about 1 minute. Scrape down the sides and up the bottom of the bowl and beat again as needed to combine.
- Add the dry ingredients to the wet ingredients and mix on low until combined. Dough will be a bit soft. If the dough seems too soft and sticky for rolling, add 1 more Tablespoon of flour.
- Divide the dough into 2 equal parts. Place each portion onto a piece of lightly floured parchment paper or a lightly floured silicone baking mat. With a lightly floured rolling pin, roll the dough out to about 1/4-inch thickness. Use more flour if the dough seems too sticky. The rolled-out dough can be any shape, as long as it is evenly 1/4-inch thick.
- Lightly dust one of the rolled-out doughs with flour. Place a piece of parchment on top. (This prevents sticking.) Place the second rolled-out dough on top. Cover with plastic wrap or aluminum foil, then refrigerate for at least 1–2 hours and up to 2 days.
- Once chilled, preheat oven to 350°F (177°C). Line 2–3 large baking sheets with parchment paper or silicone baking mats. Carefully remove the top dough piece from the refrigerator. If it’s sticking to the bottom, run your hand under it to help remove it. Using a cookie cutter, cut the dough into shapes. Re-roll the remaining dough and continue cutting until all is used. Repeat with second piece of dough. (Note: It doesn’t seem like a lot of dough, but you get a lot of cookies from the dough scraps you re-roll.)
- Arrange cookies on baking sheets about 3 inches apart. Bake for 11–12 minutes or until lightly browned around the edges. If your oven has hot spots, rotate the baking sheet halfway through bake time. Allow cookies to cool on the baking sheet for 5 minutes, then transfer to a wire rack to cool completely before decorating. No need to cover the cookies as they cool.
- Using a fork, stir the confectioners’ sugar, vanilla, corn syrup, and 4.5 Tablespoons (67ml) of water, and optional salt together in a medium bowl. It will be very thick and almost impossible to stir. Switch to a whisk and whisk in 1/2 Tablespoon (8ml) more of water. If you lift the whisk and let the icing drizzle back into the bowl, the ribbon of icing will hold shape for a few seconds before melting back into the icing. That is when you know it’s the right consistency and is ready to use. If it’s too thick (sometimes it is), whisk in another 1/2 Tablespoon (8ml) of water or a little more until you reach the proper consistency.
- If you’re tinting the icing another color, stir in the food coloring. You can pour some icing into different bowls if using multiple colors. When tinting icing, use only 1–2 drops at first, stir it in, then add more as needed to reach your desired color. Remember, color darkens as icing dries.
- You can dip the cookies into the icing or use squeeze bottles or piping bags (reusable or disposable) fitted with piping tips (I usually use Wilton Piping Tip #4). Decorate your cookies as desired. If using the squeeze bottles or piping tips, I usually outline cookies with icing first, then fill in the middle. If adding sprinkles on top of the icing, add them right after applying icing on your cookie.
- Feel free to enjoy cookies before icing completely dries. Icing dries in 24 hours. No need to cover the decorated cookies as you wait for the icing to set. If it’s helpful, decorate the cookies directly on a baking sheet so you can place the entire baking sheet in the refrigerator to help slightly speed up the icing setting. Once the icing has dried, these cookies are great for gifting or for sending.
- Cover and store decorated cookies for up to 5 days at room temperature or up to 10 days in the refrigerator.
You may also like...