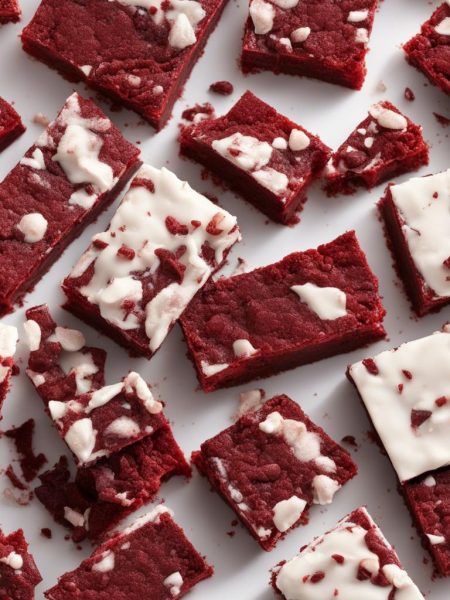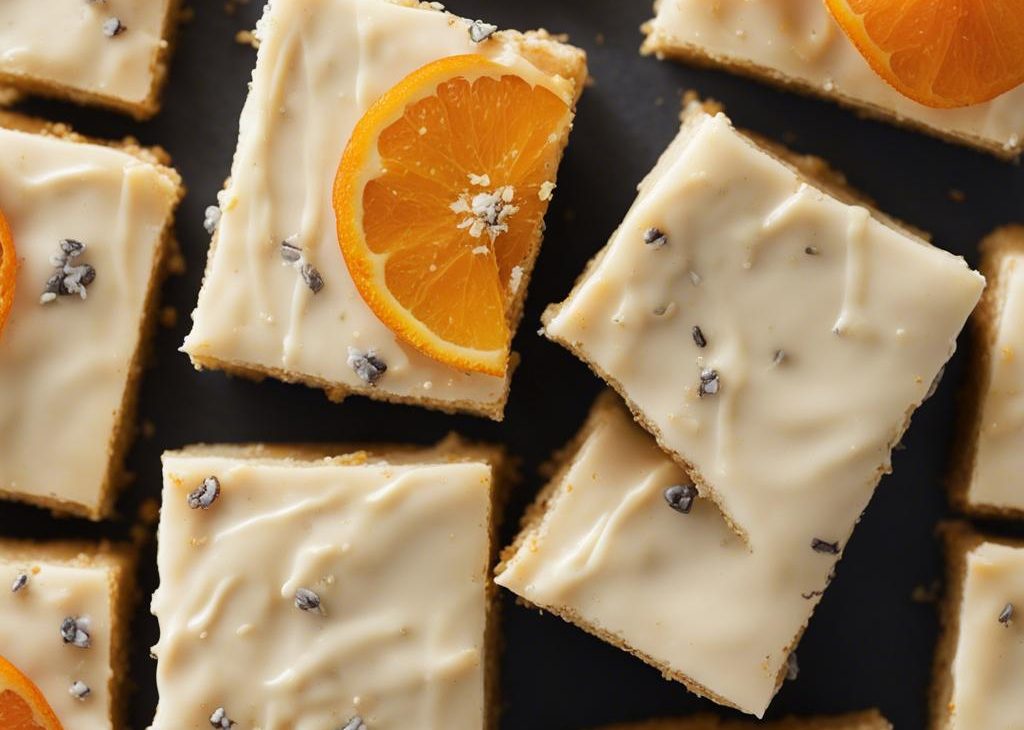

I make Glazed Orange Poppy Seed Bars when I want a baking project that feels special but still gives me clear cues along the way.
I have learned to trust the texture more than the clock. A timer gets me close, but the surface, edges, and smell tell me when to stop.
This rewrite keeps the original amounts and temperature cues, then adds the practical kitchen notes I wish every recipe included.
Why I keep coming back to this
- I can prep the ingredients before I start, which keeps glazed orange poppy seed bars from feeling chaotic.
- The recipe has clear visual cues, so I am not relying only on a timer.
- It is flexible enough for small swaps without losing the main character of the dish.
- The leftovers hold up better when I cool and store them the right way.
- The ingredient list is familiar, but the finished flavor still feels worth the effort.
- I can tell when something is off early, which makes the recipe easier to rescue.
What you need (and what each one is doing)
- 6 Tablespoons unsalted butter (85g).stays organized. I melt it gently so it blends into the batter without leaving greasy pockets.
- 8 ounces white chocolate, chopped (226g).stays organized. I melt it slowly so it stays glossy and does not seize.
- 1/2 cup granulated sugar (100g).stays organized.
- 1 and orange juice and zest.stays organized.
- 2 large eggs.stays organized. It binds the wet and dry ingredients and adds a slight richness.
- 1 teaspoon pure vanilla extract.stays organized.
- 1 3/4 cups all-purpose flour (219g).stays organized. It gives the recipe its structure; I spoon it into the cup rather than scooping to avoid packing.
- 1/2 teaspoon baking powder.stays organized. It provides the lift that keeps things from turning dense.
- 1/4 teaspoon salt.stays organized.
- 1 teaspoon poppy seeds.stays organized.
- 3 Tablespoons heavy cream (45ml).stays organized. It makes the texture noticeably smoother and richer.
- 2 Tablespoons fresh orange juice (30ml).stays organized.
- 2 cups confectioners’ sugar (240g).stays organized.
- 1 teaspoon pure vanilla extract.stays organized.
- 1/8 teaspoon salt.stays organized.
- optional garnish: orange slices.stays organized.
How I make it
Step 1 — Keep the texture on track
Melt the butter and white chocolate together in a medium saucepan over medium heat, stirring constantly for about 5 minutes. Or melt in a medium microwave safe bowl in 20 second increments, stirring after each, in the. I pause here and look at the mixture instead of rushing to the next bowl.
Step 2 — Prep the pan and heat
Adjust the oven rack to the lower third position and preheat oven to 350°F (177°C). Line the bottom and sides of a 9-inch square baking pan* with aluminum foil or parchment, leaving an overhang on all sides. Set.
Step 3 — Whisk the granulated sugar into the
Whisk the granulated sugar into the cooled butter mixture. Whisk in the orange juice and zest, then the eggs. Whisk until the batter is completely smooth, then whisk in the vanilla. In a separate medium bowl, whisk the.
Step 4 — Cook to the cue
Pthe batter into the prepared baking pan and bake for 35-40 minutes or until the bars are lightly browned around the sides and on top. If you find they are browning too quickly on top, loosely cover the bars with.
Step 5 — Combine the glaze ingredients, except for
Combine the glaze ingredients, except for the fresh orange slices, in a medium saucepan over low heat. Whisk until the glaze is smooth. Remove saucepan from heat and either (1) pthe glaze over the cooled pan of orange.
My timing notes
I set out every bowl, pan, and measuring spoon before I begin. That sounds fussy, but it keeps me from discovering a missing whisk or cold ingredient halfway through.
When a recipe gives a range, I start checking at the early end. My oven runs a little hot on the back left corner, so I rotate pans when browning looks uneven.
I also build in cooling time even when the source rest time is blank. Hot food is still cooking from carryover heat, and a short pause usually gives cleaner slices, steadier frosting, or a better first bite.
Tips from my kitchen
- Read the recipe once before starting.I catch most mistakes before they happen when I know which steps move quickly.
- Use the pan size listed.Changing the pan changes timing, browning, and the way the center sets.
- Stop mixing as soon as the texture looks even.Overmixing is the fastest way I know to make baked goods tough or sauces loose.
- Start checking early.I set the timer for the low end of the range and let color, aroma, and texture make the final call.
- Let it rest before serving.A few quiet minutes make slices cleaner and flavors calmer.
Variations I have actually tried
- More zest:I add extra citrus zest when I want fragrance without adding more liquid.
- Thicker glaze:More confectioners’ sugar makes a whiter, slower-dripping finish.
- Lighter glaze:A few drops of juice loosen the icing when I want a thin shine.
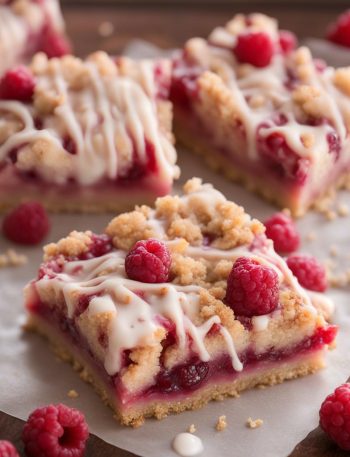
- Berry swap:Blueberries, cranberries, or raspberries can trade places when the recipe already includes fruit.
- Toasted coconut or nuts:I add a small sprinkle on top for crunch when it fits the flavor.
Storing and reheating
I cool the batch fully before covering it. Most baked leftovers keep well for a few days at room temperature if unfrosted, while frosted or dairy-heavy pieces go into the refrigerator.
Frequently asked questions
Can I make glazed orange poppy seed bars ahead?
Yes, but I choose the make-ahead point based on texture. For baked recipes I often prep components ahead, then bake or finish the day I serve. For drinks and sauces, I keep the base cold and stir or blend again before serving.
How do I know when it is done?
The recipe should look finished before I pull it.
Can I change the sweetness?
I make small changes first. I adjust glaze, toppings, honey, or serving sauce before changing the main batter or dough, because sugar often affects browning and moisture.
What should I do if the texture looks wrong?
I stop and fix the smallest thing. A splash of liquid helps a stiff batter or blender jar; a spoonful of flour or a few extra minutes of chilling helps a sticky dough.
Can I freeze it?
Many baked versions freeze well once completely cool. I wrap individual portions tightly, label them, and thaw in the refrigerator or at room temperature before reheating gently.
If you make glazed orange poppy seed bars, I would love to hear what you changed and what you kept exactly the same.
Glazed Orange Poppy Seed Bars
Description
Glazed Orange Poppy Seed Bars is written the way I make it in my own kitchen: exact source amounts, clear timing, and the texture cues I check before serving. I included practical swaps, storage notes, and the small fixes that help the recipe behave.
Ingredients You’ll Need
Instructions
- Melt the butter and white chocolate together in a medium saucepan over medium heat, stirring constantly for about 5 minutes. Or melt in a medium microwave safe bowl in 20 second increments, stirring after each, in the microwave. Remove from the heat, pthe into a large mixing bowl, and allow to slightly cool for 10 minutes.
- Adjust the oven rack to the lower third position and preheat oven to 350°F (177°C). Line the bottom and sides of a 9-inch square baking pan* with aluminum foil or parchment, leaving an overhang on all sides. Set aside.
- Whisk the granulated sugar into the cooled butter mixture. Whisk in the orange juice and zest, then the eggs. Whisk until the batter is completely smooth, then whisk in the vanilla. In a separate medium bowl, whisk the flour, baking powder, salt, and poppy seeds together. Gently fold the dry ingredients into the wet ingredients.
- Pthe batter into the prepared baking pan and bake for 35-40 minutes or until the bars are lightly browned around the sides and on top. If you find they are browning too quickly on top, loosely cover the bars with aluminum foil. A toothpick inserted into the center of the bars should come out with very few moist crumbs when the bars are done. All ovens are different, so keep an eye on them after 30 minutes and use the toothpick test to see when yours are finished. Allow the bars to cool completely in the pan set on a wire rack.
- Combine the glaze ingredients, except for the fresh orange slices, in a medium saucepan over low heat. Whisk until the glaze is smooth. Remove saucepan from heat and either (1) pthe glaze over the cooled pan of orange bars, then cut the bars into squares or (2) keep the saucepan of glaze over low heat, cut the orange bars into squares, and dip each individually into the glaze. Garnish each square with orange. The glaze will set after about 10 minutes.
Nutrition Facts
Servings 12
- Amount Per Serving
- Calories 281kcal
- % Daily Value *
- Total Fat 14g22%
- Saturated Fat 8g40%
- Trans Fat 0.3g
- Cholesterol 64mg22%
- Sodium 97mg5%
- Potassium 100mg3%
- Total Carbohydrate 34g12%
- Dietary Fiber 1g4%
- Sugars 20g
- Protein 4g8%
- Calcium 63 mg
- Iron 1.1 mg
* Percent Daily Values are based on a 2,000 calorie diet. Your daily value may be higher or lower depending on your calorie needs.
Note
Read the recipe once before starting. I catch most mistakes before they happen when I know which steps move quickly.
Use the pan size listed. Changing the pan changes timing, browning, and the way the center sets.
Stop mixing as soon as the texture looks even. Overmixing is the fastest way I know to make baked goods tough or sauces loose.
Start checking early. I set the timer for the low end of the range and let color, aroma, and texture make the final call.
Frequently Asked Questions
Yes, but I choose the make-ahead point based on texture. For baked recipes I often prep components ahead, then bake or finish the day I serve. For drinks and sauces, I keep the base cold and stir or blend again before serving.
The recipe should look finished before I pull it.
I make small changes first. I adjust glaze, toppings, honey, or serving sauce before changing the main batter or dough, because sugar often affects browning and moisture.
I stop and fix the smallest thing. A splash of liquid helps a stiff batter or blender jar; a spoonful of flour or a few extra minutes of chilling helps a sticky dough.
Many baked versions freeze well once completely cool. I wrap individual portions tightly, label them, and thaw in the refrigerator or at room temperature before reheating gently.
You may also like...