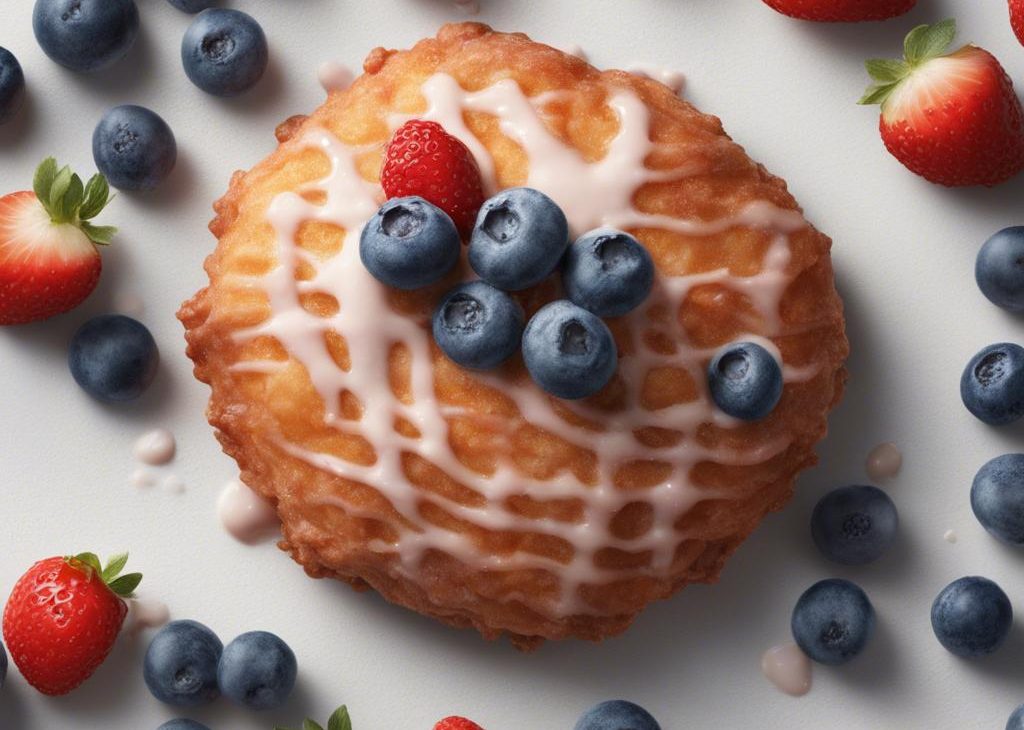

Try homemade berry fritters the next time a doughnut craving hits! Based off of the popular apple fritters, this summery fried berry fritter combines a soft yeasted dough, blueberries, and a creamy strawberry glaze made from real strawberries.
This recipe is brought to you in partnership with Red Star Yeast.
While brainstorming new recipes to try recently, my brain kept going back to monkey bread. I don’t know how or why, but I have a feeling it was the cinnamon-sugar-butter-dough that kept my mind racing and stomach growling. I used it as inspiration for a totally new recipe—perhaps a doughnut that has the same pull-apart style as monkey bread?
Yes, that’s what I’ll do.
I had never made fritters until recently, but I consider myself a pro at traditional glazed doughnuts. Apple fritters are pretty popular in the fall season, so I decided to put a summery spin on things. Bakers, meet my homemade berry fritters.
What are Fritters?
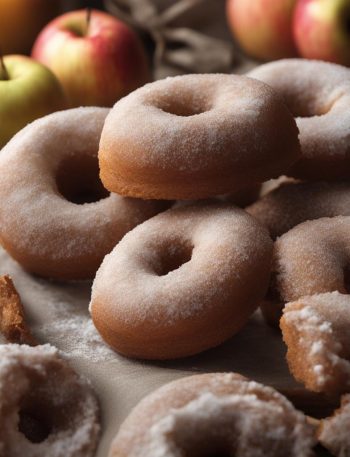
Fritters are deep-fried pull-apart style cakes of dough. The shaping process seems like it would be complicated, but there’s really no precise technique required. I’ll get to that in a minute. Apple fritters are the most common variety, but there’s also blueberry fritters, banana fritters, and even shrimp and clam fritters! After frying, the sweet varieties are usually dusted with sugar or dunked into glaze.
The term “fritters” can also refer to little savory cakes such as zucchini fritters, corn fritters, or these zucchini sweet potato fritters. Today we’re talking about doughnut-variety fritters, a warm breakfast indulgence popular at doughnut shops. They’re VERY good. (Obviously!)
Use My Favorite Yeasted Doughnut Dough
To start, let’s revisit my favorite doughnut dough. This is a rich, buttery dough that requires yeast for its rise. Don’t be nervous, this is actually a very straightforward dough recipe. Let’s walk through each ingredient:
How to Make Berry Fritters
. Go light on the blueberries. If you use too many, they’ll just fall out of the frying fritters and burn. You can also use blackberries or chopped strawberries. I recommend fresh blueberries because they aren’t as juicy. Frozen berries or juicier berries make this dough a mess!
Fold it over like a calzone:
Make a bunch of cuts vertically and horizontally:
Divide into 12 pieces, round them out, then cover and let them rest:
Let’s Fry Them!
You need a large heavy-bottomed pot. This oil gets VERY hot, so a heavy-bottomed, quality pot is the safest choice. I usually use my 5.5 quart dutch oven. Pour a quart or 2 of oil into your pot. You want at least 2-3 inches of oil—don’t let it come more than halfway up the pot. Use a candy/oil thermometer to heat the oil to 350°F (177°C).
Cook a couple berry fritters at a time, only about 1-2 minutes on each side. Some of the blueberries may come loose and float around in the oil. That’s par for the course! Just discard them since they’ll taste burnt. After frying the berry fritters, use a slotted metal spoon or metal spatula to place the fritters on a wire rack. Let some of the oil drip off, then once they’re cool enough to handle, dunk each fritter into strawberry glaze.
Once you’ve mastered the frying here, you’ll be set to try your hand at homemade funnel cakes!
Strawberry Glaze
If there’s an opportunity for pink strawberry glaze, let’s take it.
As the berry fritters are cooling, process a few fresh strawberries into a purée. Once liquified, pour over confectioners’ sugar, then add milk or heavy cream and vanilla extract. Whisk together until smooth, then let each fritter take a nice dip!
Most of the berry flavor comes from this glaze, so I don’t recommend skipping it or switching flavors. Instead of strawberries, you can use blackberries or raspberries. Blueberries aren’t quite as juicy, so I don’t recommend using them for the glaze topping.
Like big giant berry pillows! Would love to know if you try these.
Homemade Berry Fritters Recipe
Description
This sweet summery fried fritter combines a soft yeasted dough, blueberries, and a creamy strawberry glaze made from real strawberries.
Ingredients You’ll Need
Instructions
- Whisk the warm milk, yeast, and 1 Tablespoon of sugar together in the bowl of your stand mixer fitted with a dough hook or paddle attachment. Cover and allow to sit for 5 minutes.
- Add the remaining 7 Tablespoons of sugar, eggs, butter, vanilla extract, salt, nutmeg, and 1 cup flour. Beat on low speed for 30 seconds, scrape down the sides of the bowl with a silicone spatula, then add the remaining flour. Beat on medium speed until the dough comes together and pulls away from the sides of the bowl, about 2 minutes. If needed, add more flour, 1 Tablespoon at a time, until the dough pulls away from the sides of the bowl. Don’t add too much flour, though. You want a slightly sticky dough. *If you do not own a mixer, you can mix this dough with a large wooden spoon or silicone spatula. It will take a bit of arm muscle!*
- Keep the dough in the mixer and beat for an additional 5-7 full minutes, or knead by hand on a lightly floured surface for 5-7 full minutes..) If the dough becomes too sticky during the kneading process, sprinkle 1 teaspoon of flour at a time on the dough or on the work surface/in the bowl to make a soft, slightly tacky dough. Do not add more flour than you need because you do not want a dry dough. After kneading, the dough should still feel a little soft. Poke it with your finger—if it slowly bounces back, your dough is ready to rise. You can also do a “windowpane test” to see if your dough has been kneaded long enough: tear off a small (roughly golfball-size) piece of dough and gently stretch it out until it’s thin enough for light to pass through it. Hold it up to a window or light. Does light pass through the stretched dough without the dough tearing first? If so, your dough has been kneaded long enough and is ready to rise. If not, keep kneading until it passes the windowpane test.
- Lightly grease a large bowl with oil or nonstick spray. Place the dough in the bowl, turning it to coat all sides in the oil. Cover the bowl with aluminum foil, plastic wrap, or a clean kitchen towel. Allow the dough to rise in a relatively warm environment for 1-2 hours or until double in size. (I always let it rise on the counter. Takes about 2 hours. For a tiny reduction in rise time, see my answer to Where Should Dough Rise? in my Baking with Yeast Guide.)
- When the dough is ready, punch it down to release the air. Turn it out onto a lightly floured work surface and with lightly floured hands, flatten the dough into a long oval about 1/2 inch thick. You can use a rolling pin if needed, but your hands should be able to stretch it out just fine. Spread blueberries onto half of the dough,. Fold the dough over the blueberries, then seal the edges. Using your hands, work the dough into an even log, making sure the edges are totally sealed. Using a sharp knife or bench scraper, cut the dough into about 12 even strips, then cut 4-5 perpendicular strips to make a cross pattern of sorts. This is NOT an exact process, so don’t stress. You really just need a bunch of small pieces of blueberry-filled dough! Divide the cut-up dough into 12 even pieces. Mold each into a round shape and try to “enclose” the blueberries inside the dough as much as you can. (They’ll fall out of the fritters otherwise.) Place the shaped fritters on a lined baking sheet, then cover and allow to rest as you heat the oil. They will rise a bit as they rest.
- Place a cooling rack on a large baking sheet. Set aside.
- Pour oil into a large heavy-bottomed pot set over medium heat. Using a candy/oil thermometer, heat the oil to 350°F (177°C). This will take several minutes. Add 2 fritters at a time and fry for 1-2 minutes on each side or until golden brown. Wear kitchen gloves if oil is splashing. Carefully remove with a metal spatula or metal slotted spoon. Place fritters onto prepared rack. Repeat with remaining fritters, then turn off the heat.* Some blueberries may come loose in the oil. Discard those since they’ll taste burnt.
- Let the fritters cool for a few minutes as you prepare the glaze.
- Place confectioners’ sugar in a medium bowl. Set aside. Purée the strawberries in a food processor. Scrape down the sides if needed. If they aren’t pureeing into a liquid, add 1 Tablespoon of the heavy cream, half-and-half, or milk you are using in the glaze. Once liquefied, pour over confectioners’ sugar, then add the cream/milk, and vanilla extract. Whisk until smooth. If needed, add more cream/milk to thin out or more confectioners’ sugar to thicken.
- Dunk each fritter into glaze. Place back onto prepared rack for excess glaze to drip down. The glaze will eventually set on the fritters after about 20-30 minutes.
- Fritters are best enjoyed the same day. Cover and store leftovers at room temperature for 1 day or in the refrigerator for up to 3 days. Reheat in the microwave.
You may also like...