
Homemade Cake Pops is the version I make when I want the idea of the original recipe, but with enough real kitchen detail that I can repeat it without second-guessing myself.
I have learned to slow down at the small moments: scraping the blender jar, letting dough puff, waiting for caramel to cool, or tasting a sauce after it sits for a minute. Those details are not fussy. They are the difference between a recipe I make once and a recipe I keep in my notes.
This recipe serves 40 and takes 2 min prep, 36 min cook. I wrote the method the way I talk myself through it at the counter: what I look for, where I adjust, and what I avoid when I am tired or in a hurry.
Why I keep coming back to this
- The recipe gives me clear doneness cues beyond the timer.
- Cooling time improves the final texture.
- It makes the kitchen smell warm and lived-in.
- I can prep pieces ahead when needed.
- Small changes like spice or fruit are easy to track.
- It slices or serves better when I let it rest.
What you need and what each ingredient is doing
- 1 2/3 cups all-purpose flour (209g).I measure it carefully because a heavy scoop changes the texture.
- 1/2 teaspoon baking powder.I blend or whisk it thoroughly because dry pockets are the fastest way to make this taste rushed.
- 1/4 teaspoon baking soda.
- 1/2 teaspoon salt.I measure the small amount because it is what keeps the flavor from tasting flat.
- 1/2 cup unsalted butter, softened (8 Tbsp; 113g; for cake).
- 1 cup granulated sugar (200g).
- 1 large egg, at room temperature.I let it do the binding work and mix until it disappears.
- 2 teaspoons pure vanilla extract (for cake).
- 1 cup milk (240ml).
- 7 Tablespoons unsalted butter, softened (99g; for frosting).
- 1 3/4 cups confectioners sugar (210g).
- 2-3 teaspoons heavy cream or whole milk.
- 1 teaspoon pure vanilla extract (for frosting).
- 24 ounces white chocolate or candy melts (678g).
- sprinkles.
How I make it
Step 1 — Set up the recipe so nothing gets missed
I preheat oven to 350°F (177°C). Grease a 9-inch springform pan. I whisk the flour, baking powder, baking soda, and salt together in a medium bowl. Set aside. Using a handheld or stand mixer fitted with a paddle or whisk attachment, beat the butter and sugar together in a large bowl until creamed, about 2 minutes. Add the egg and vanilla extract and beat on high speed until combined. Scrape down the bottom and sides of the bowl as needed.
Step 2 — Build the main mixture patiently
I add the dry ingredients and milk to the bowl with the wet ingredients and mix on low speed until combined. Give the thick batter a quick stir with a spatula to ensure there are no large lumps at the bottom of the bowl. Pour and spread the batter evenly into the prepared pan. Bake for 30-36 minutes or until a toothpick inserted in the center comes out clean. If the top begins browning too quickly in the oven, loosely tent with a piece of aluminum foil. I allow the cake to cool completely in the pan set on a wire rack.
Step 3 — Build the main mixture patiently
With a handheld or stand mixer fitted with a paddle attachment, beat the butter on medium speed until creamy, about 2 minutes. Add confectioners’ sugar, heavy cream, and vanilla extract and mix on low speed to combine. Increase to high speed and beat for 3 full minutes. I crumble the cooled cake into the bowl on top of the frosting. Make sure there are no large lumps. Turn the mixer on low speed and beat the frosting and cake crumbles together until combined.
Step 4 — Build the main mixture patiently
I scoop 1 Tablespoon (about 20g) of cake/frosting mixture and roll into a ball. Place balls on a lined baking sheet. Refrigerate for 2 hours, or freeze for 1 hour to set the shape. Re-roll the chilled cake pop balls to smooth out, if needed. Place the tray back into the fridge, as I’ll only work with a couple at a time. I melt the chocolate or candy melts in a 2-cup liquid measuring cup (best for dunking!) in the microwave in 20-second increments, stirring after each increment, until melted and smooth. I can also use a double boiler on the stove, if I prefer.
Step 5 — Finish, check texture, and serve
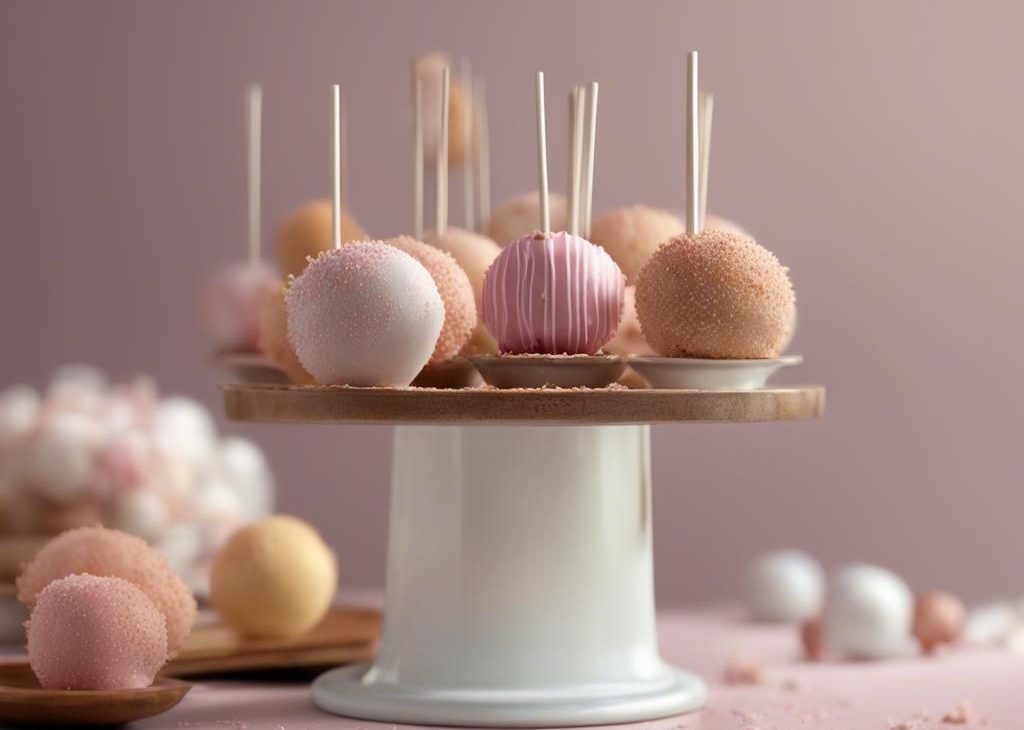
I remove just 2 or 3 cake balls from the refrigerator at a time. Dip the end of a lollipop stick about 1/2 inch into the coating, then insert the coated end into the center of the cake ball. Only push it about halfway through the cake ball. Dip the cake ball into the coating until it is completely covered. Make sure the coating covers the base of the cake ball where it meets the lollipop stick. Very gently tap the stick against the edge of the measuring cup to allow excess coating to drip off. Decorate the top with sprinkles and place upright into a styrofoam block or box (as explained in the blog post). Repeat with remaining cake balls, working with just a few out of the refrigerator at a time. The cake. I keep the full card steps close and use this stage as my checkpoint before moving on.
Tips from my kitchen
- Measure first.I set out every small amount before I start so I do not lose my place.
- Watch texture.I treat the timer as a guide and the mixture as the real answer.
- Change one thing at a time.I make a note before adjusting sweetness, liquid, or heat.
- Cool before cutting.Warm fillings and coatings need time to settle.
- Rotate pans.I turn them if browning looks uneven.
Variations I have actually tried
- Spice shift:I add cinnamon, cardamom, or nutmeg when the flavor can handle warmth.
- Chocolate:I fold in mini chips or drizzle chocolate after cooling.
- Fruit:I use berries, apples, or cherries when the base has enough structure.
- Nutty:I add toasted pecans, almonds, or walnuts for crunch.
- Smaller portions:I shape pieces smaller and check early.
How I serve and store it
I let homemade cake pops cool or rest as directed before cutting, dipping, or wrapping. That waiting time keeps fillings from running and coatings from smearing.
For leftovers, I use an airtight container once everything is fully cool. If the recipe is tender, glazed, or frosted, I separate layers with parchment so the top stays neat.
Frequently asked questions
Can I make it ahead?
Yes, though I choose the make-ahead point carefully. I often prep components early and finish closer to serving.
How do I know it is done?
I use the visual cue first: golden edges, set centers, thick filling, or a clean tester.
Can I freeze leftovers?
Most baked pieces freeze well once fully cooled and wrapped individually.
Can I reduce the sugar?
Sometimes, but I reduce only a little because sugar affects browning and moisture.
What mistake should I avoid?
Rushing the rest time. Warm fillings, doughs, and coatings usually need a pause.
If you make this homemade cake pops, I would love to hear what small adjustment made it work best in your kitchen.
Homemade Cake Pops
Description
Homemade Cake Pops is my practical first-person rewrite with the source amounts preserved and the kitchen cues made clear. I explain the texture, timing, serving, and storage details that help the recipe repeat well.
Ingredients You’ll Need
Instructions
- I preheat oven to 350°F (177°C). Grease a 9-inch springform pan.
- I whisk the flour, baking powder, baking soda, and salt together in a medium bowl. Set aside. Using a handheld or stand mixer fitted with a paddle or whisk attachment, beat the butter and sugar together in a large bowl until creamed, about 2 minutes. Add the egg and vanilla extract and beat on high speed until combined. Scrape down the bottom and sides of the bowl as needed.
- I add the dry ingredients and milk to the bowl with the wet ingredients and mix on low speed until combined. Give the thick batter a quick stir with a spatula to ensure there are no large lumps at the bottom of the bowl. Pour and spread the batter evenly into the prepared pan. Bake for 30-36 minutes or until a toothpick inserted in the center comes out clean. If the top begins browning too quickly in the oven, loosely tent with a piece of aluminum foil.
- I allow the cake to cool completely in the pan set on a wire rack.
- With a handheld or stand mixer fitted with a paddle attachment, beat the butter on medium speed until creamy, about 2 minutes. Add confectioners' sugar, heavy cream, and vanilla extract and mix on low speed to combine. Increase to high speed and beat for 3 full minutes.
- I crumble the cooled cake into the bowl on top of the frosting. Make sure there are no large lumps. Turn the mixer on low speed and beat the frosting and cake crumbles together until combined.
- I scoop 1 Tablespoon (about 20g) of cake/frosting mixture and roll into a ball. Place balls on a lined baking sheet. Refrigerate for 2 hours, or freeze for 1 hour to set the shape. Re-roll the chilled cake pop balls to smooth out, if needed. Place the tray back into the fridge, as I'll only work with a couple at a time.
- I melt the chocolate or candy melts in a 2-cup liquid measuring cup (best for dunking!) in the microwave in 20-second increments, stirring after each increment, until melted and smooth. I can also use a double boiler on the stove, if I prefer.
- I remove just 2 or 3 cake balls from the refrigerator at a time. Dip the end of a lollipop stick about 1/2 inch into the coating, then insert the coated end into the center of the cake ball. Only push it about halfway through the cake ball. Dip the cake ball into the coating until it is completely covered. Make sure the coating covers the base of the cake ball where it meets the lollipop stick. Very gently tap the stick against the edge of the measuring cup to allow excess coating to drip off. Decorate the top with sprinkles and place upright into a styrofoam block or box (as explained in the blog post). Repeat with remaining cake balls, working with just a few out of the refrigerator at a time. The cake balls must be very cold when dipping!
- I coating will set within an hour. Store cake pops in the refrigerator for up to 1 week.
Nutrition Facts
Servings 40
- Amount Per Serving
- Calories 63kcal
- % Daily Value *
- Total Fat 3g5%
- Saturated Fat 2g10%
- Trans Fat 0.1g
- Cholesterol 7mg3%
- Sodium 42mg2%
- Potassium 15mg1%
- Total Carbohydrate 9g3%
- Sugars 5g
- Protein 1g2%
- Calcium 12 mg
- Iron 0.2 mg
* Percent Daily Values are based on a 2,000 calorie diet. Your daily value may be higher or lower depending on your calorie needs.
Note
Measure first. I set out every small amount before I start so I do not lose my place.
Watch texture. I treat the timer as a guide and the mixture as the real answer.
Change one thing at a time. I make a note before adjusting sweetness, liquid, or heat.
Cool before cutting. Warm fillings and coatings need time to settle.
Frequently Asked Questions
Yes, though I choose the make-ahead point carefully. I often prep components early and finish closer to serving.
I use the visual cue first: golden edges, set centers, thick filling, or a clean tester.
Most baked pieces freeze well once fully cooled and wrapped individually.
Sometimes, but I reduce only a little because sugar affects browning and moisture.
Rushing the rest time. Warm fillings, doughs, and coatings usually need a pause.
You may also like...