
These honey wheat English muffins are completely homemade from a simple 8 ingredient dough. The sticky dough does not require kneading and you can skip the rolling pin entirely. Some homemade English muffin recipes call for a round biscuit/cookie cutter, but you don’t need it for these—your hands sprinkled with cornmeal or semolina flour are your best tool.
Though the dough rises and is ready in about 2 hours, I strongly recommend refrigerating it for at least 6 hours so your English muffins have better flavor.
This post is lengthy because I want you prepped for the best success possible.. Are you a yeast beginner? This Baking with Yeast Guide is helpful.
English muffins are a breakfast staple in the US, inspired by the traditional English crumpet. You can enjoy them plain, but they taste divine toasted with butter, honey butter, jam, or even raspberry sauce. English muffins are essential for eggs Benedict and as the bread for breakfast sandwiches. If you’ve never heard of English muffins before, imagine a homemade yeasted bread patty with plenty of airy pockets inside—much denser and flatter than dinner rolls. The craggy, airy goodness inside is branded as “nooks and crannies” by the company Thomas’.
Today’s recipe is a variation of English muffins, which are traditionally made with all white flour and very little sugar. I like to use a combination of all purpose and whole wheat flours here and sweeten them with honey. They’re NOT sweet like regular quick bread-style muffins—just a little touch of honey goodness to pair with the whole wheat flavor.
By the way, if you enjoy baking with whole wheat flour, try this hearty, yet soft whole wheat pizza dough. It’s a whole grain favorite!
Are English Muffins… Bread?
Yes, a yeast bread. I learned they’re called English muffins so they aren’t confused with sweeter cupcake-like muffins such as blueberry muffins.
Let me brief you on today’s recipe.
These Homemade English Muffins Are:
- Made with a simple 8 ingredient no-knead dough
- Fresher-tasting than store-bought
- Perfect if you’re looking for a fun baking project
- Started on the stove and finished in the oven
- Heartier than white flour English muffins
- Super soft and filled with their signature jagged texture aka “nooks & crannies”
- Begging you to slice & toast them and slather with butter!
- An intermediate baking recipe
They don’t have the same exact texture as store-bought, but the flavor is out-of-this-world especially if you let the dough rest in the refrigerator for at least 6 hours (and up to 24 hours). Your kitchen will smell like a bakery and it’s just so satisfying.
Start on the stove: Homemade English muffins can be cooked entirely on the stove, but it depends on your stove and griddle/skillet situation. I have a large griddle, but it doesn’t heat evenly so the batch is never consistent. I also find that English muffins solely cooked on the stove end up doughy inside. For best (and most uniform) results, I recommend starting the muffins on the stove and finishing them in the oven.
Recipe Testing: What Worked & What Didn’t
After making homemade English muffins from King Arthur Baking, I decided to try my hand at a honey wheat version. This recipe went through 6 rounds of dough variations.
Here’s What Works:
- Use melted butter because recipe tests made with softened butter weren’t as flavorful.
- Embrace a sticky dough made with *some* whole wheat flour and *some* all-purpose or bread flour.
- You will be tempted to add more flour, but don’t. The high hydration level is key to obtaining that shaggy & airy texture inside.
- Let the dough rise on the counter until doubled, about 2 hours. Then let it rest in the refrigerator for at least 6 hours. This time gives the muffins extra flavor, plus cold dough is MUCH EASIER to work with. (We do the same when making artisan bread, cranberry nut no-knead bread, and olive bread.)
- Start the muffins on the stove in a skillet or on a griddle and finish them in the oven. Cook until an instant read thermometer reads the center as 200°F (93°C). If you don’t have an instant read thermometer, cut a muffin open and if it’s still extra doughy in the center, return to the oven.
Here’s What Doesn’t Work:
- A firm, dry dough will not produce an airy center.
- Avoid using ALL whole wheat flour because you may end up with bread hockey pucks.
- Do not punch down the dough after it rises.
- Do not skip the cornmeal or semolina flour because it’s needed to coat the dough and your hands.
- Do not flatten the shaped muffins with force because they will deflate.
9 Ingredients You Need
There are 8 ingredients in the dough, plus cornmeal for hands + cooking surface.
Quick Test Recipe Comparison
Once I landed on the perfect dough, it’s all a matter of shaping and cooking the muffins. Use your hands to gently shape the dough into 1-inch thick discs.. Let me explain each.
Can I Skip the Stove?
I do not recommend it. Cooking them entirely or briefly on the stove browns and sets the exterior, preventing them from puffing up too much. If cooked entirely in the oven, you’ll have rounded dense dinner rolls, not English muffins.
Cutting Into Your English Muffins
To preserve the craggy texture, I recommend slicing the honey wheat English muffins in half using a serrated knife. Or you can slice around the edges with a regular sharp knife and then pry the two halves apart with a fork.
How to Store & Freeze English Muffins
This recipe yields 12 muffins. The shelf life of homemade English muffins is shorter than store-bought. Store leftovers covered at room temperature for up to 2 days and then transfer to the refrigerator for up to 3 days. After that, it’s best to freeze them. Freeze for up to 3 months and then thaw by defrosting in the microwave or setting out on the counter. For best taste and texture, slice and toast them.
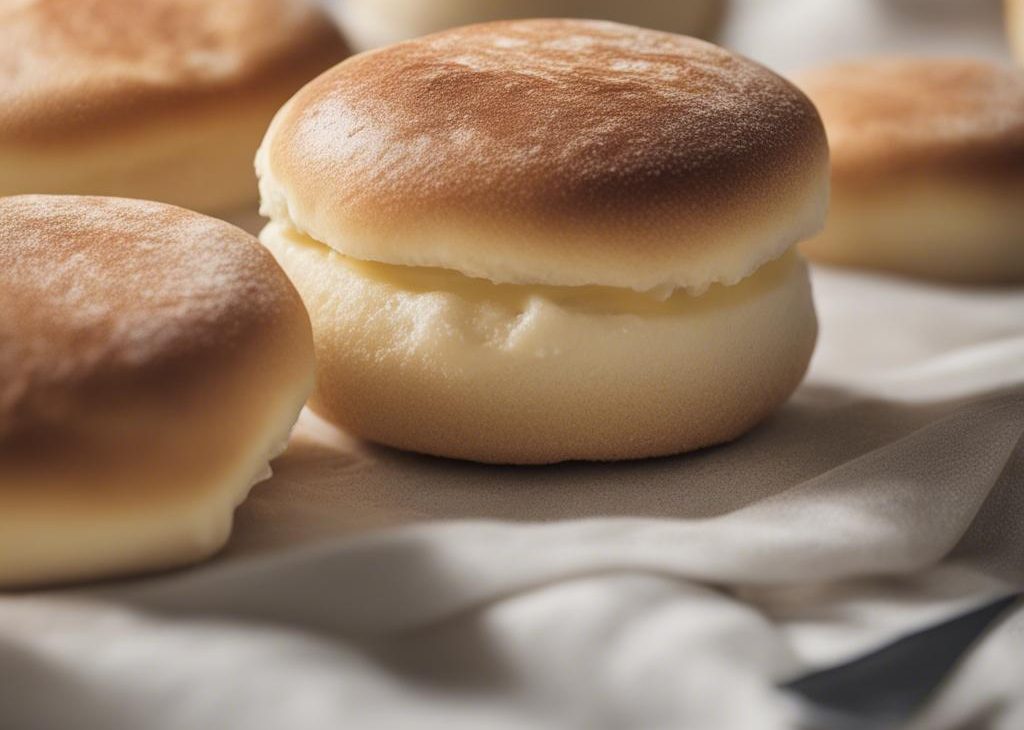
See Your Homemade English Muffins
Many readers tried this recipe as part of a baking challenge!
Let Me Show You a Few Steps
Here is the yeast proofing mixture that you prepare in step 1 above. The foamy top proves the yeast is ready and active.
After the dough comes together, use a silicone spatula to fold the dough a few times and scrape down the sides of the bowl. The dough is very, very sticky:
Below left: Let the dough rise at room temperature until doubled.
Below right: Refrigerate for at least 6 hours. The dough doesn’t rise that much in the refrigeration period—just a little. Cold dough does, however, produce a more flavorful English muffin and it’s a lot easier to work with than room temperature dough.
Unlike most yeasted bread recipes, do not punch the dough down—you do not want this dough to collapse or release air. With cornmeal or semolina dusted hands, begin pulling sections of dough and gently shaping into discs. The dough is very sticky, but manageable since it’s cold.
Arrange on a lined baking sheet and then cover and let rest for 20 minutes as you prepare the stove for cooking.
Homemade English Muffins Recipe
Description
These honey wheat English muffins are completely homemade from a simple no-knead 8 ingredient dough. Though the dough rises and is ready in about 2 hours, I strongly recommend refrigerating it for at least 6 hours so your English muffins have better flavor..
Ingredients You’ll Need
Instructions
- In a large un-greased mixing bowl, whisk the warm milk, yeast, and honey together in the bowl of your stand mixer fitted with a dough hook attachment. Cover and allow mixture to sit for about 5 minutes or until foamy on top. *If you do not own a mixer, you can do this in a large mixing bowl and in the next step, mix the dough together with a large wooden spoon/silicone spatula. A hand mixer works, but the sticky dough repeatedly gets stuck in the beaters. Mixing by hand with a wooden spoon or rubber spatula is a better choice.*
- Add the butter, egg, salt, whole wheat flour, and 1 cup (about 130g) of the bread flour. Whisk to combine. Add 1 more cup (130g) bread flour and beat on low speed for 2 minutes. Dough will be extremely sticky and like a loose batter. Add remaining flour, scrape down the sides of the bowl with a silicone spatula, and then beat on low speed for 1 minute to combine. Scrape down the sides of the bowl again and then fold the dough together a few times with your silicone spatula. Do not be tempted to add more flour. It’s supposed to be very sticky.
- Cover the dough tightly with plastic wrap or aluminum foil and set on the counter at room temperature. Allow to rise until double in size, about 2 hours. The dough will be sticking to the sides of the bowl and have a lot of air bubbles. You can continue with step 4 immediately, but for absolute best flavor and texture, I strongly recommend letting this risen dough rest in the refrigerator for at least 6 hours and up to 24 hours. Place covered dough in the refrigerator for 6-24 hours. The dough will very slightly puff up during this time, but may begin to deflate after 24 hours.
- Line two large baking sheets with parchment paper or silicone baking mats. One is for the shaped uncooked muffins and the 2nd is for baking the muffins.
- Remove cold dough from the refrigerator—no need to bring it to room temperature. Sprinkle a little cornmeal/semolina on the surface of the dough and all over your hands. Have more nearby and use whenever things begin getting super sticky. Grab a small handful of dough, about 1/3 cup of dough or 2.5-3 ounces if you have a kitchen scale, and gently form into a 1-inch thick disc that’s about 3.5 inches in diameter—doesn’t need to be perfect—and place onto lined baking sheet. You’re basically shaping them as you’d shape hamburger patties. Repeat with remaining dough for a total of about 12. Sprinkle the tops of the shaped discs lightly with more cornmeal and cover to rest for 20 minutes. (Do not extend this time or the muffins will puff too much.)
- Meanwhile, as the shaped muffins rest, get your stove ready. Heat a griddle to medium heat or about 325°F (163°C) or use a large skillet or cast iron skillet over medium-low heat. If your griddle/skillet/cast iron is nonstick or seasoned, there’s no need to grease it. If not nonstick, grease with a little butter. Once greased pan/griddle is heated, sprinkle lightly with cornmeal/semolina flour and begin to cook the muffins in the next step.
- Using a flat spatula, carefully transfer however many muffins can fit on your pan/griddle with at least 2 inches between each because muffins will puff up as they cook. Gently flatten them around the edges with the back of your spatula, being careful to not flatten too hard which would deflate them. Cook for 7-8 minutes and then flip over, gently flatten again, and cook for another 7-8 minutes. (No need to grease or sprinkle more cornmeal/semolina when flipping.) This cook time is a general guideline because griddles/stoves/pans can heat differently and/or unevenly. You want to cook until golden brown on each side and edges seem set. If muffins seem to be over-browning quickly, slightly turn down the stove’s heat. And, as the muffins cook, you can start preheating the oven (next step). Transfer cooked muffins to the unused prepared baking sheet.
- Preheat oven to 350°F (177°C).
- Bake for 8-11 minutes or until an instant read thermometer reads the center as 200°F (93°C). If you don’t have an instant read thermometer, cut a muffin open after 8 minutes and if it’s still extra doughy in the center, return to the oven until baked through. I usually bake them for at least 10 minutes.
- Remove from the oven and cool for 10 minutes on the baking sheet before slicing and handling. To preserve the craggy texture, slice the honey wheat English muffins in half using a serrated knife. Or you can slice around the edges with a regular sharp knife and then pry the two halves apart with a fork. Toast halves in the toaster if desired (taste best that way!) and serve warm with desired toppings such as butter, honey butter, jam, apple butter, or other topping of choice. Muffins can also be used for breakfast sandwiches or eggs Benedict.
- Store leftovers covered at room temperature for up to 2 days and then transfer to the refrigerator for up to 3 days. After that, it’s best to freeze them. Freezing instructions in notes.
You may also like...