I make Lemon Berry Petit Fours when I want something that feels homemade without needing a dramatic kitchen production. The first thing I pull out is unsalted butter, softened, and once that is on the counter I can usually settle into the rhythm of the recipe.
What I like about this one is that it gives clear signals as it moves along: the smell changes, the texture tightens, and the color tells me when to slow down. I have learned to trust those little cues more than my urge to rush, especially with a recipe that has 20 ingredients.
The timing stays close to the source: 1 minutes of prep and 30 minutes of cooking. I keep those numbers in mind, but I still use my eyes, nose, and a quick touch test because every stove and oven in my life has had its own personality.
Why I keep coming back to this
- I can read the ingredient list once and understand where the recipe is going; that matters when I am cooking on a busy day.
- The servings stay practical at 48 portions, so I am not left guessing how much to set out.
- The method has enough structure to keep me from wandering, but it still leaves room for normal kitchen judgment.
- It uses familiar cues: aroma, thickness, browned edges, or a clean set instead of mystery timing.
- I can prep a few pieces ahead and the final dish still tastes freshly made.
- The lemon flavor comes through as bright and clean, not harsh, because I keep zest and juice in balance.
What you need (and what each one is doing)
- 1 and 1/2 cups unsalted butter, softened (340g).
- 8 ounces cream cheese, softened (226g).
- 2 cups granulated sugar (400g).
- 1/3 cup sour cream (80g).
- 1 and 1 1/2 teaspoons pure vanilla extract all-purpose flour.
- 6 large eggs, at room temperature.This binds the mixture and helps it set.
- 3 cups cake flour (354g).
- 1 teaspoon baking powder.This is the technical helper, so I check that it is fresh.
- 1/8 teaspoon salt.
- 3 Tablespoons fresh lemon juice (45ml).This is the bright flavor I want to notice clearly.
- 1/4 cup raspberry jam.
- 1/4 cup lemon curd (60g).
- 3/4 cup unsalted butter, softened (12 Tbsp; 170g).
- 3 cups confectioners’ sugar (360g).
- 2 Tablespoons heavy cream (30ml).
- 1 teaspoon pure vanilla extract.It rounds out the sweetness so the recipe does not taste one-dimensional.
- pinch of salt.
- 2 4-ounce bars white chocolate, chopped (226g).I melt it slowly so it stays glossy and does not seize.
- 2 teaspoons canola, vegetable, or coconut oil.
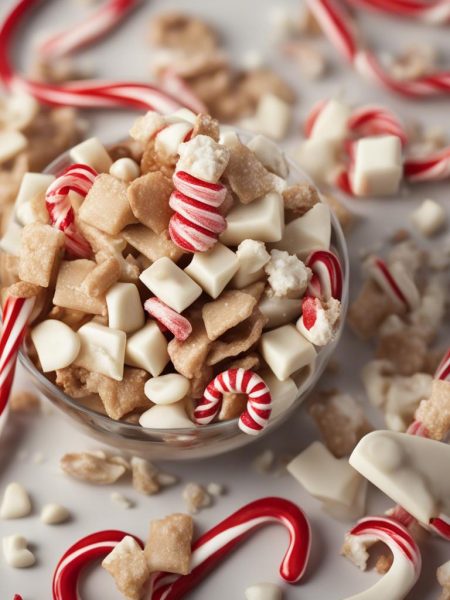
- optional garnish: white sixlets, mint leaves, edible flowers, berries, and/or sprinkles.
How I make it
Step 1 — Preheat oven to 325 F (163
Preheat oven to 325°F (163°C). Grease a 12×17-inch half sheet pan, then line with parchment paper. Pan size is imperative. This batter won’t fit into anything smaller. Likewise, the cake would be too thin if baked in larger pans. Using a handheld or stand mixer fitted with a paddle or whisk attachment, beat the butter on high speed.
Step 2 — On low speed, beat the eggs
On low speed, beat the eggs in 1 at a time allowing each to fully mix in before adding the next. Careful not to overmix after the eggs have been added. Once the 6th egg is combined, stop the mixer and add the cake flour, baking powder, and salt. Beat on medium speed *just* until combined, then beat.
Step 3 — Remove cake from the oven
Remove cake from the oven and allow to cool inside the pan. The cake will shrink down from the sides. . Once cool, invert the cake onto a cutting board or the counter with the long side facing you. With a sharp knife (I find serrated knife is best here) or pizza cutter, slice cake in half horizontally.
Step 4 — With a handheld or stand mixer
With a handheld or stand mixer fitted with a paddle attachment, beat the butter on medium speed until creamy, about 2 minutes. Add confectioners’ sugar, heavy cream, and vanilla extract. Beat on low speed for 30 seconds, then increase to high speed and beat for 3 full minutes. Add up to 1/4 cup more confectioners’ sugar if frosting.
Step 5 — Give it time to set
Place the lemon curd/raspberry jam rectangles on top of the vanilla buttercream rectangles. Layer the plain rectangle on top. Loosely cover each and chill in the refrigerator for at least 2 hours or freeze for 1 hour. They must chill before cutting into tiny petit fours. Once cold, slice each into 12 little squares. Arrange on a baking.
Step 6 — Melt the white chocolate and oil
Melt the white chocolate and oil together in a double boiler or in the microwave in 20 second increments, stopping and stirring after each until smooth and melted. If it seems too thick, add another drop of oil to thin out. Spoon or drizzle over petit fours. Top with optional garnish if desired. Cover and store petit fours.
Tips from my kitchen
- I measure first.When I line everything up before starting, I catch missing ingredients before heat or softened butter puts me on a timer.
- I scrape the bowl.A few dry streaks hiding at the bottom can change the texture, especially in batters, sauces, and fillings.
- I trust the visual cue.The written time matters, but color, thickness, and smell usually tell me more.
- I give it a short rest.Even a few minutes helps juices settle, crumbs firm up, or flavors stop tasting separate.
- I cool before decorating.Warm cake, cookies, or bars will melt frosting and glaze faster than I expect.
Variations I have actually tried
- Berry swap:I use blueberries, raspberries, or blackberries depending on what looks best.
- Orange version:Orange zest and juice make a softer citrus flavor than lemon.
- Almond note:A tiny splash of almond extract works well with berries, but I keep it small.
- Mini portions:The same flavors work in smaller pans or cups as long as I watch the bake time.
- Less sweet finish:I skip heavy garnish and let the fruit or citrus do more of the work.
Storing and reheating
I let it cool completely before covering because trapped steam is the enemy of a good crumb. Most slices or portions keep well in an airtight container for a couple of days at room temperature if there is no cream filling, or in the refrigerator when frosting, berries, curd, cream cheese, or mousse are involved.
A note on pacing
When a recipe has several small parts, I do not try to prove I can move fast. I finish one stage, wipe the counter if I need to, and then start the next part with a clearer head.
Frequently asked questions
Can I make Lemon Berry Petit Fours ahead?
Yes. I usually do at least some prep ahead: measuring dry ingredients, making fillings, or chopping aromatics. If the recipe has a crisp top or fresh garnish, I save that part for the day I serve it.
How do I know it is done?
I look for the cue built into the method: set edges, a thicker sauce, a clean tester, or food that smells cooked rather than raw. The listed time is my guide, but I check a few minutes early.
Can I use bottled lemon juice?
I reach for fresh lemon juice when lemon is a main flavor. Bottled juice works in an emergency, but it tastes flatter, and it does not give the same aroma as fresh zest.
What should I do if the texture seems off?
I slow down before adding more ingredients. Batters may need scraping, sauces may need another minute, and chilled mixtures may simply need time to warm slightly.
How long do leftovers keep?
It depends on the fresh ingredients, but I usually plan on 2-4 days in the refrigerator for anything creamy or fruit-filled, and a bit longer for sturdy baked goods. I use smell, texture, and common sense before serving leftovers.
If you make Lemon Berry Petit Fours, leave a comment and tell me what you noticed in your kitchen; I always like hearing which little tweaks worked.
Lemon Berry Petit Fours
Description
I make Lemon Berry Petit Fours with unsalted butter, softened, cream cheese, softened, granulated sugar, sour cream, keeping the original prep and cook times intact. The rewrite below includes the practical cues I use in my kitchen so the recipe feels clear, personal, and easy to repeat.
Ingredients You’ll Need
Instructions
- Preheat oven to 325°F (163°C). Grease a 12x17-inch half sheet pan, then line with parchment paper. Pan size is imperative. This batter won't fit into anything smaller. Likewise, the cake would be too thin if baked in larger pans.
- Using a handheld or stand mixer fitted with a paddle or whisk attachment, beat the butter on high speed until smooth and creamy, about 2 minutes. Scrape down the sides and up the bottom of the bowl with a rubber spatula. Add the cream cheese and beat on high speed until completely smooth and combined, about 1 minute. Add the sugar and beat on high speed until combined, about 1 minute, then add the sour cream and vanilla and beat on high speed until combined and creamy. Scrape down the sides and up the bottom of the bowl with a rubber spatula.
- On low speed, beat the eggs in 1 at a time allowing each to fully mix in before adding the next. Careful not to overmix after the eggs have been added. Once the 6th egg is combined, stop the mixer and add the cake flour, baking powder, and salt. Beat on medium speed *just* until combined, then beat in the lemon juice. Try not overmix. Using a rubber spatula or sturdy whisk, give the batter a final turn to make sure there are no lumps at the bottom of the bowl. The batter will be thick and creamy.
- Pour/spoon batter evenly into prepared pan. Bang the pan on the counter once or twice to bring up any air bubbles. Bake for 26-31 minutes. Use a toothpick to test for doneness. Once it comes out completely clean, the cake is done.
- Remove cake from the oven and allow to cool inside the pan. The cake will shrink down from the sides.
- . Once cool, invert the cake onto a cutting board or the counter with the long side facing you. With a sharp knife (I find serrated knife is best here) or pizza cutter, slice cake in half horizontally. Then cut each long rectangle into 3 smaller rectangles. You'll now have 6 rectangles.. You now have 12 thin rectangles.
- With a handheld or stand mixer fitted with a paddle attachment, beat the butter on medium speed until creamy, about 2 minutes. Add confectioners' sugar, heavy cream, and vanilla extract. Beat on low speed for 30 seconds, then increase to high speed and beat for 3 full minutes. Add up to 1/4 cup more confectioners' sugar if frosting is too thin or another Tablespoon of cream if frosting is too thick. Add a pinch of salt if frosting is too sweet. (I always add a pinch.).
- With a sharp knife, trim the ends off the rectangles that touched the pan. They're a little harder and uneven, which would create lopsided petit fours. Spread vanilla buttercream in a thick even layer on 4 rectangles. Spread both lemon curd and raspberry jam on 4 rectangles. (The remaining 4 rectangles are plain because they are the tops.) Go a little lighter on the raspberry jam and lemon curd compared to the vanilla buttercream. If there's too much, it creates a big mess when cutting the petit fours.
- Place the lemon curd/raspberry jam rectangles on top of the vanilla buttercream rectangles. Layer the plain rectangle on top. Loosely cover each and chill in the refrigerator for at least 2 hours or freeze for 1 hour. They must chill before cutting into tiny petit fours.
- Once cold, slice each into 12 little squares. Arrange on a baking sheet and chill in the refrigerator or freezer as you melt the white chocolate.
- Melt the white chocolate and oil together in a double boiler or in the microwave in 20 second increments, stopping and stirring after each until smooth and melted. If it seems too thick, add another drop of oil to thin out. Spoon or drizzle over petit fours. Top with optional garnish if desired.
- Cover and store petit fours in the refrigerator for up to 5 days.
Nutrition Facts
Servings 48
- Amount Per Serving
- Calories 80kcal
- % Daily Value *
- Total Fat 2g4%
- Saturated Fat 1g5%
- Trans Fat 0.1g
- Cholesterol 7mg3%
- Sodium 33mg2%
- Potassium 17mg1%
- Total Carbohydrate 14g5%
- Sugars 9g
- Protein 1g2%
- Calcium 14 mg
- Iron 0.4 mg
* Percent Daily Values are based on a 2,000 calorie diet. Your daily value may be higher or lower depending on your calorie needs.
Note
Set up first. I measure the ingredients before I start so the recipe moves calmly once heat or mixing begins.
Use the cue, not only the clock. I check color, aroma, thickness, and texture a few minutes before the listed time.
Scrape well. Dry pockets at the bottom of a bowl or pan can change the finished texture.
Rest when needed. A short rest helps the crumb, sauce, filling, or garnish settle before serving.
Frequently Asked Questions
Yes. I usually do at least some prep ahead: measuring dry ingredients, making fillings, or chopping aromatics. If the recipe has a crisp top or fresh garnish, I save that part for the day I serve it.
I look for the cue built into the method: set edges, a thicker sauce, a clean tester, or food that smells cooked rather than raw. The listed time is my guide, but I check a few minutes early.
I reach for fresh lemon juice when lemon is a main flavor. Bottled juice works in an emergency, but it tastes flatter, and it does not give the same aroma as fresh zest.
I slow down before adding more ingredients. Batters may need scraping, sauces may need another minute, and chilled mixtures may simply need time to warm slightly.
It depends on the fresh ingredients, but I usually plan on 2-4 days in the refrigerator for anything creamy or fruit-filled, and a bit longer for sturdy baked goods. I use smell, texture, and common sense before serving leftovers.
You may also like...