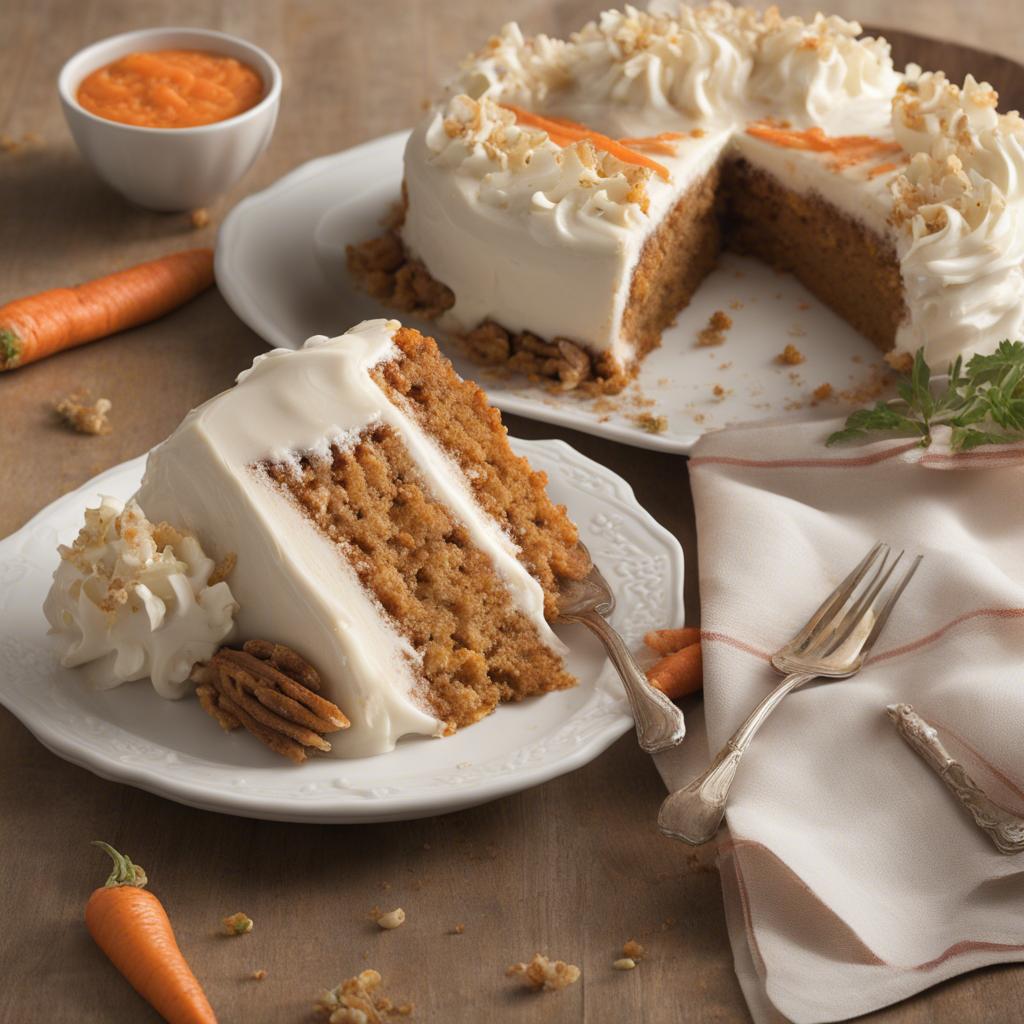

If you find yourself looking for an alternative to American-style buttercream—which we all know can be cloyingly sweet—you may enjoy this whipped frosting instead. Made from only 4 simple ingredients, this lightly sweetened frosting is fabulously creamy and fluffy, but still holds its shape when piped with a piping tip. Enjoy it with vanilla cupcakes, white cake, chocolate cake, lemon blueberry cupcakes, or anywhere you’re looking for a lighter frosting option.
Enjoy Creamy, Lightly Sweet Frosting
Today’s recipe can really be known as “all the things” including whipped frosting, creamy lightly sweetened frosting, whipped cream frosting that pipes well, won’t-give-you-a-toothache-frosting, etc. I settled on Not-So-Sweet Whipped Frosting so you understand the selling point as soon as you read the title… this is a whipped frosting that isn’t too sweet.
If you’ve made this cookies and cream cake before, you’ve made a version of today’s frosting!
Whipped Frosting Details
- Texture: This frosting is basically a very sturdy whipped cream. Think of a thicker, fluffier version of soft whipped cream. Even though it’s thick, it’s still pretty light and airy. There’s something known as stabilized whipped cream and I suppose today’s recipe could fall into that category, but it does contain cream cheese so there’s a little extra flavor. It can be piped on cupcakes, spread on cakes or ice cream cake, or even used between layers of pastry in homemade mille-feuille.
- Flavor: Like the consistency, the whipped frosting flavor is light. It’s a little sweet, a little tangy, and flavored with vanilla extract. I especially love it with soft cakes that have strong flavor such as lemon blueberry cake, pumpkin cake, and citrus cake. You can’t really taste the cream cheese, but if you really dislike cream cheese, you may be able to detect it. (A few taste testers had no idea there was cream cheese in the frosting.)
- Ease: If you love the consistency and structure of Swiss meringue buttercream, but are looking for something simpler, this whipped frosting is a prime choice. It’s probably the easiest frosting you’ll ever make because even if you mess up, there’s likely a solution to fix it. All you’re doing is mixing the ingredients together in a particular order at various speeds.
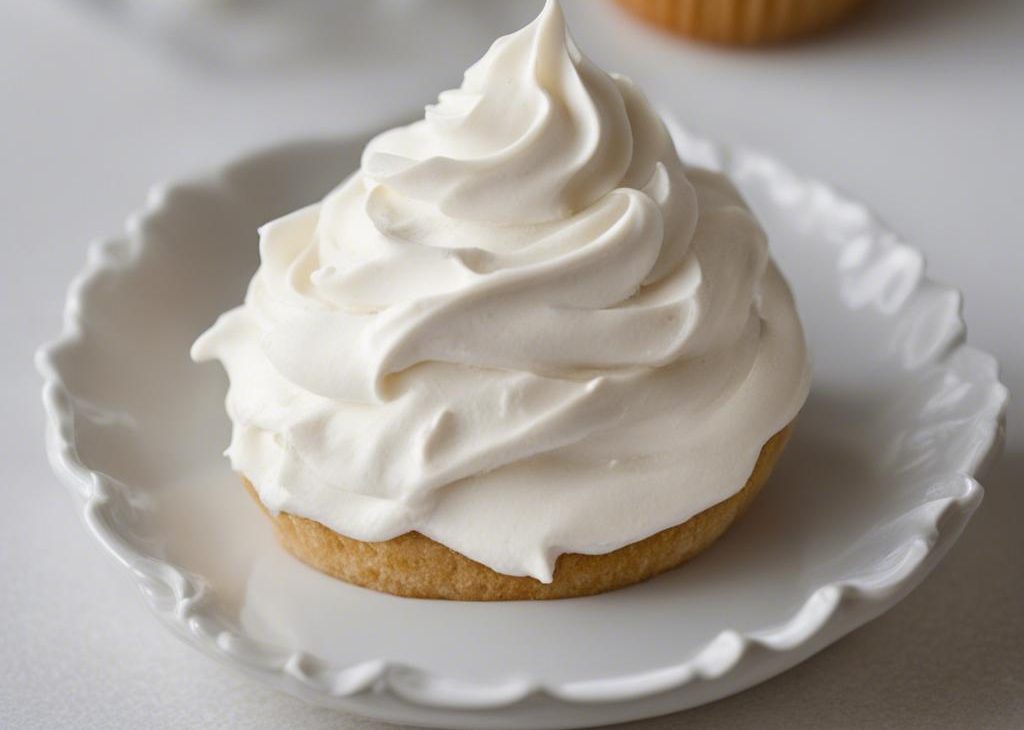
Pictured: vanilla cupcakes with today’s whipped frosting.
Even though this recipe is easy, I want to set you up for success by giving you all the information you need to get started. Review these headnotes before you try the recipe for the first time because they will help you understand the best ingredients to use and the ideal consistency you need.
This Whipped Frosting Has 4 Ingredients
And with only 4 ingredients, it’s imperative you use the correct ones!
By the way, this recipe is very easy to scale up or down. Use 2 ounces of cream cheese per 1/4 cup (30g) confectioners’ sugar and 1/2 cup (120ml) heavy cream. Add more or less vanilla extract. When you’re whipping in the heavy cream, reduce or extend that length of time based on the volume. Whip shorter if you scaled down the recipe and whip longer if you scaled up the recipe.
I didn’t want to call this recipe whipped cream frosting because you have a little flavor from cream cheese. Again, even though the flavor is very faint, if you’re sensitive to the taste of cream cheese or simply do not care for it, I would skip this recipe.
FAQ: Can I Make This Without Cream Cheese?
No. Instead, try a different recipe.
If you’re looking for a lighter topping, I recommend regular whipped cream. For a sturdy, yet lightly sweetened frosting, try Swiss meringue buttercream. If you need a whipped buttercream, use the frosting found with this vanilla sheet cake. Or search for whipped frosting made without cream cheese—some recipes use cornstarch or instant pudding mix instead.
Let’s Make Whipped Frosting!
In terms of preparation, the recipe reminds me of no-bake cheesecake. We’re using mostly the same ingredients found in the filling, except that recipe instructs you to whip the cream cheese and heavy cream separately. Here, we’re doing it all in 1 bowl in different stages. First, beat the cream cheese to begin breaking it down. Then add the confectioners’ sugar and vanilla extract and beat together. You really want to rid all the lumps:
Now here comes the *magic!* Switch the mixer to low speed and in a slow and steady stream, whip in the heavy cream. After you add all of the heavy cream, turn the mixer up to high speed and watch your new favorite frosting fill with air and rise up in the bowl.
You’re looking for a thick, airy consistency with stiff peaks. If you were to shimmy and shake this bowl, the frosting would hardly move:
Now let me show you what not to do.
Too Thin Vs Too Thick
Too thin: If you do not whip the mixture long enough, you’ll have soft, soupy, thin frosting. If you were to shake a bowl of under-whipped frosting, it will jiggle all around like a jello mold. This is an easy fix—just keep whipping until you have the consistency above.
Too thick: If you over-whip the frosting, it will appear chunky and curdled. While my fix isn’t perfect, it will certainly help—by hand, stir in more liquid heavy cream 1 Tablespoon at a time until the frosting smooths out again.
Whipped Frosting: 3 Success Tips (Do Not Miss These!)
- No lumps in cream cheese. While you can over-whip the frosting after you add the heavy cream, you cannot over-mix the 1st 3 ingredients in the recipe. Beat the cream cheese, confectioners’ sugar, and vanilla extract together for as long as you need to rid all of the cream cheese lumps. Stop and scrape down the mixing bowl as needed.
- Don’t leave. Do not walk away and let the mixer run after you add the heavy cream. Sometimes the frosting sets up in 1 minute and sometimes it takes 3 minutes. Keep your eyes on the mixture to avoid over-whipped frosting.
- Pop the air if needed. After you make the whipped frosting, you’ll notice that the consistency can change the longer it sits in the bowl. The frosting develops more air bubbles and if you want the silky, yet thick consistency back, stir the frosting by hand a few times to deflate the air. I don’t notice this as much when the frosting sits on a finished cake and that’s likely because you handled it a lot in the frosting process—the bubbles develop most when the frosting is just sitting in the bowl before you use it. Likewise, if you notice the frosting really airy and looking over-whipped as you pipe it, either “massage” the frosting while it’s in the piping bag (sounds weird, but this can help deflate air bubbles) or pipe back into the mixing bowl and gently stir it.
The success of this recipe depends on the ingredients used and length of time mixing. Follow the recipe below carefully. It’s so nice to have an easy sturdy frosting that isn’t too sweet!
. Dessert perfection!
Not-So-Sweet Whipped Frosting Recipe
Description
Made from only 4 ingredients, this lightly sweetened whipped frosting is creamy and fluffy, yet holds its shape when piped with a piping tip. For best results, review the success tips above and recipe notes below before you begin.
Ingredients You’ll Need
Instructions
- In a large bowl using a hand-held mixer or stand mixer fitted with a whisk or paddle attachment, beat the cream cheese on medium-high speed until creamy, about 1 minute. Scrape down the sides and up the bottom of the bowl and beat again as needed until creamy. Add the confectioners’ sugar and vanilla extract, and then beat on medium speed until combined and completely smooth (absolutely no lumps), at least 2 full minutes. Scrape down the sides and up the bottom of the bowl and beat again as needed to smooth out.
- Switch to a whisk attachment (if you haven’t already been using it). Turn the mixer to low speed and with the mixer running, carefully pour in the cream in a slow and steady stream. After all of the cream has been added, turn the mixer up to high speed and whip until thick and stiff peaks form, about 1-2 minutes. This time can vary depending on exact temperature of ingredients, temperature in kitchen, and even the humidity. Do not walk away during this time and do not be concerned if your frosting takes longer to whip. You’re looking for a thick, airy consistency with stiff peaks. If you were to shimmy and shake your bowl, the frosting would hardly move. If your frosting appears soupy now or at any point you are working with it, it needs more whipping to introduce more air. If your frosting appears chunky or curdled, it’s over-whipped. To fix, stir 1 Tablespoon of heavy cream into the frosting by hand to smooth out again. Use more heavy cream if needed to smooth out.
- After you make the whipped frosting, it’s ready to frost your cupcakes, cake, or other confections. After frosting a cake or cupcakes with this frosting, I strongly recommend refrigerating them uncovered for at least 30 minutes to help “set” the frosting (especially when using on a layer cake). Then you can serve or set out for a few hours before serving. And please note that you’ll notice the frosting becomes thicker and airier the longer it sits in your mixing bowl. This is not a problem and can easily be fixed by gently stirring it to pop any air bubbles. Likewise, if you notice the frosting really airy and looking over-whipped as you pipe it with piping tips, either “massage” the frosting while it’s in the piping bag (sounds weird, but this can help deflate air bubbles) or pipe back into the mixing bowl and gently stir it. You can even stir in a splash of heavy cream to thin/smooth out if needed.
- After the 30 minutes of refrigerating to “set” the frosting as instructed in step 3, frosted confections are fine to serve or sit out at room temperature for a few hours. If you plan to serve later than that, such as the next day, I recommend storing in the refrigerator. Lightly cover as best you can. Confections topped with this frosting can be made ahead and refrigerated for up to 2 days.
You may also like...