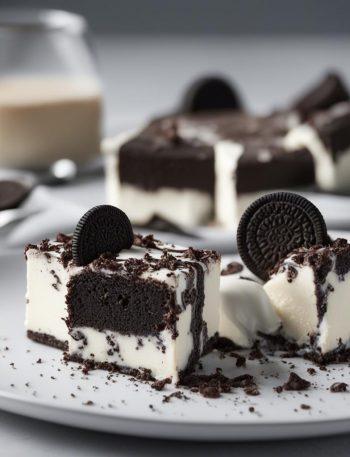

I make Ruth Chris Cheesecake when I want a sweet recipe that feels familiar but still needs care. The first time I tested my way through it, I noticed the same thing I notice with most good recipes: the ingredients are not difficult, but the order and the little cues matter. I keep those cues written into my notes because they save me from guessing.
This version keeps the original timing, temperatures, pan sizes, and servings intact, but I rewrote the method in the way I actually cook. I like knowing when to stir, when to stop, and what the mixture should look like before I move on. That is especially helpful with Ruth Chris Cheesecake, where texture can change quickly if I rush.
I also keep the flavor practical. If a recipe is sweet, I use salt to make it cleaner. If it is savory, I build flavor in layers. If it is a drink, I keep the ice and garnish from taking over. The goal is a batch I would gladly make again on a busy day, not a one-time project.
Why I keep coming back to this
- I like Ruth Chris Cheesecake because the texture has a clear cue: set edges, a soft center, or a clean slice.
- The ingredient list is familiar, but the salt keeps the sweetness from feeling heavy.
- Most of the work happens before baking or chilling, so serving time feels calm.
- The recipe stores well when I let it cool fully before packing it away.
- It is flexible enough for nuts, chocolate, caramel, or a simple finish on top.
- I can make it for a tray, a tin, or a quiet dessert without changing the main method.
What you need (and what each one is doing)
- 2 packages of Oreo cookies. This carries the dessert flavor. I keep the pieces even so it melts or bakes at the same pace.
- 5 packages of softed cream cheese. I use it for body and smoothness, and I try not to overheat it once it is in the mix.
- 2 packets of whipped topping. I keep this measured and ready before I start because it is easier than hunting for it mid-recipe.
- 1/2 Cup butter, melted. I use it for body and smoothness, and I try not to overheat it once it is in the mix.
- 2 cups crushed Oreo cookies. This carries the dessert flavor. I keep the pieces even so it melts or bakes at the same pace.
- 6 teaspoon vanilla extract. I treat this as the flavor anchor, so I measure it instead of shaking it in over the bowl.
- 1/2 Cup sugar. This brings sweetness and color. I watch it closely because it can move from glossy to scorched quickly.
- 1/2 Cup cocoa. This carries the dessert flavor. I keep the pieces even so it melts or bakes at the same pace.
How I bake it
Step 1 — Set up the pan
I preheat the oven to 375 degrees. I keep the pace steady here and scrape the bowl, pan, or skillet whenever I see dry pockets or uneven color.
Step 2 — Mix without rushing
I work steadily here: In a bowl, combine the crushed Oreo cookies, sugar, and melted butter. Mix until a thick paste forms. I keep the pace steady here and scrape the bowl, pan, or skillet whenever I see dry pockets or uneven color.
Step 3 — Set up the pan
I use this cue for the next stage: Grease an 8-inch round pan with butter or nonstick spray and press the Oreo cookie mixture into it, forming the bottom layer of your cheesecake. I keep the pace steady here and scrape the bowl, pan, or skillet whenever I see dry pockets or uneven color.
Step 4 — Mix without rushing
I work steadily here: In a separate bowl, mix together the cream cheese, vanilla extract, and cocoa until fully combined. I keep the pace steady here and scrape the bowl, pan, or skillet whenever I see dry pockets or uneven color.
Step 5 — Mix without rushing
I spread the cream cheese mixture over the Oreo crust layer, using an offset spatula to evenly distribute it. I keep the pace steady here and scrape the bowl, pan, or skillet whenever I see dry pockets or uneven color.
Step 6 — Handle this stage
I top with the whipped topping and spread it out so that it covers the entire surface of the cheesecake. I keep the pace steady here and scrape the bowl, pan, or skillet whenever I see dry pockets or uneven color.
Step 7 — Set up the pan
I use this cue for the next stage: Garnish with Oreo cookies. Place in a preheated oven and bake for 25-30 minutes, or until a toothpick inserted into the center comes out clean. I keep the pace steady here and scrape the bowl, pan, or skillet whenever I see dry pockets or uneven color.
Step 8 — Cool before serving
I use this cue for the next stage: Let it cool before serving. I keep the pace steady here and scrape the bowl, pan, or skillet whenever I see dry pockets or uneven color.
Tips from my kitchen
- Cool fully. I do not cut, frost, or pack this while it is warm unless I want smears and crumbs.
- Use the pan size listed. A small change in depth changes the center before the edges have a chance to catch up.
- Salt at the end with restraint. I want a small spark of salt, not a crunchy layer that takes over.
- Watch the visual cue. My timer gets me close, but set edges and a soft center tell me more.
Variations I have actually tried
- Extra chocolate: I fold in a small handful of chopped chocolate or chips when the base already includes cocoa or caramel.
- Nut-free: I skip the nuts and use more chocolate, oats, pretzels, or crumbs so the texture still has contrast.
- Darker finish: I use bittersweet chocolate and a lighter hand with the drizzle when I want the sweetness toned down.
- Holiday version: I add a little cinnamon, orange zest, or toasted nuts, depending on what already fits the recipe.
- Smaller pieces: I cut bars, brownies, or cookies slightly smaller when the batch is rich; nobody complains about taking a second.
Storing and reheating
I let Ruth Chris Cheesecake cool completely before storing because trapped steam softens the texture. I keep cookies, bars, and brownies covered at room temperature when the filling allows it, and I refrigerate anything with cream cheese, heavy cream, or a soft caramel layer. For longer storage, I freeze pieces in a single layer first, then move them to a bag so they do not glue themselves together.
What I serve with it
I serve Ruth Chris Cheesecake in modest pieces because the flavor is concentrated. Coffee, cold milk, or unsweetened tea is usually enough alongside it. If I am packing it for a tray, I separate layers with parchment so the tops stay neat.
Frequently asked questions
Can I make Ruth Chris Cheesecake ahead?
Yes. I make the sturdy parts ahead and keep the final topping, garnish, or bake as close to serving as I can. If the recipe needs chilling, I count that time as part of the plan.
How do I know when it is done?
I use the listed time as a guide, then check the cue in the method: bubbling sauce, set edges, tender centers, or a chilled texture that holds its shape.
Can I halve the recipe?
Usually, yes. I halve the ingredients evenly and use a smaller pan or container so the depth stays close to the original. I start checking a few minutes early.
What should I do if it tastes flat?
I add a small pinch of salt first. If it is sweet, a little acid helps; if it is savory, a splash of lemon, vinegar, or hot sauce usually wakes it up.
How should I store leftovers?
I cool leftovers first, then store them covered. Baked sweets usually sit well at room temperature for a short time; creamy, meaty, or dairy-heavy dishes go in the refrigerator.
If you make Ruth Chris Cheesecake, I would like to hear what you changed and what you kept exactly the same. Those small kitchen notes are the ones I come back to.
Ruth Chris Cheesecake
Description
I make Ruth Chris Cheesecake with packages of Oreo cookies, packages of softed cream cheese, packets of whipped topping, butter, melted and a method that keeps the timing clear. The recipe includes the cues I watch for, the storage notes I use, and the small fixes that help the batch taste homemade instead of rushed.
Ingredients You’ll Need
Instructions
- Preheat the oven to 375 degrees.
- In a bowl, combine the crushed Oreo cookies, sugar, and melted butter. Mix until a thick paste forms.
- Grease an 8-inch round pan with butter or nonstick spray and press the Oreo cookie mixture into it, forming the bottom layer of your cheesecake.
- In a separate bowl, mix together the cream cheese, vanilla extract, and cocoa until fully combined.
- Spread the cream cheese mixture over the Oreo crust layer, using an offset spatula to evenly distribute it.
- Top with the whipped topping and spread it out so that it covers the entire surface of the cheesecake.
- Garnish with Oreo cookies. Place in a preheated oven and bake for 25-30 minutes, or until a toothpick inserted into the center comes out clean.
- Let it cool before serving.
Nutrition Facts
Servings 10
- Amount Per Serving
- Calories 127kcal
- % Daily Value *
- Total Fat 9g14%
- Saturated Fat 6g30%
- Trans Fat 0.4g
- Cholesterol 24mg8%
- Sodium 2mg1%
- Potassium 7mg1%
- Total Carbohydrate 10g4%
- Sugars 10g
- Calcium 3 mg
- Iron 0.0 mg
* Percent Daily Values are based on a 2,000 calorie diet. Your daily value may be higher or lower depending on your calorie needs.
Note
Cool fully. I do not cut, frost, or pack this while it is warm unless I want smears and crumbs.
Use the pan size listed. A small change in depth changes the center before the edges have a chance to catch up.
Salt at the end with restraint. I want a small spark of salt, not a crunchy layer that takes over.
Watch the visual cue. My timer gets me close, but set edges and a soft center tell me more.
Frequently Asked Questions
Yes. I make the sturdy parts ahead and keep the final topping, garnish, or bake as close to serving as I can. If the recipe needs chilling, I count that time as part of the plan.
I use the listed time as a guide, then check the cue in the method: bubbling sauce, set edges, tender centers, or a chilled texture that holds its shape.
Usually, yes. I halve the ingredients evenly and use a smaller pan or container so the depth stays close to the original. I start checking a few minutes early.
I add a small pinch of salt first. If it is sweet, a little acid helps; if it is savory, a splash of lemon, vinegar, or hot sauce usually wakes it up.
I cool leftovers first, then store them covered. Baked sweets usually sit well at room temperature for a short time; creamy, meaty, or dairy-heavy dishes go in the refrigerator.
You may also like...