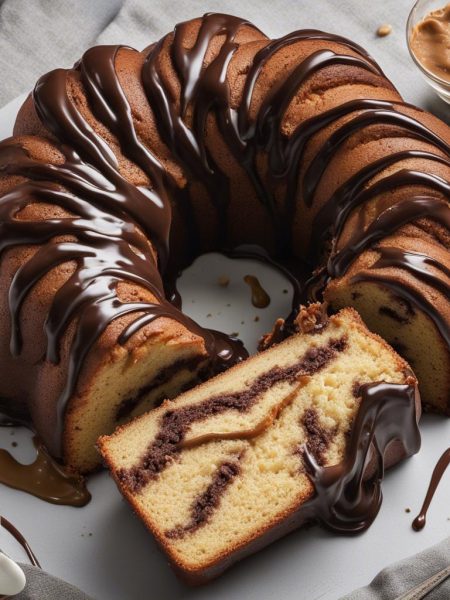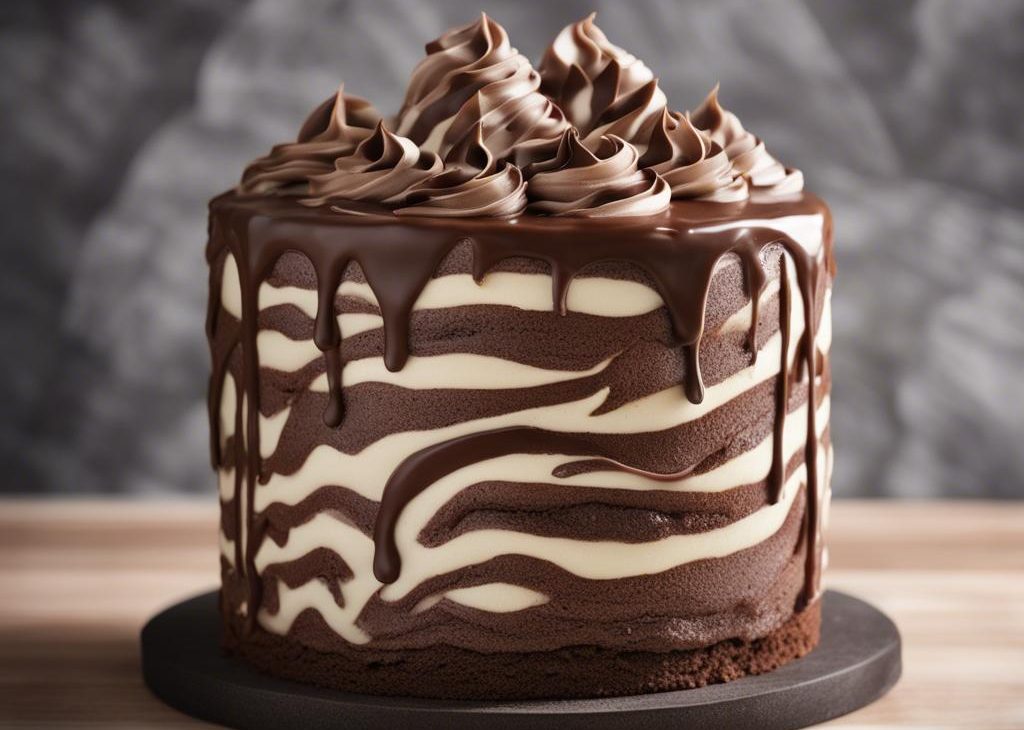

There’s a zebra loose in our kitchens!!
You’re looking at chocolate and vanilla cakes baked together in a striking striped pattern. Pretty, right? Much easier than you think to pull off, too. Like marble loaf cake but a little more flashy. Zebra cake is often baked as a single layer cake or a Bundt cake, but I needed a fun and towering cake for our friend’s birthday. And an excuse to make chocolate cream cheese frosting.
And if you came here looking for a Little Debbie zebra cake, so sorry! Man those little things are good.
Let me walk you through my mindset as I was preparing and testing this zebra layer cake. Beware: my mind is a very jumbled space.
Recipe Testing
I started with a basic vanilla cake/yellow cake hybrid recipe: my checkerboard cake. I ADORE this cake. Somewhere between a mega buttery yellow cake and light vanilla cake, I’m really proud to have a base cake recipe that’s as moist as box mix cakes. And you can make it 3 layer or 4 layer, just adjust the baking time slightly. But if I’m not careful, I can over-cream the butter + sugar or over-mix the batter (since there’s so much of it). This can leave me with a denser tasting cake. I wanted to avoid all that, so I slightly reduced the flour and added a little more baking powder for lift + airiness. Does this make sense? To see if I could get away with it, I added some sour cream too. Just for a little extra moisture. Totally worked. This cake is so moist!
Made From 1 Batter
So now I have a solid starting point for my zebra cake, let’s figure out how to make the chocolate portion.
The chocolate cake is made from the vanilla batter, so you don’t have to prepare two completely separate batters. YAY! I wanted a suuuuuper dark chocolate stripe for contrast. I was going to use chopped chocolate, like in my marble cake, but that never gives me a very dark chocolate batter. And if I added *more* chocolate to darken the shade, the texture of the chocolate batter would be compromised. So let’s use cocoa powder. How about a dark cocoa powder like Hershey’s special dark? Gorgeous! But since we’re adding a dry and bitter ingredient to the chocolate batter, it will dry out the cake. A little sugar and milk solved that problem. Both the vanilla cake and chocolate cake are so moist. We did it!
Oh and one more thing! I added a little espresso powder to the chocolate batter. Just to help bring out the chocolate flavor. This is an optional ingredient. You can find it in the coffee aisle at the grocery store or online.
You’ll end up with about 8 cups of vanilla batter. Pour 4 cups of it into a separate bowl for the chocolate batter. Add the cocoa, sugar, milk, and espresso powder. You’ll have some little lumps—that’s ok.
Now here’s where the zebra shows up! We create a zebra stripe pattern by layering the batters on top of each other. Start with a spoonful of 1 batter in the center, place a spoonful of the other batter on top, then alternate until you’ve filled the pans..
Give the pans a shake every now and then to level the batter off. And, after the cakes are baked, level them off with a knife to create flatter tops. Why? So your layer cake isn’t all topsy turvy! You want nice flat-topped surfaces.
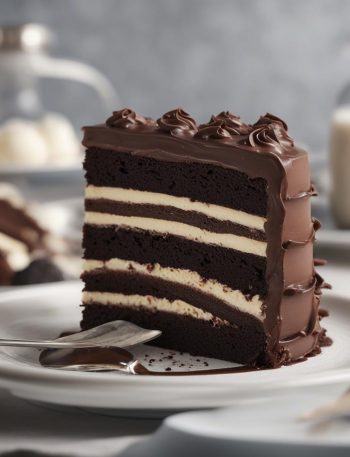
Moving onto the frosting. Let me show off my latest obsession: chocolate cream cheese frosting. Regular cream cheese frosting is one of my favorites because it’s not as cloyingly sweet as buttercream. It’s the creamiest of frostings with a silky smooth and velvet-y mouthfeel. With carrot cake, red velvet cake, hummingbird, banana cake, spice cake, and pumpkin cake… it’s just the best!!!
But if we think regular cream cheese frosting is the best, we’re definitely backwards. Because this chocolate cream cheese frosting is, in fact, the best in the biz.
(Although traditional chocolate buttercream—or even vanilla buttercream—are fantastic here if you prefer a non-cream cheese option!)
Now the moment of truth. Let’s cut into the cake to see how our zebra stripes look!!
Zebra Cake Recipe
Description
This easy, moist, and delicious swirled chocolate and vanilla zebra cake is topped with creamy chocolate cream cheese frosting.
Ingredients You’ll Need
Instructions
- Preheat oven to 350°F (177°C). Grease three 9-inch round cake pans, line with parchment paper rounds, then grease the parchment paper. Parchment paper helps the cakes seamlessly release from the pans..)
- Whisk the flour, salt, baking powder, and baking soda together in a large bowl. Set aside. Using a handheld or stand mixer fitted with a paddle or whisk attachment, beat the butter and sugar together on high speed until smooth and creamy, about 3 minutes. Scrape down the sides and up the bottom of the bowl with a silicone spatula as needed. On medium-high speed, add 1 egg at a time, beating well after each addition. Beat in the sour cream and vanilla extract. Scrape down the sides and up the bottom of the bowl with a silicone spatula as needed.
- With the mixer on low speed, add the dry ingredients in three additions alternating with the buttermilk, beginning and ending with the dry ingredients, and mixing each addition just until incorporated. Do not overmix this batter. The batter will be smooth, velvety, and slightly thick.
- There will be around 8 cups of batter total. Transfer half of it to another bowl. Whisk in the 4 chocolate batter ingredients until combined. A few small lumps are ok.
- . Drop a large spoonful of 1 batter in the center of the pan. Top with a spoonful of the other batter. Alternate spoonfuls on top of each other. Give the pan a shake to level it all out. Repeat with each cake pan until all the batter is used. There’s about 8 cups of batter total, so each cake pan will have a little less than 3 cups of batter in it.
- Bake for around 25-27 minutes or until the cakes are baked through. To test for doneness, insert a toothpick into the center of the cake. If it comes out clean, it is done. Allow cakes to cool completely in the pans set on a wire rack. The cakes must be completely cool before frosting and assembling.
- In a large bowl using a handheld or stand mixer fitted with a paddle or whisk attachment, beat the cream cheese for 1 minute on high speed until completely smooth and creamy. Beat in the butter until combined. Add the confectioners’ sugar, cocoa powder, vanilla extract, 1 Tablespoon milk, and salt and beat on medium-high speed until combined and creamy. Add 1 more Tablespoon of milk to slightly thin out, if desired. Taste, then add another pinch of salt if desired.
- First, using a large serrated knife, slice a thin layer off the tops of the cakes to create a flat surface. Discard (or crumble over ice cream!). Place 1 cake layer on your cake stand, cake turntable, or serving plate. Evenly cover the top with frosting. Top with 2nd layer and evenly cover the top with more frosting. Top with the third cake layer. Spread the frosting into a thick layer all over the top and sides. Garnish with sprinkles, if desired. Refrigerate for at least 45 minutes before slicing. This helps the cake keep its shape when cutting—it could slightly fall apart without time in the fridge.
- Cover leftover cake tightly and store in the refrigerator for 5 days.
You may also like...