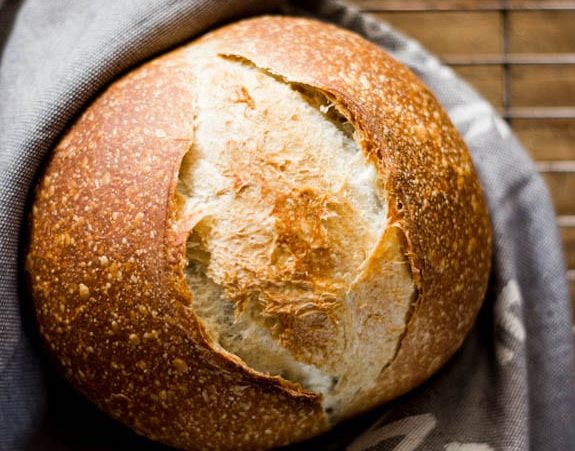
Think you can’t bake fresh, homemade sourdough bread at home? Think again! Sourdough Bread: a beginner’s guide is your best recipe resource for easy, artisan sourdough bread without kneading. Make the dough in the morning or at night- it will come together in under 10 minutes. The taste is light, crisp and tangy!

Beginner’s Homemade Sourdough Bread, Step by Step
Description
So, What Is Sourdough Bread?
It’s unique because it does not require commercial yeast in order to rise. Instead, sourdough bread is made with a live fermented culture a sourdough starter which acts as a natural leavening agent.
Sourdough is known for its characteristic tangy flavor, chewy texture and crisp, crackly crust. From a health standpoint, it dominates when compared to supermarket loaves. The naturally occurring acids and long fermentation help to break down the gluten, making it more digestible and easy for the body to absorb. And it tastes darn good!
Before you begin, you’ll need a sourdough starter.
Simply put: a sourdough starter is a live culture made from flour and water.
Once combined the mixture will begin to ferment, cultivating the naturally occurring wild yeasts and bacteria present within the mixture. A small portion of this culture is used make your bread dough rise.
But it doesn’t stop there.
Your sourdough starter must be kept alive with regular feedings of flour and water to maintain its strength for maximum rising power.
- Every baker has their own method, and with practice you’ll eventually develop your own routine.
Here’s my method at a glance: I pour off some of the culture (about half) and then feed what’s left in the jar with equal weights of flour and water. I whisk well with a fork until it’s lump-free. Then, I let it rest at room temperature or in a warm spot (75-80º F/ 24-26º C is ideal) until it becomes bubbly and active.
PS: I use this the jar for my sourdough starter and I LOVE it.
When Is My Sourdough Starter Ready To Use?
Your starter is ready to use when it becomes bubbly, active and doubles in size.
This can take anywhere from 2-12 hours or more depending on temperature (the warmer the better) and the condition of your starter. Be patient!
Float Test: If you’re unsure whether your sourdough starter is ready to use drop a small amount, about 1 tsp, into a glass of water. Do this when the starter is a peak height before it collapses. If it floats to the top it’s ready to use. If it sinks, your starter should be fed again.
How To Make Sourdough Bread: Step-By-Step Recipe Guide

Step #1: Mix
The Dough
Combine the following ingredients in a large bowl (I use a fork to mix):
250 g water
150 g bubbly, active sourdough starter
25 g olive oil
Add:
500 g bread flour
10 g fine sea salt
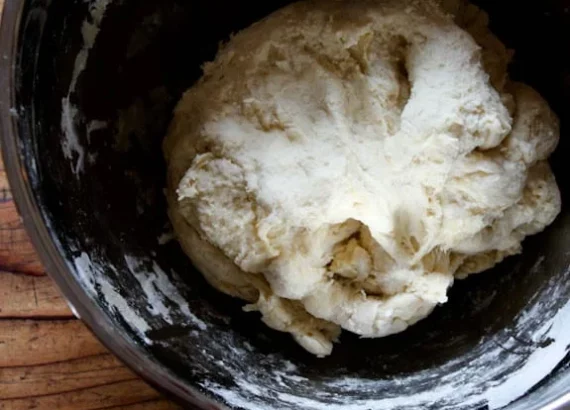
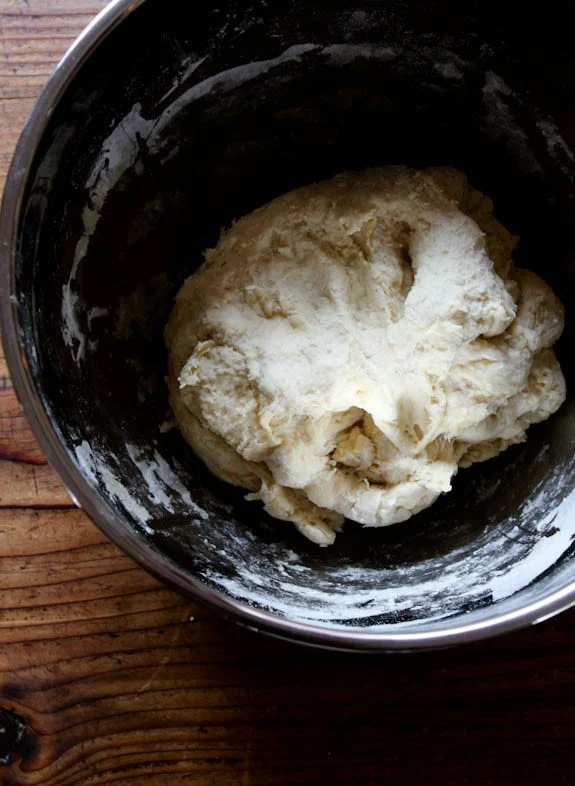
Squish the mixture together with your hands until the flour is fully absorbed. The dough will feel dry, rough and shaggy.
Cover the bowl with plastic wrap, reusable wax wrap, or a very damp kitchen towel. Let rest or ‘autolyse’ for about 30 minutes to 1 hour. After the dough has rested, return to the bowl and work it into a ball (it doesn’t have look perfect).
TIP: For best results, weigh all of your ingredients with a digital kitchen scale. Measuring cups are not as accurate, causing the dough texture to vary.
What Is Autolyse?
This is the first resting period right after you mix the dough. This step jumpstarts gluten development without kneading. Strong gluten = good bread.
For timing, autolyse can range anywhere from 15 minutes to 1 hour or more depending on the type of bread you’re making and your own personal baking schedule. A minimum of 30 minutes works best for this recipe. However, when time permits, I’ll let it go for an hour. The dough will become more soft and manageable to work with afterwards.
A Note on Salt: some bakers prefer to add the salt only after autolyse because it might slow down the gluten development. I’ve followed this technique for years, but no longer do so. I prefer to mix everything all at once. It’s practical, effective and produces excellent loaves (plus, you won’t forget to add the salt later on!). I’ll leave the choice up to you.

Step #2: Bulk Rise
Now the dough is ready to rise. This step is referred to as the “bulk rise” or “bulk fermentation.”
To do so: cover the bowl of dough with lightly oiled wrap (or transfer to a dough tub) and let rise at room temperature, about 68-70 F.
How Long Will It Take?
The dough is ready when it has almost doubled in size and no longer looks dense. This can take anywhere from 3-12 hours depending on your current room temperature, the potency of your sourdough starter and the specifics of your surrounding environment. This is where a dough tub with measuring marks comes in handy!
For example: in the summer the dough can take anywhere between 2-4 hours @ 80º F/ 26º C. In the winter, it will take longer about 10-12 hours @ 68º F/ 20º C. Temperature controls time.
And remember, because sourdough bread does not contain instant yeast, comparatively speaking, it will ALWAYS take longer to rise. Watch the dough and not the clock. Be flexible.
Optional Step: Stretch And Fold The Dough
About 30 minutes into the bulk rise, you have the option to perform a series of ‘stretch & folds’ to strengthen the bread dough

Step #3: Divide & Shape The Dough
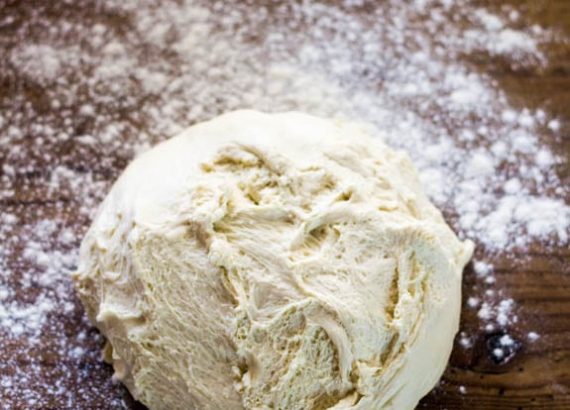
Remove the dough onto a lightly floured surface.
Cut the dough in half to make 2 loaves, or leave it whole to bake a single loaf.
How To Shape A Round Sourdough Boule (Loaf)
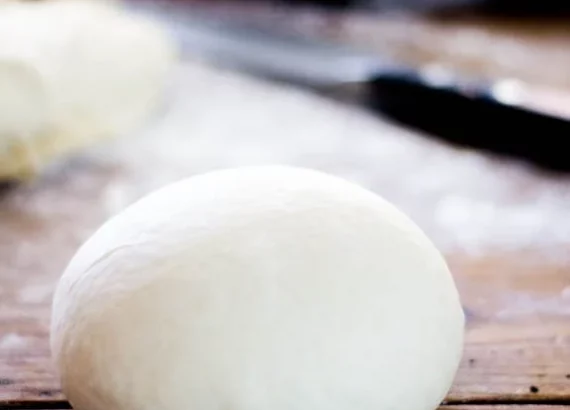
Starting at the top, fold the dough over toward the center. Give it a slight turn, and then fold over the next section of dough. Repeat until you have come full circle. Alternatively, use the envelope shaping technique below.
Step #4: Choose a Baking Pot
I bake my sourdough bread in a Dutch oven. You can also try the Challenger Bread Pan which accommodates both round and oval shaped loaves.
The baking pot traps in heat and moisture which is essential to achieving artisan-style bread at home. Steam plays a key role in how the bread will rise, open up or ‘bloom’ while baking. Using a Dutch oven helps to control this process.

Note: You can use any oven safe pot that can heat up to 450º F/ 232º C (including the lid and handles).
Step #5: Second Rise
After shaping the dough, it needs to rise again. This is called the “second rise”.
To do so: generously coat the bottom of your Dutch oven with cornmeal (or line the bottom with non-stick parchment paper instead). Place the dough inside.
This time, the dough will rise for a shorter period than the bulk rise, about 30 minutes- 1 hour. The dough is ready when it’s puffy and no longer dense. It does not need to double in size.
Preheat your oven to 450º F/ 232º C during the tail end of the second rise.
Step #6: Score The Dough
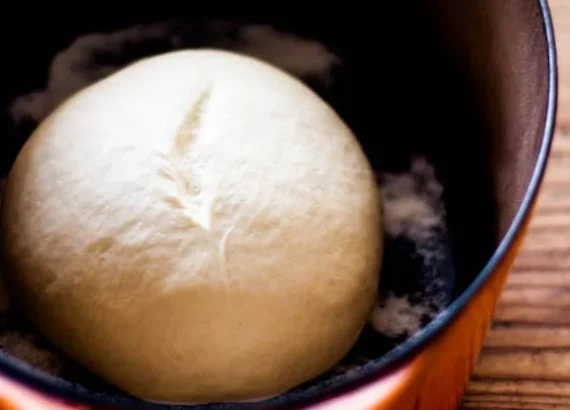
After the second rise, and right before the dough goes into the oven, make a slash about 2-3 inches long down the center of the dough.
This allows the steam to escape and for the dough to expand during baking.
You can use a small serrated knife, paring knife or bread lame.

Step #7: Bake The Sourdough Bread
Place the lid on top of the pot and reduce the oven temperature to 400º F/ 204º C.
Bake on the center rack for 20 minutes.
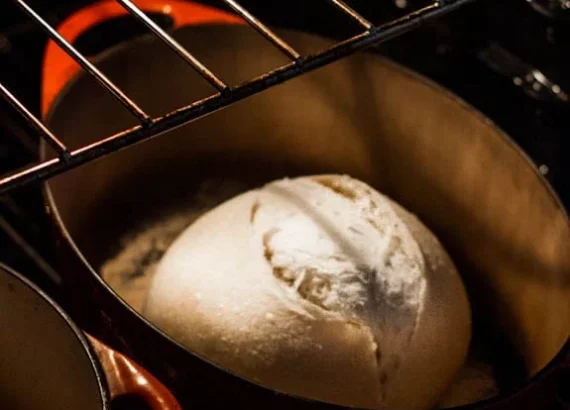
When 20 minutes is up, remove the lid. Your bread will be pale and shiny like the picture above.
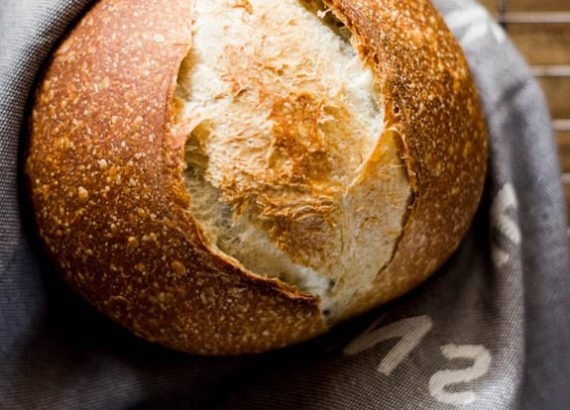
Continue to bake (uncovered) for an additional 40 minutes or until deep, golden brown. The internal temperature should read 205-210º F/ 96-98º C.
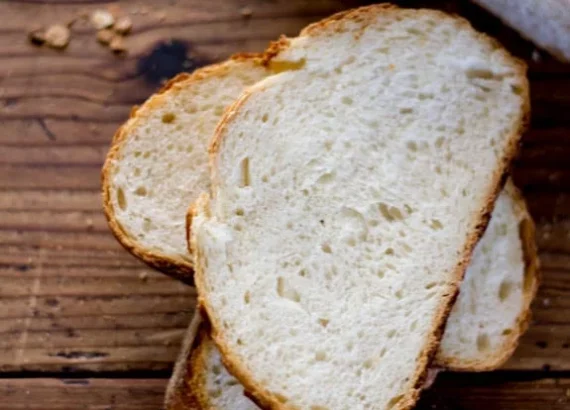
Cool on a wire rack for at least a 1 hour before slicing. Be patient! If you cut into it too soon, the texture will be gummy
TIP: During the last 10 minutes of baking, crack open the oven door (optional). This allows the moisture to escape, leaving your sourdough bread with a crisp crust. Alternatively, remove the bread from the pot and let it bake directly on the rack. The latter produces a more crisp crust.


Ingredients
Notes & Tips
Instructions
Make The Dough
- In a large bowl, add the sourdough starter, water and olive oil. Mix with a fork to combine. Add the flour and salt. Continue mixing with your fork until the dough becomes stiff. Then squish everything together with your hands to incorporate all of the four. The dough will be dry and shaggy. Cover the bowl with plastic wrap, reusable wrap or a clean, very damp kitchen towel. Let rest (autolyse) for 30 minutes or up to 1 hour, if preferred.
- After the dough has rested: return to the bowl and work the dough into a rough ball, about 15 seconds.
- Note: I’ve given a range in water quantity for the dough (see ingredient list above). If using 250 g of water, the texture at this stage will be quite dry and stiff. If using an increased amount of water, approximately 300-325 g, the dough will be more wet. Both textures are normal, depending on which route you take.
Bulk Rise
- Now the dough needs to rise. Cover the bowl with light oiled wrap (alternatively, transfer the dough to a high-sided dough tub with lid and measuring marks). Let rest in a warm spot to rise, ideally 70-75 F. The dough is ready when it no longer looks dense and has almost doubled in size.
- Note: The bulk rise time can take anywhere from 3-12 hours depending on the temperature of your ingredients, the potency of your sourdough starter, and your current room temperature. This will be different for everyone. For example, in the summer rise times can take anywhere between 2-4 hours @ 80º F/ 26º C whereas in the winter, the dough will take about 10-12 hours @ 68º F/ 20º C. Watch the dough and not the clock.
Optional Step: Stretch & Fold The Dough
- During bulk rise, you have the option to perform a series of ‘stretch & folds’ to strengthen the dough. Start 30-45 minutes into the bulk rise. Gather a portion of the dough, stretch it upwards and then fold it over itself. Rotate the bowl ¼ turn and repeat this process until you have come full circle to complete 1 set. Do this once or twice spaced about 1 hour apart. Although this step is not mandatory, it will increase the total volume and height of your bread. Click here for a step-by-step video tutorial.
- Note: Doughs made with 250 g of water vs. 300-325 g of water will feel completely different. The former will be more stiff; the latter will have more elasticity. One texture is neither right or wrong; just different and worth noting for comparison. When in doubt, always give the dough extra rest time in between sets if it won’t stretch with ease.
Cut & Shape The Dough
- Divide your work surface in half; lightly flour one side (for cutting) and leave the other half clean (for shaping).
- Remove the dough from the bowl, and place onto the floured section so that it does not stick. You do not need to ‘punch down’ the dough; it will gently deflate as you fold and shape it.
- Cut the dough in half to make 2 loaves, or leave it whole for a single loaf.
- To shape: use a bench knife to move your dough to the non-floured section (if there is any flour present, it will be difficult to shape- brush away any excess). Starting at the top, fold the dough over toward the center. Give it a slight turn, and then fold over the next section of dough. Repeat until you have come full circle.
- Then flip the dough over and place it seam side down. Using your hands, gently cup the sides of the dough and rotate it, using quarter turns in a circular motion. You can also pull it towards you to even out the shape. Repeat this process until you are happy with its appearance.
- Note: When shaping, the idea is for the dough to catch enough surface tension on a non-floured area in order to create a tight ball. If there is flour present, it will slide around… and drive you nuts.
Second Rise
- Now the dough needs to rise again, but for a shorter period of time.
- Coat the bottom of your Dutch oven with cornmeal. Alternatively, use parchment paper to prevent sticking (this is what I do, now). Place the dough inside of the pot for a “free form” second rise, about 30 minutes to 1 hour. Cover with the lid of the pot. The dough ready when it is slightly puffy but not double in size.
- Preheat your oven to 450º F/ 232º C towards the tail end of the second rise.
- Note: The “free form” second rise in the pot works best with a dough made with 250 g of water. It won’t spread. If your dough contains more water, skip the free from rise. You’ll need to do the second rise in a cloth-lined, floured proofing basket instead. The basket will hold its shape to prevent spreading.
Score The Dough
- Right before your bread goes into the oven, make a shallow slash about 2-3 inches long (or more) in the center of the dough. Use a bread lame, razor blade, sharp pairing or a small serrated steak knife. The cut should be about 1/4-inch deep.
Bake The Dough
- Place the bread into the oven on the center rack (lid on) and reduce the temperature to 400° F/ 204° C. Bake for 20 minutes. Remove the lid, and continue to bake (uncovered) for an additional 40 minutes or until deep, golden brown. Keep in mind that all ovens are different; you might have to make minimal adjustments to these temperatures.
- You can also take the internal temperature of your bread to double check that it is done. For sourdough, it should read about 205-210º F/ 96-98º C.
- Remove the bread from the oven, and cool on a wire rack for at least an hour before slicing. Don’t cut too soon or else the inside will have a gummy texture!

