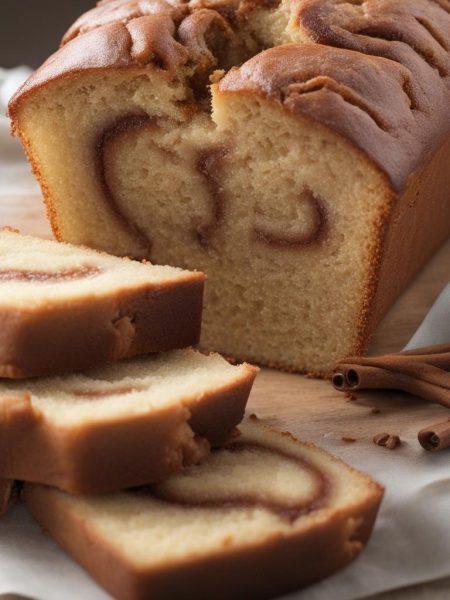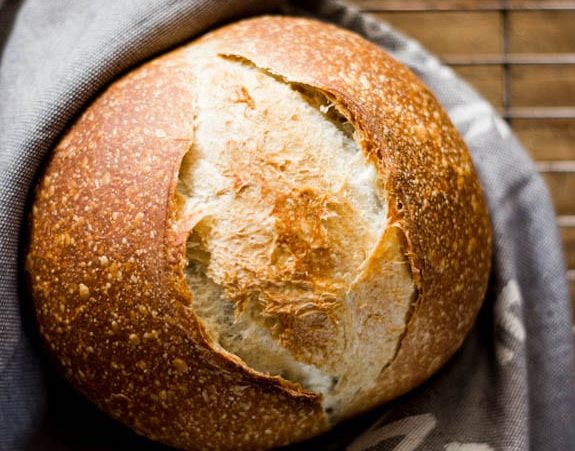

Sourdough looks intimidating until I remember that most of the work is waiting. The dough is mixed with a fork, rested, shaped, rested again, and baked in a covered pot. The bread decides the pace more than I do.
This beginner loaf uses 150 grams active starter, 250 grams warm water, olive oil, bread flour, and salt. The lower water amount makes a stiffer dough that is easier to shape, which is exactly what I want when I am teaching someone the feel of sourdough.
I have learned to watch the dough instead of the clock. A summer kitchen can move fast; a winter kitchen can make the same dough feel like it is taking the day off. The instructions give ranges because sourdough needs them.
Why I keep coming back to this
- The dough comes together in under 10 minutes of hands-on mixing.
- A 250g water start creates a manageable dough for first-time shaping.
- Olive oil makes the crumb softer and the dough less sticky.
- The optional stretch-and-folds improve height without traditional kneading.
- The Dutch oven traps steam, so the crust sets crisp and brown.
- The recipe teaches the most useful sourdough habit: watch the dough, not only the clock.
What you need (and what each one is doing)
- 150 g bubbly active sourdough starter (5.35 oz). The starter should be active and bubbly, not sleepy from the refrigerator. It provides the rise and tang.
- 250 g warm water, preferably filtered (8.80 oz; increase up to 300-325g for softer dough). Water hydrates the flour. I start with 250g for a beginner-friendly dough that holds its shape.
- 25 g olive oil (0.90 oz). Olive oil softens the crumb slightly and makes the dough easier to handle.
- 500 g bread flour (17.65 oz; not all-purpose flour). Bread flour gives the loaf strength and chew. A digital scale matters here.
- 10 g fine sea salt (0.4 oz). Salt controls flavor and fermentation. I mix it in with the flour so it distributes evenly.
- fine ground cornmeal or parchment paper (for the Dutch oven). Either one keeps the dough from sticking to the pot during the second rise and bake.
How I make it
Step 1 — Mix and rest
In a large bowl, stir the active starter, warm water, and olive oil with a fork. Add bread flour and salt and mix until stiff. I use my hands at the end to squeeze in dry flour. Cover and rest 30 minutes to 1 hour so the flour can hydrate.
Step 2 — Shape a rough ball
After the rest, I work the dough in the bowl for about 15 seconds until it looks more like a rough ball. With 250g water it can feel dry and shaggy; with 300-325g it will feel looser. Both can work, but beginners usually appreciate the firmer dough.
Step 3 — Bulk rise
Cover the bowl and let the dough rise in a warm spot, ideally 70-75°F (21-24°C), until it no longer looks dense and has almost doubled. This can take 3-12 hours depending on the starter and room temperature.
Step 4 — Fold together
About 30-45 minutes into bulk rise, I sometimes stretch one side of the dough up and fold it over itself, then rotate the bowl and repeat until I have gone all the way around. One or two sets, spaced about an hour apart, help the loaf stand taller.
Step 5 — Shape and proof
Turn the dough onto a lightly floured surface, shape it into a round by folding edges toward the center, then flip seam-side down and tighten the surface with gentle quarter turns. Place it in a Dutch oven dusted with cornmeal or on parchment for a 30-60 minute second rise.
Step 6 — Score and bake
Preheat the oven to 450°F (232°C) near the end of the second rise. Slash the top 2-3 inches long and about 1/4 inch deep. Put the covered pot in the oven, reduce to 400°F (204°C), bake 20 minutes covered, then 40 minutes uncovered.
Step 7 — Check for doneness
The loaf should be deep golden and around 205-210°F (96-98°C) inside. I cool it on a rack for at least an hour because cutting early makes the crumb gummy.
Tips from my kitchen
- Use a scale. Cups vary too much for bread, and sourdough notices.
- Start with 250g water. Higher hydration is fun later, but stiff dough is easier when learning.
- Give it time. If the dough still looks dense, it is not ready just because the clock says so.
- Cool the loaf. Steam needs to finish moving through the crumb after baking.
Variations I have actually tried
- Higher hydration: Increase water to 300-325g for a softer, more open crumb, and proof in a floured cloth-lined bowl.
- Seeded top: Roll the shaped loaf in sesame seeds before the second rise.
- Whole wheat: Replace 50g bread flour with whole wheat flour for a nuttier loaf.
- Herb loaf: Add chopped rosemary during the first mix.
- Two small loaves: Divide after bulk rise and shape two smaller rounds.
Small details I pay attention to
I treat Beginner’s Homemade Sourdough Bread, Step by Step as a recipe where the written numbers are a guide, not a reason to stop paying attention. I look for the practical cues: the way the dough feels, how the sauce coats a spoon, how the edges brown, or whether the center has actually set. Those little signs are what keep a familiar recipe from turning into a dry loaf, a pale crust, or a pan of fruit that never thickened.
I also set up my counter before I start. Ingredients measured, pan or skillet ready, towel nearby, and a clear place for cooling. That sounds fussy, but it keeps me from making rushed choices while butter is softening, dough is drying, or a hot pan is waiting. Most of my kitchen mistakes happen in the two minutes when I think I can multitask.
How I like to serve it
For the first serving of Beginner’s Homemade Sourdough Bread, Step by Step, I keep things simple so I can taste what the recipe is doing. If it is baked, I let it cool long enough for the crumb, crust, or filling to settle. If it is cooked on the stove, I serve it while the texture is still lively. That first plate tells me whether I want extra salt, something creamy, something crisp, or just a cup of coffee beside it.
When I make it for other people, I add the extras at the table instead of hiding them in the recipe. A bowl of fruit, hot sauce, whipped cream, rice, butter, or chopped herbs lets everyone steer their own plate. I like recipes that can be shared without making the cook stand there explaining every bite.
Storing and serving
I store sourdough cut-side down on a board for the first day, then move it to a paper bag or bread box. Plastic softens the crust, which is fine if I plan to toast it.
For longer storage, I slice the cooled loaf and freeze the slices. They go straight into the toaster from frozen, and the crust comes back nicely.
Frequently asked questions
How active should my starter be?
It should be bubbly, expanded, and smell pleasantly tangy. If it has not risen after feeding, I wait before mixing dough.
Can I use all-purpose flour?
The source specifically calls for bread flour, and I agree. Bread flour gives better strength for this beginner loaf.
Why is my bulk rise range so wide?
Starter strength and room temperature change everything. In a warm kitchen it may rise in a few hours; in a cool kitchen it can take most of the day.
Do I have to stretch and fold?
No, but one or two sets help structure and height. I skip them when timing is messy and still get bread.
Why did my loaf spread?
The dough may have been high hydration, under-shaped, or over-proofed. Use 250g water and build surface tension while shaping.
When can I slice it?
Wait at least one hour. The loaf is still setting inside, and early slicing can make the crumb gummy.
If you bake it, tell me how long bulk rise took in your kitchen.
Beginner’s Homemade Sourdough Bread, Step by Step
Description
This beginner sourdough loaf uses active starter, water, olive oil, bread flour, and salt. I rely on time, a simple shape, and a covered Dutch oven bake for a crisp crust.
Ingredients
Instructions
- In a large bowl, mix active sourdough starter, warm water, and olive oil with a fork. Add bread flour and fine sea salt; mix until stiff, then use your hands to incorporate dry flour. Cover and rest 30 minutes to 1 hour.
- Work the rested dough into a rough ball for about 15 seconds. Cover and let bulk rise in a warm spot, ideally 70-75°F (21-24°C), until no longer dense and almost doubled, about 3-12 hours.
- Optional: during bulk rise, perform 1-2 sets of stretch and folds, starting 30-45 minutes in and spacing sets about 1 hour apart.
- Turn dough onto a lightly floured surface. Shape into a round by folding edges toward the center, flipping seam-side down, and tightening with gentle quarter turns.
- Place dough in a Dutch oven dusted with cornmeal or on parchment. Cover and let rise 30 minutes to 1 hour, until slightly puffy but not doubled.
- Preheat oven to 450°F (232°C). Slash the loaf 2-3 inches long and about 1/4 inch deep. Cover, place in oven, reduce to 400°F (204°C), and bake 20 minutes.
- Remove lid and bake 40 minutes more, until deep golden and about 205-210°F (96-98°C) inside. Cool on a wire rack at least 1 hour before slicing.
Nutrition Facts
Servings 1
- Amount Per Serving
- Calories 2026kcal
- % Daily Value *
- Total Fat 34g53%
- Saturated Fat 4g20%
- Trans Fat 0.0g
- Sodium 3886mg162%
- Potassium 501mg15%
- Total Carbohydrate 360g120%
- Dietary Fiber 12g48%
- Sugars 2g
- Protein 60g120%
- Calcium 88 mg
- Iron 24.2 mg
* Percent Daily Values are based on a 2,000 calorie diet. Your daily value may be higher or lower depending on your calorie needs.
Note
Scale required. For best results, weigh ingredients; cups are not accurate enough for this dough.
Water range. Use 250g water for easier shaping, or 300-325g for a softer dough once comfortable.
Temperature. Bulk rise depends on room temperature and starter strength, not only the clock.
Cooling. Wait at least an hour before slicing to avoid a gummy crumb.
Frequently Asked Questions
It should be bubbly, expanded, and smell pleasantly tangy. If it has not risen after feeding, I wait before mixing dough.
The source specifically calls for bread flour, and I agree. Bread flour gives better strength for this beginner loaf.
Starter strength and room temperature change everything. In a warm kitchen it may rise in a few hours; in a cool kitchen it can take most of the day.
No, but one or two sets help structure and height. I skip them when timing is messy and still get bread.
The dough may have been high hydration, under-shaped, or over-proofed. Use 250g water and build surface tension while shaping.
Wait at least one hour. The loaf is still setting inside, and early slicing can make the crumb gummy.
You may also like...