
What Are These Snack Bars?
Snack bars are our version of store-bought KIND bars. Simple and wholesome, these grain free bars are made with nuts, dried fruit, and not much else. (And seeds if you’re making my quinoa snack bars!) One ingredient you may not recognize? Almond meal. It’s used in these bars to bind the ingredients together. For anyone not familiar with almond meal, don’t get nervous. Almond meal is just ground almonds—ground almonds before reaching the stage of almond butter. You can buy almond meal, but I find it’s much more convenient (and cheap!) to make it at home. Simply pulse almonds until they reach a gritty and rough flour-like consistency..)
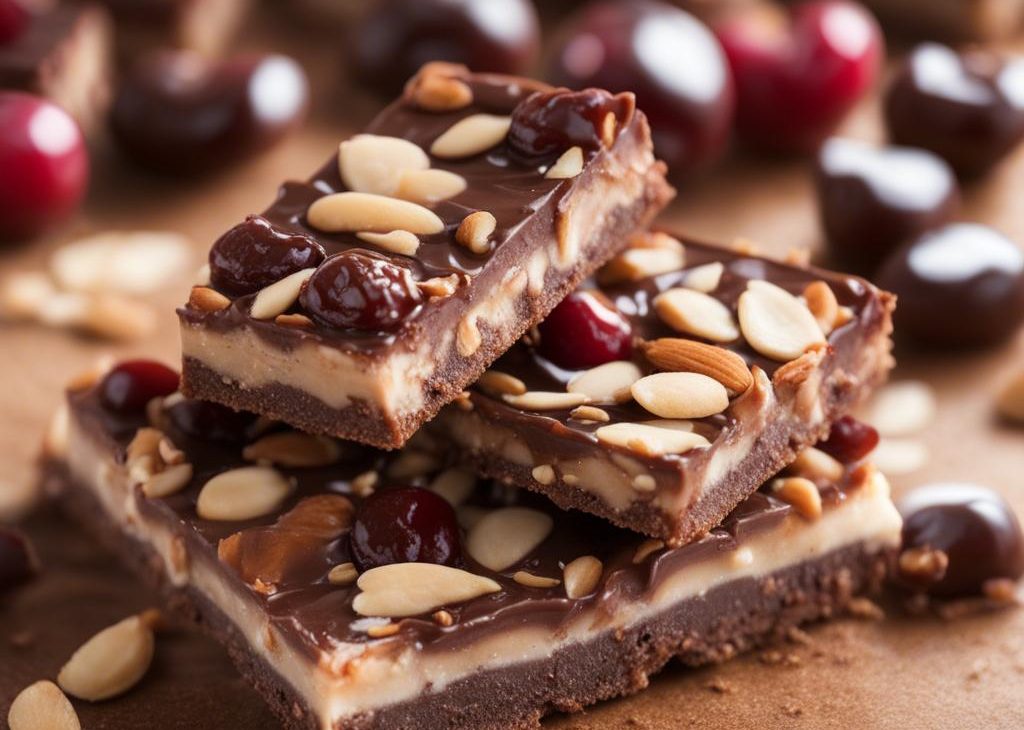
Flavors of almond & cherry pair so well, just like in these cherry almond linzer cookies. In these snack bars we use roughly chopped almonds for crunch—they make up a bulk of the bars. Dried cherries and vanilla extract add flavor, while chocolate chips are necessary for snack time cravings… right? Tip: use mini chocolate chips so there are more in each bar.
For a little sweetness and binding, use honey. Like I’ve mentioned in my previous snack bar recipes, I do not recommend thinner liquid sweeteners like maple syrup or agave. Rather, you want a thick liquid sweetener. Brown rice syrup works as well. You can use either in these berry vanilla cashew snack bars, too.
Some favorite things about them: chewy, crunchy, nutty, sweet, food you recognize, grain-free, chocolate, chocolate, chocolate. Perfect for an on-the-go breakfast or snack, or even if you’re in need of healthier dessert recipe ideas.
Chocolate Cherry Almond Snack Bars Recipe
Description
Chewy, crunchy, satisfying chocolate cherry almond bars made with real, wholesome ingredients.
Ingredients You’ll Need
Instructions
- Preheat oven to 300°F (149°C). Line an 8-inch or 9-inch square baking pan with parchment paper with enough overhang on the sides to easily remove the bars from the pan. Set aside.
- Using a silicone spatula or wooden spoon, mix the honey, vanilla, almond meal, salt, and almond butter together until combined. Fold in the almonds, cherries, and chocolate chips until combined.
- Transfer mixture to prepared baking pan and press very firmly into an even layer. You really want it packed in tight—as tight as possible. Bake for 20 minutes. Remove from the oven and allow to cool completely in the pan set on a wire rack for 1 hour, then transfer to the refrigerator to chill for 1 more hour. This helps firm up the bars which makes them stay compact. Remove bars from the pan using the overhang on the sides and cut into bars. Individually wrap each bar in plastic wrap or parchment. Store at room temperature for 1 week or in the refrigerator for up to 2 weeks. I find they get a little sticky at room temperature over a few days, so I prefer the refrigerator.
You may also like...