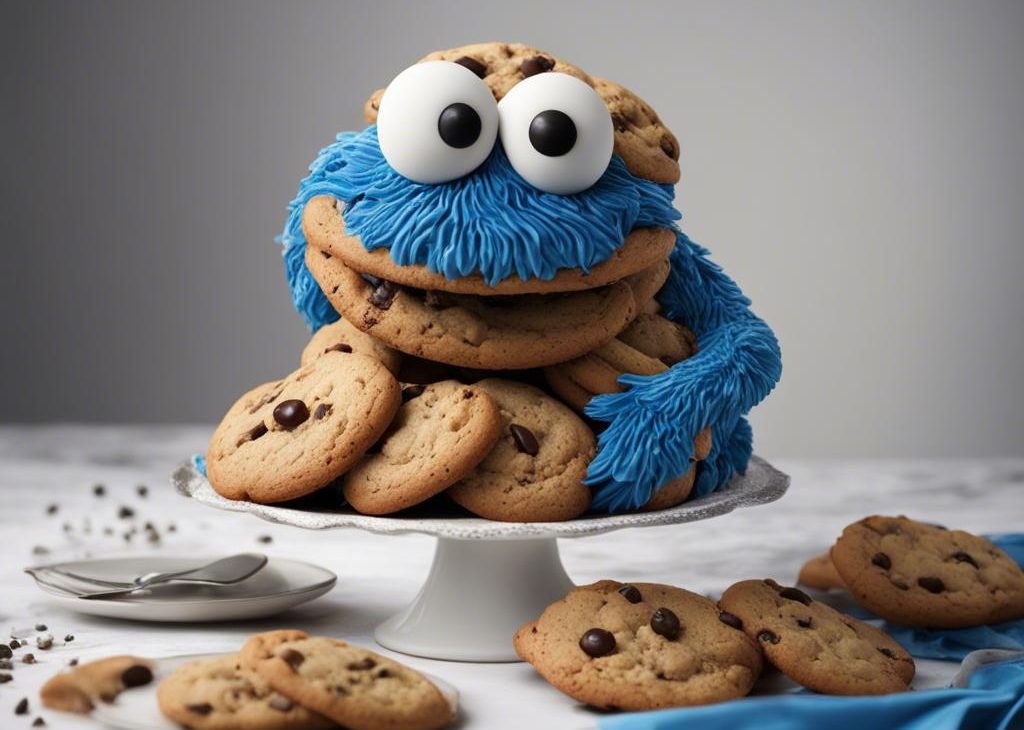

Use this page to learn how to make a Cookie Monster cake, an adorable Sesame Street-themed homemade chocolate chip birthday cake. I love this decorating method because it’s pretty easy, even if you’re a cake decorating beginner. You don’t need any fondant or special molding ingredients for Cookie’s eyes and mouth.
For my oldest’s 2nd birthday, I made an Elmo cake, so it seemed very appropriate—necessary, even—to make a Cookie Monster cake for my youngest’s 2nd birthday! Her older sister loves Elmo, so Cookie Monster has naturally become a favorite character around here.
I’m not an advanced cake decorator. While I’ve improved with dedicated practice over the years, you won’t see me making super elaborate cake designs—a naked cake is more my speed! However, this is a surprisingly simple cake to decorate. The hardest part is the tedious task of piping all of Cookie Monster’s fur, so take a few breaks to give your hand a rest.
Chocolate Chips Galore Your Monsters Will Adore!
C is for cookies. And cake. And chocolate chips.
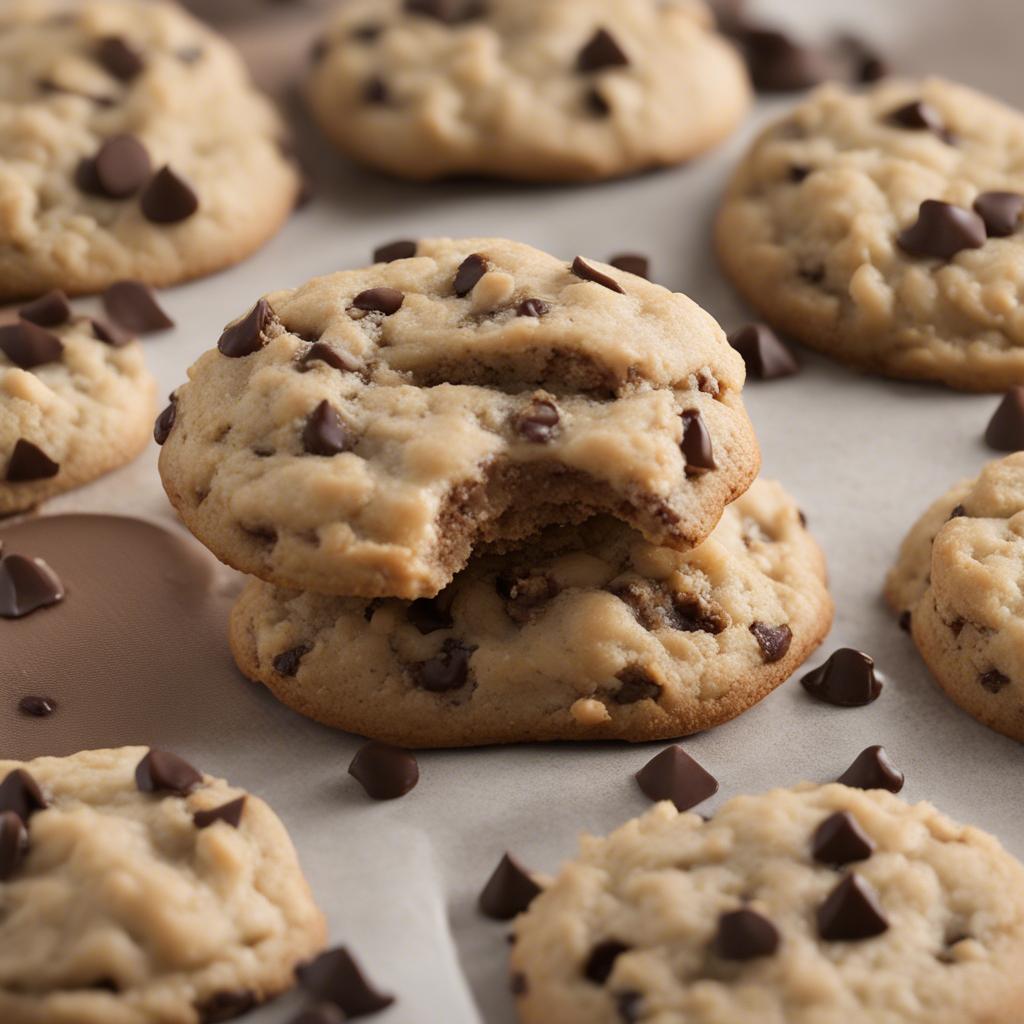
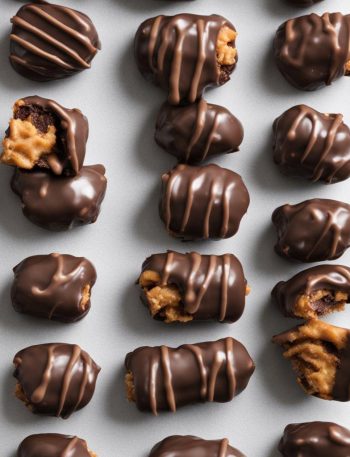
This cake is so much fun because it includes chocolate chips inside, and it also includes chocolate chip cookies outside. [Monster voice] COOOOKIEEES. I made a batch of mini chocolate chip cookies using my recipe for mini M&M cookies, just subbing mini chocolate chips for the mini M&Ms. These are perfect for adding around the Cookie Monster cake, and also perfect for little cookie monsters to eat!
If you want to make full-size cookies for your Cookie Monster cake to be “eating,” you can really choose any of your favorite cookie recipes. I made these chewy chocolate chip cookies. I think he liked them. [Nom nom nom nom]
Make a 2-Layer Round Cake
The focus of this cake is the top (as opposed to the sides), so I opted for a shorter 2-layer cake. (Also, the taller the cake, the more piping you need to do!) My 2-layer white cake recipe promises a soft and flavorful cake with the fluffiest texture. It’s always a hit, especially for birthday parties. This time, I added mini chocolate chips to the cake batter, and all I have to say is YUM.
Always line your round pans with parchment paper rounds before adding the batter to prevent it from sticking to the pan!
Cool, then level the cakes: The baked cakes will have a slight dome, so carefully level them off with a cake leveler or serrated knife. **Save the scraps because they will be used for Cookie Monster’s eyes.**
How to Decorate Cookie Monster Cake
Now that you have your cakes ready, let’s begin to assemble and decorate.
Let’s see those decorating steps come together. Most of the frosting is tinted blue, then tint some black and leave the rest untinted:
Layer the cooled and leveled-off cakes together with untinted buttercream between them. Use some of the blue frosting to apply a very thin crumb coat:
The crumb coated-cake must chill for at least 30 minutes to help set the cake, so start Cookie Monster’s eyes while you wait.
How to Make Cookie Monster’s Eyes
You don’t need anything extra like rolled fondant or modeling chocolate to shape Cookie Monster’s googly eyes. Rather, simply use the scraps of cake that you leveled off, mixed with some of the white (untinted) buttercream frosting. Then we’ll coat them in melted white chocolate. We’re basically making 2 cake pops, sans sticks. My taste testers actually thought the eyes were exceptionally delicious, which is a little bit creepy, but there you have it.
Shaping Tip: Only add enough frosting to the cake crumbs to yield a semi-moist mixture that you can shape into his eyes. Form into 2 disc-like circles, about 2 inches in diameter, flattened slightly. Freeze or refrigerate until solid, about 30 minutes.
After they’ve had a chance to solidify, melt the white chocolate. Chop up a bar of white chocolate (I like the Ghirardelli kind, found in the baking aisle), and melt in the microwave in 20-second increments, stirring after each time. Dip the eyes into the melted white chocolate until completely coated, and lift out with a fork. Place on a sheet of parchment paper and chill in the refrigerator until the coating has set.
The eyes require 2 quick rounds of chilling, so circle back to the cake as you wait. Form the mouth and pipe the fur:
Once the white chocolate coating on Cookie’s eyes has set, pipe the black pupils with a round piping tip—remember to make them googly—and gently press onto cake. Cookie Monster’s pupils are usually looking in opposite directions; I assume this is an adaptation that helps him spot cookies no matter which way he’s facing. LOL
And here’s my Elmo Cake recipe, also perfect for cake decorating beginners:
Recommended Tools for Cookie Monster Cake Decoration
- Grass Tip and Round Tip
- Piping Bags (disposable or reusable)
- Toothpick
- Cake Turntable (optional)
- Small Offset Spatula
- Large Icing Spatula
- Bench Scraper
- Blue & Black Gel Food Coloring
- Cake Carrier for storing and transporting
Today’s post is brought to you by the letter C. 😉
Cookie Monster Cake Recipe
Description
You'll love this method for a Cookie Monster cake because it's delicious AND relatively easy, even if you're a cake decorating beginner. Review the recipe and recommended tools before beginning.
Ingredients You’ll Need
Instructions
- . (Same method here, just no nose.) If you wish to make the cake ahead of time, read my Make-Ahead Instructions below before beginning.
- Preheat oven to 350°F (177°C). Grease two 9-inch cake pans, line with parchment paper rounds, then grease the parchment paper. Parchment paper helps the cakes seamlessly release from the pans..)
- Whisk the cake flour, baking powder, baking soda, and salt together. Set aside.
- Using a handheld or stand mixer fitted with a paddle or whisk attachment, beat the butter and sugar together on high speed until creamed, about 2 minutes. Scrape down the sides and up the bottom of the bowl with a rubber spatula as needed. Add the egg whites, sour cream, and vanilla. Beat on high speed until fully combined and mixed, about 2 minutes. Scrape down the sides and up the bottom of the bowl as needed. Pour the dry ingredients into the bowl. Then with the mixer running on low, slowly pour in the milk. Do not over-mix. You may need to whisk it all by hand to make sure there are no lumps at the bottom of the bowl. The batter will be slightly thick.
- Toss mini chocolate chips with 1 Tablespoon of cake flour to coat them and then fold into the batter.
- Pour batter evenly into cake pans. Bake for around 25-26 minutes or until the cakes are baked through. To test for doneness, insert a toothpick into the center of the cake. If it comes out clean, the cake is done. Cool cakes in the pans set on a wire rack for 30 minutes, then remove the cakes and cool completely directly on a wire rack. The cakes must be completely cool before frosting and assembling.
- In a large bowl using a handheld or stand mixer fitted with a paddle attachment, beat the butter on medium speed until creamy, about 2 minutes. Add confectioners’ sugar, milk/cream, vanilla extract, and salt with the mixer running on low. Increase to high speed and beat for 3 full minutes. Taste. Add a pinch of salt if frosting is way too sweet. Frosting will be thick.
- Place 1 cup + 2 Tablespoons (about 1 heaping cup or 275g) of frosting into a medium bowl. This will remain white/untinted and be used for the cake’s filling and to form Cookie Monster’s eyes. Place 1/3 cup (about 85g) of frosting into a small bowl. Stir in 3 drops of black gel food coloring until it’s dark gray. (Keep in mind that frosting dries darker.) Tint the remaining frosting blue using about 4-5 big drops of blue gel food coloring. Tint until you are satisfied with the color. Remember, frosting dries darker, and we’re going for lighter Cookie Monster blue, not darker Grover blue!
- Using a large serrated knife, slice the domes off the cooled cakes (a semi-thin layer) to create a flat surface. Place tops into a bowl to use in step 10. Place 1 cake layer on your cake stand, serving plate, or cake turntable. Spread 1 cup (about 250g) of white untinted frosting all over the top. (Reserve remaining white frosting for step 10.) Top with 2nd layer. Spread a thin layer of blue frosting around the sides and top of the cake. This is your crumb coat and should be a pretty thin layer. An icing spatula and bench scraper are helpful for this. Chill uncovered in the refrigerator or freezer for at least 30 minutes to help set the crumb coat.
- Crumble the pieces of cake that you leveled off into crumbs. I just use my hands for this. Stir in 1 Tablespoon of white frosting. If the mixture still seems pretty crumby and dry, add a little more of the white frosting until you have a moist mixture that you can form into shapes. Mixture shouldn’t be overly wet. Form into two 2-inch discs. Smooth them out as best you can. Place on a lined baking sheet and chill in the refrigerator or freezer for at least 30 minutes to set. Once they’re set, you can smooth out any bumps on the surface with your hands if needed.
- First, spread a thin layer of black frosting on the bottom half of the top of the cake. Use a small offset spatula to help ensure it’s perfectly smooth. Reserve remaining black frosting. Using a toothpick, trace/outline Cookie’s mouth shape within the black frosting. Use it as your guide for piping his fur around it. Fit your piping bag with Wilton piping tip #233 (grass tip). Spoon some blue frosting inside. It’s difficult to pipe this frosting if the bag is over-filled, so just work with a little bit of frosting in the bag at a time. Place the tip directly on top of the cake’s surface and apply pressure to squeeze the frosting out of the tip. Quickly lift the tip up while squeezing the frosting out. Pipe his fur all over the top and sides of the cake. (The sides are optional, but if you have enough frosting, go for it!) It’s helpful to carefully tilt the cake stand/turntable so you can more easily pipe frosting on the sides. Set cake aside. You can refrigerate uncovered if desired as you finish Cookie’s eyes.
- Melt the white chocolate and oil together in a double boiler or the microwave. If using the microwave: place the chopped chocolate and oil in a medium heat-proof bowl. Microwave for 20-second increments, stirring after each time, until completely melted and smooth. Place one of the discs (eyes) into the white chocolate. Use a fork to help fully coat it. Using a fork, lift the disc (eye) out of the chocolate. Place back onto lined baking sheet. Repeat with 2nd disc (eye). Refrigerate or freeze for 20 minutes or until white chocolate has set.
- After the white chocolate sets, fit your piping bag with Wilton tip #12 (round tip). Spoon some black frosting inside. Pipe Cookie Monster’s pupils onto the eyes—remember to make them off-center and “googly”. Carefully press the eyes on top of the cake to form Cookie’s face. If desired, add chocolate chip cookies around the cake and in his mouth, see Note.
- If you decorated the cake on a cake turntable, use a couple thin spatulas (and a helper!) to carefully lift the cake off the turntable and onto a cake stand, server, or cake carrier base. I actually like to use a cake carrier to cover and store my cakes in the refrigerator.
- Cover leftover cake tightly and store in the refrigerator for up to 5 days.
You may also like...