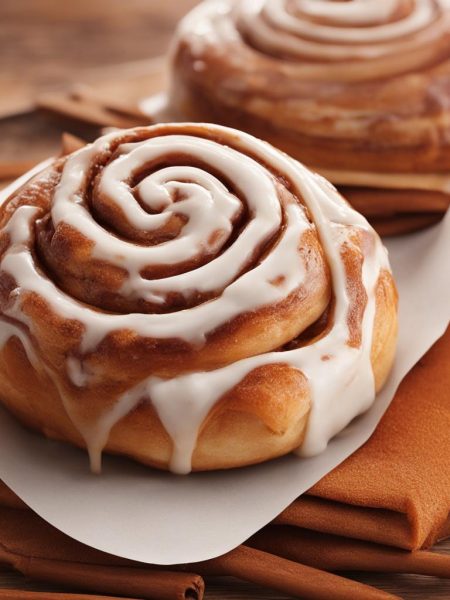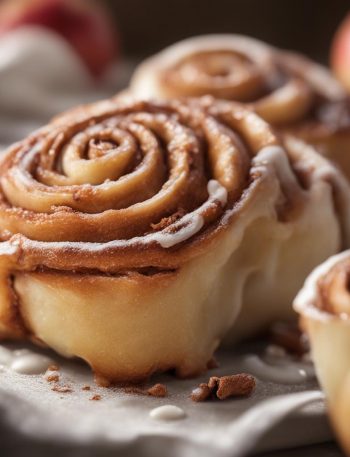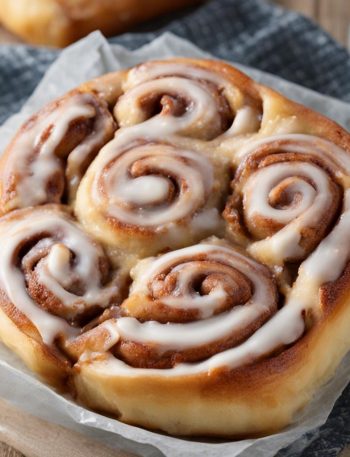

I make Apple Cinnamon Rolls when I want the kitchen to smell like butter, cinnamon, yeast, and baked apples before anyone is even fully awake.
The ingredient list looks straightforward on paper, but the finished result depends on texture more than neatness. I pay attention to smell, drag, and how the batter, dough, or filling moves because that usually tells me more than a timer does.
Wet apples, rushed proofing, or dough that stays too sticky can make the centers gummy even when the tops look beautifully brown.
Why I keep coming back to this
- The dough is rich enough to taste buttery even before the filling gets involved.
- Apples bring freshness to the spirals so the rolls do not eat like plain sugar coils.
- I like that I can prep them the night before and bake them when the house is still quiet.
- A messy drizzle of icing suits them better than anything too tidy.
- They feel festive, but the technique is still grounded in ordinary kitchen habits.
What I use and why it matters
- 1 cup whole milk (240ml).
- 2/3 cup granulated sugar (135g).
- 1 1/2 tablespoons active dry yeast (14g).I measure this carefully because a small mistake changes lift, spread, or set more than I would like.
- 1/2 cup unsalted butter (113g).
- 2 large eggs, at room temperature.I like it close to room temperature so it blends in smoothly and does not shock the batter or dough.
- 1/2 teaspoon salt.
- 4 1/2 cups all-purpose flour (563g).I measure lightly so the bake stays tender instead of turning heavy or pasty.
- 6 tablespoons unsalted butter, very soft (85g).
- 1/2 cup packed light or dark brown sugar (100g).
- 1 1/2 tablespoons ground cinnamon.
- 2 cups peeled and finely chopped apples (250g).I cut it evenly so it softens at the same pace and still tastes like apple when I bite into it.
- 1 cup confectioners’ sugar (120g).
- 1/2 teaspoon pure vanilla extract.
- 2 tablespoons milk.
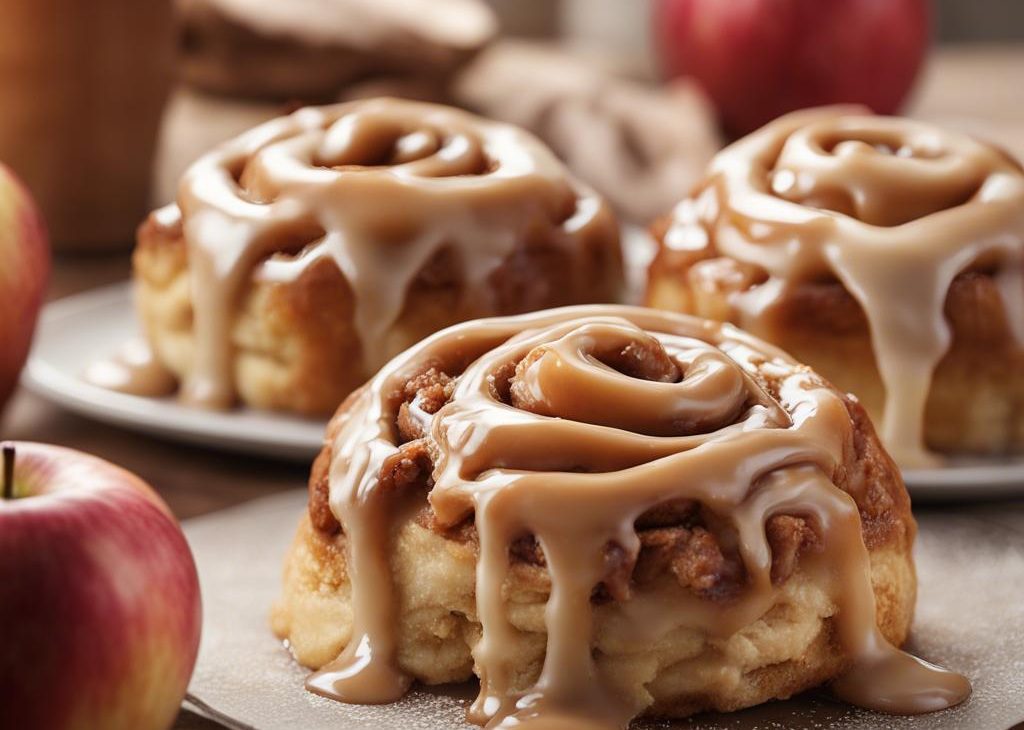
- 2 tablespoons warmed salted caramel.
How I make it
Step 1 – I whisk the warm milk, 2
I whisk the warm milk, 2 Tablespoons sugar, and the yeast together in the bowl of your stand mixer fitted with a dough hook or paddle attachment.
Step 2 – Beat until smooth
I on medium speed, beat in the remaining sugar (which should be 1/2 cup/100g) and the softened butter until it is slightly broken up.
Step 3 – Mix the batter
I keep the dough in the mixer and beat for an additional 5 full minutes, or knead by hand on a lightly floured surface for 5 full minutes..) If the dough becomes too sticky during the kneading process, sprinkle 1 teaspoon of flour at a time on the dough or on the work surface/in the bowl to make a soft, slightly tacky dough.
Step 4 – I lightly grease a large bowl
I lightly grease a large bowl with oil or use nonstick spray.
Step 5 – I grease the bottom and sides
I grease the bottom and sides of a metal or glass 9×13-inch baking dish or line with parchment paper.
Step 6 – Punch Down the Dough to Release
I punch down the dough to release the air.
Step 7 – Spread the Softened Butter All Over
I spread the softened butter all over the dough.
Step 8 – Cover the Rolls Tightly and Allow
I cover the rolls tightly and allow to rise until puffy, about 45-60 minutes.(Or use the overnight option in the Notes below).
Step 9 – Preheat the oven
I preheat the oven to 375°F (191°C).
Step 10 – Bake until set
I bake for about 25 minutes or until they lightly browned on top.
Step 11 – I whisk all of the icing
I whisk all of the icing ingredients together and drizzle over warm rolls. Serve warm.
Step 12 – Cover Leftover Frosted or Unfrosted Rolls
I cover leftover frosted or unfrosted rolls tightly and store at room temperature for up to 2 days or in the refrigerator for up to 5 days.
Tips from my kitchen
- Proof by look, not fear.I wait for puffy dough instead of staring only at the clock.
- Chop the apples small.Large chunks tear the spiral and leak more juice.
- Flour lightly.Too much bench flour tightens the dough and dries it out.
- Ice while warm.The glaze melts into the coils better when the rolls still have some heat.
Variations I actually like
- Vanilla glaze.I skip the caramel and use plain vanilla icing when I want the apples clearer.
- Cream cheese top.I use cream cheese icing when I want a tangier finish.
- Overnight rise.I chill the shaped rolls overnight when I want a calmer morning.
- Nut filling.I add a small scatter of walnuts for extra bite when I know the crowd likes them.
Serving and storing
I cover the pan and keep leftovers refrigerated because of the rich dough and sticky filling. A short warm-up in the microwave softens them again without much fuss.
I can freeze the baked rolls, but I prefer freezing before the final rise if I am planning far ahead. Fresh-baked rolls still have the better texture.
I want these warm, sticky, and a little messy, with enough icing to drip into the spirals.
Frequently asked questions
Can I make these overnight?
Yes. I often shape the rolls the night before and let them finish their second rise in the refrigerator. In the morning I let them lose the chill a bit before baking.
Can I use instant yeast?
Yes. I still watch the dough rather than the clock because instant yeast can move faster, especially in a warm kitchen.
Why did the filling leak out?
A little leakage is normal, but very wet apples or an overfilled roll can cause more of it. I chop the apples small and spread the filling evenly.
What icing works best?
I like the caramel version most, but vanilla or cream cheese icing also works. I choose based on whether I want the apples to stay center stage or not.
These rolls take a little patience, but the smell alone usually convinces me I made the right decision.
Apple Cinnamon Rolls
Description
Warm and gooey apple cinnamon rolls with delicious caramel icing on top. Fall breakfast has never tasted so good!Ingredients You’ll Need
Instructions
- Whisk the warm milk, 2 Tablespoons sugar, and the yeast together in the bowl of your stand mixer fitted with a dough hook or paddle attachment. Cover and allow mixture to sit for about 5 minutes or until foamy on top. *If you do not own a mixer, you can do this in a large mixing bowl and in the next step, mix the dough together with a large wooden spoon/silicone spatula. It will take a bit of arm muscle. A hand mixer works, but the sticky dough repeatedly gets stuck in the beaters. Mixing by hand with a wooden spoon or silicone spatula is a better choice.*.
- On medium speed, beat in the remaining sugar (which should be 1/2 cup/100g) and the softened butter until it is slightly broken up. Add the eggs and salt and beat on medium speed until combined. The butter won't really be mixing into the mixture, so don't be alarmed if it stays in pieces. Switch the mixer down to low speed and with it running, add 1 cup of flour at a time, making sure it's fully incorporated before adding the next. After 4 cups have been added, add the last 1/2 cup and beat until the dough comes together and pulls away from the sides of the bowl, about 3 minutes. Dough will be soft.
- Keep the dough in the mixer and beat for an additional 5 full minutes, or knead by hand on a lightly floured surface for 5 full minutes..) If the dough becomes too sticky during the kneading process, sprinkle 1 teaspoon of flour at a time on the dough or on the work surface/in the bowl to make a soft, slightly tacky dough. Do not add more flour than you need because you do not want a dry dough. After kneading, the dough should still feel a little soft. Poke it with your finger-if it slowly bounces back, the dough is ready to rise. You can also do a "windowpane test" to see if the dough has been kneaded long enough: tear off a small (roughly golfball-size) piece of dough and gently stretch it out until it's thin enough for light to pass through it. Hold it up to a window or light. Does light pass through the stretched dough without the dough tearing first? If so, the dough has been kneaded long enough and is ready to rise. If not, keep kneading until it passes the windowpane test.
- Lightly grease a large bowl with oil or use nonstick spray. Place the dough in the bowl, turning it to coat all sides in the oil. Cover the bowl with aluminum foil, plastic wrap, or a clean kitchen towel. Allow the dough to rise in a relatively warm environment for 2 hours or until double in size. (I always let it rise on the counter and it takes about 2 hours. For a tiny reduction in rise time, see my answer to Where Should Dough Rise? in my Baking with Yeast Guide.).
- Grease the bottom and sides of a metal or glass 9×13-inch baking dish or line with parchment paper.
- Punch down the dough to release the air. Place dough on a lightly floured work surface and using a lightly floured rolling pin, roll dough into a 12×18-inch rectangle. Make sure the dough is smooth and evenly thick. If the dough keeps shrinking as you roll it out, stop what you're doing, cover it lightly, and let it rest for 10 minutes to relax the gluten. When you return to the dough, it should stretch out much easier.
- Spread the softened butter all over the dough. In a small bowl, toss the brown sugar and cinnamon together until combined and then sprinkle evenly over the dough. Top evenly with chopped apples. Tightly roll up the dough to form an 18-inch-long log. Cut into 12 equal rolls. Arrange them in the prepared baking pan. Cover the rolls very tightly with aluminum foil.
- Cover the rolls tightly and allow to rise until puffy, about 45-60 minutes.(Or use the overnight option in the Notes below).
- Preheat the oven to 375°F (191°C).
- Bake for about 25 minutes or until they lightly browned on top. About halfway through baking time, tent a piece of aluminum foil over the pan to prevent the tops from browning too quickly. Remove pan from the oven and place pan on a wire rack for about 10 minutes as you make the icing.
- Whisk all of the icing ingredients together and drizzle over warm rolls. Serve warm.
- Cover leftover frosted or unfrosted rolls tightly and store at room temperature for up to 2 days or in the refrigerator for up to 5 days.
Nutrition Facts
Servings 12
- Amount Per Serving
- Calories 354kcal
- % Daily Value *
- Total Fat 15g24%
- Saturated Fat 9g45%
- Trans Fat 0.6g
- Cholesterol 38mg13%
- Sodium 93mg4%
- Potassium 102mg3%
- Total Carbohydrate 50g17%
- Dietary Fiber 3g12%
- Sugars 12g
- Protein 6g12%
- Calcium 55 mg
- Iron 2.5 mg
* Percent Daily Values are based on a 2,000 calorie diet. Your daily value may be higher or lower depending on your calorie needs.
Note
Proof by look, not fear. I wait for puffy dough instead of staring only at the clock.
Chop the apples small. Large chunks tear the spiral and leak more juice.
Flour lightly. Too much bench flour tightens the dough and dries it out.
Ice while warm. The glaze melts into the coils better when the rolls still have some heat.
Frequently Asked Questions
Yes. I often shape the rolls the night before and let them finish their second rise in the refrigerator. In the morning I let them lose the chill a bit before baking.
Yes. I still watch the dough rather than the clock because instant yeast can move faster, especially in a warm kitchen.
A little leakage is normal, but very wet apples or an overfilled roll can cause more of it. I chop the apples small and spread the filling evenly.
I like the caramel version most, but vanilla or cream cheese icing also works. I choose based on whether I want the apples to stay center stage or not.
You may also like...