
I used to think a pretty pie crust required a pastry-school hand and a drawer full of cutters. Then I started practicing with scraps, and I learned that most designs are just repeated simple moves: cut a strip, braid a strip, stamp a leaf, chill when the dough gets floppy.
This tutorial is the system I follow when I want a pie to look special but still taste like a pie I made at home. The designs go on an unbaked filled pie, except for baked cut-outs that can be added to a finished pie.
The most important ingredient here is patience with the dough. If it warms up, I stop. Ten minutes in the refrigerator fixes more problems than extra flour ever will.
Why I keep coming back to this
- The same pie dough can make several looks, so I do not need a separate recipe for each design.
- Braids hide uneven edges beautifully and make a simple fruit pie look dressed up.
- Cut-outs are forgiving because they can be baked separately and placed wherever the pie needs coverage.
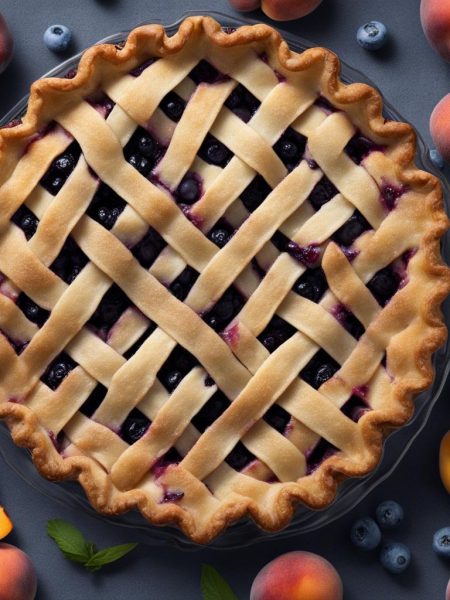
- A wide-and-thin lattice looks dramatic without requiring tiny, fragile strips.
- Leaf cut-outs work well for beginners because overlapping hides imperfect shapes.
- Egg wash and coarse sugar make even a simple design look finished after baking.
What you need (and what each one is doing)
- pie dough (enough for a double-crust pie plus scraps as needed). Cold pie dough is the material for every design. I keep extra dough chilled while I work so it does not stretch.
- all-purpose flour (as needed for rolling). A light dusting prevents sticking. Too much flour makes the dough slide and toughens the scraps.
- 1 large egg (beaten with 1 Tablespoon milk for egg wash). Egg wash gives the designs shine and helps the sugar cling to the surface.
- coarse sugar (optional). Coarse sugar adds sparkle and crunch, especially on fruit pies.
How I make it
Step 1 — Serve
For most designs, I begin with a filled, unbaked pie waiting in the refrigerator. The bottom crust should already be in the pie plate. I keep the decorative dough chilled until the moment I roll it, because warm dough stretches and loses clean edges.
Step 2 — Make a braided-and-wavy top
Roll one dough disc into a 12-inch circle and cut 18 wavy strips with a scalloped pastry wheel. Roll half of a second disc into a long rectangle and cut six narrow 14-inch strips. Braid three strips together, repeat with the other three, then weave the wavy strips across the pie and place the braids around the rim.
Step 3 — Bake separate cut-outs
For decorations that sit on a fully baked pie, roll about half a disc of dough to 1/8-inch thickness. Cut shapes, place them on a parchment-lined baking sheet, brush with egg wash, and bake at 350°F (177°C) for about 10 minutes until lightly browned. Cool them before arranging on the pie.
Step 4 — Cook
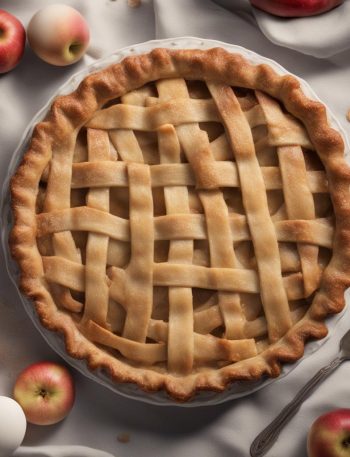
Roll one disc into a 12-inch circle. Cut ten strips about 1 inch wide, then cut every other strip in half lengthwise so you have thick and thin pieces. Lay three thick and four thin strips in each direction, weaving gently. Trim, tuck, and flute the edge.
Step 5 — Garnish and finish
Roll one disc about 1/8 inch thick and cut leaves with a cutter or a sharp knife. Arrange them over the filling so they slightly overlap, then crimp the edge of the bottom crust with a fork. Brush everything with egg wash and sprinkle with coarse sugar before baking according to the pie recipe.
Tips from my kitchen
- Chill whenever the dough bends too easily. Soft dough smears instead of cutting cleanly.
- Use less flour than you think. I dust the pin and counter lightly, then brush off excess before shaping.
- Trim with kitchen shears. They are easier than a knife once dough is already on the pie.
- Save scraps flat. Pressing scraps into a ball overworks them; stacking and rerolling keeps more flake.
Variations I have actually tried
- Mini stars: I use them on berry pies because the filling peeks through the gaps.
- Plain braid only: Skip the woven center and use a braid around a single top crust.
- Half lattice: Cover only one side of the pie if the dough starts running short.
- Cookie-cutter message: Small letters or hearts work well as separately baked cut-outs.
- No sugar finish: For savory pies, I use egg wash only and skip coarse sugar.
Small details I pay attention to
I treat Beautiful Pie Crust Designs Tutorial as a recipe where the written numbers are a guide, not a reason to stop paying attention. I look for the practical cues: the way the dough feels, how the sauce coats a spoon, how the edges brown, or whether the center has actually set. Those little signs are what keep a familiar recipe from turning into a dry loaf, a pale crust, or a pan of fruit that never thickened.
I also set up my counter before I start. Ingredients measured, pan or skillet ready, towel nearby, and a clear place for cooling. That sounds fussy, but it keeps me from making rushed choices while butter is softening, dough is drying, or a hot pan is waiting. Most of my kitchen mistakes happen in the two minutes when I think I can multitask.
How I like to serve it
For the first serving of Beautiful Pie Crust Designs Tutorial, I keep things simple so I can taste what the recipe is doing. If it is baked, I let it cool long enough for the crumb, crust, or filling to settle. If it is cooked on the stove, I serve it while the texture is still lively. That first plate tells me whether I want extra salt, something creamy, something crisp, or just a cup of coffee beside it.
When I make it for other people, I add the extras at the table instead of hiding them in the recipe. A bowl of fruit, hot sauce, whipped cream, rice, butter, or chopped herbs lets everyone steer their own plate. I like recipes that can be shared without making the cook stand there explaining every bite.
Storing and serving
Decorated unbaked pies can usually wait in the refrigerator while the oven heats. If the design took a long time and the dough feels soft, I chill the whole pie for 15-20 minutes before baking.
Baked cut-outs can be made a day ahead and stored at room temperature in an airtight container. I place them on the pie after the filling cools so they stay crisp.
Frequently asked questions
What pie dough works best?
A buttery dough that holds its shape is easiest. Store-bought dough works, too, but I keep it cold because it softens quickly.
Do the designs change the baking time?
Usually I follow the pie recipe. A very thick braid may need a loose foil shield if it browns before the filling bubbles.
Can I make designs without cutters?
Yes. A knife, pizza wheel, fork, and ruler can make strips, leaves, diamonds, and simple vents.
Why did my braid crack?
The dough was probably too cold or rolled too thick. Let it sit two minutes, then braid gently without pulling.
Do I need egg wash?
You can skip it, but I like the shine and color. Milk alone gives softer browning; egg wash gives a more polished surface.
If you decorate a pie this way, I would love to know which design felt easiest in your kitchen.
Beautiful Pie Crust Designs Tutorial
Description
These are the pie crust designs I use when I want a homemade pie to look intentional without needing professional tools. I walk through braids, cut-outs, lattice strips, and overlapping leaves.
Ingredients You’ll Need
Instructions
- Start with a filled, unbaked pie for top-crust designs, keeping the pie and unused dough chilled until needed.
- For a wavy braided design, roll 1 dough disc to a 12-inch circle and cut 18 wavy strips. Roll half of another disc into a 14-inch-long shape, cut 6 narrow strips, and braid them into 2 braids. Weave the wavy strips over the pie, trim, then press the braids around the edge.
- For baked cut-outs, roll 1/2 disc dough to 1/8-inch thickness, cut shapes, brush with egg wash, and bake on a lined sheet at 350°F (177°C) for 10 minutes. Cool before placing on a cooled pie.
- For a lattice, roll 1 disc to 12 inches, cut 10 strips about 1 inch wide, then cut every other strip in half lengthwise. Weave thick and thin strips over the filled pie, trim, tuck, and flute.
- For a leaf crust, roll 1 disc to about 1/8 inch thick, cut leaves, overlap them over the filling, crimp the edge, brush with egg wash, sprinkle with coarse sugar, and bake according to the pie recipe.
Nutrition Facts
Servings 1
- Amount Per Serving
- Calories 93kcal
- % Daily Value *
- Total Fat 6g10%
- Saturated Fat 2g10%
- Trans Fat 0.0g
- Cholesterol 242mg81%
- Sodium 92mg4%
- Potassium 90mg3%
- Protein 8g16%
- Calcium 36 mg
- Iron 1.2 mg
* Percent Daily Values are based on a 2,000 calorie diet. Your daily value may be higher or lower depending on your calorie needs.
Note
Cold dough matters. If the dough gets glossy or stretchy, refrigerate it before continuing.
Egg wash. Beat 1 large egg with 1 Tablespoon milk and brush lightly; puddles can glue delicate shapes down.
Cut-outs. Separately baked shapes are the easiest way to rescue a pie with a plain or cracked top.
Practice. Use scraps on a small baking sheet if you want to test a design before putting it on a pie.
Frequently Asked Questions
A buttery dough that holds its shape is easiest. Store-bought dough works, too, but I keep it cold because it softens quickly.
Usually I follow the pie recipe. A very thick braid may need a loose foil shield if it browns before the filling bubbles.
Yes. A knife, pizza wheel, fork, and ruler can make strips, leaves, diamonds, and simple vents.
The dough was probably too cold or rolled too thick. Let it sit two minutes, then braid gently without pulling.
You can skip it, but I like the shine and color. Milk alone gives softer browning; egg wash gives a more polished surface.
You may also like...