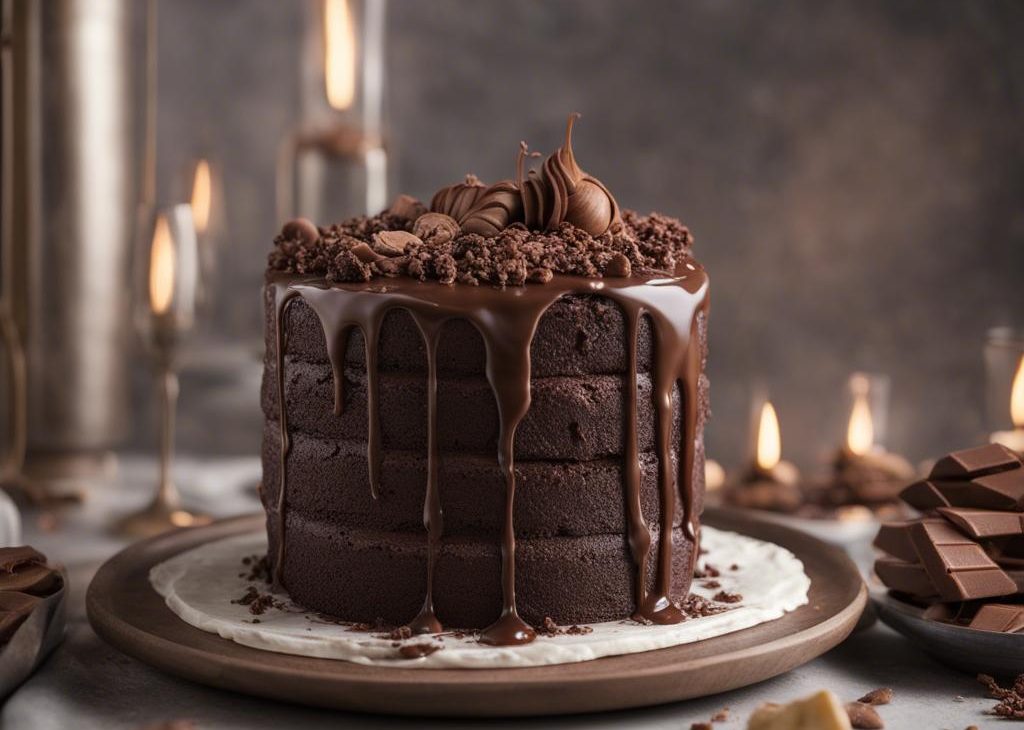

I treat this Claim Jumper-style chocolate motherlode cake like a project cake, not a casual Tuesday bake. It uses three 9-inch pans, plenty of cocoa, chocolate chips, and boiling water for a batter that bakes up dark and soft.
The source did not include frosting quantities, so I keep the cake itself faithful and frost it with whatever chocolate frosting I have planned. The layers are sturdy enough for a generous coat.
I have written the method with the exact temperatures, pan sizes, and timing cues I rely on. I would rather tell you where a recipe can get awkward than pretend every bowl behaves the same.
Why I keep coming back to this
- It gives me the main flavor I want from Claim Jumper-style chocolate motherlode cake without adding unnecessary steps.
- The ingredient list is practical, and I can set everything out before I preheat or start the pan.
- The texture has clear doneness cues, which makes the recipe easier to repeat.
- Leftovers are useful instead of sad, especially when I store them the right way.
- The recipe takes well to small changes, but the base version is reliable.
- It feels homemade in a way that is specific, not fussy.
What you need (and what each one is doing)
- 3 3/8 cups all-purpose flour. so the mixing goes smoothly. It gives the recipe its structure; I spoon it into the cup rather than scooping to avoid packing.
- 3 tablespoons softened butter. so the mixing goes smoothly.
- 1 1/2 cups vegetable oil. so the mixing goes smoothly.
- 3/4 cup unsweetened cocoa powder. so the mixing goes smoothly.
- 1 1/2 cups boiling water. so the mixing goes smoothly.
- 3/8 teaspoon salt. so the mixing goes smoothly. A small amount sharpens every other flavor in the recipe.
- 3/4 cup buttermilk. so the mixing goes smoothly.
- 1 1/2 teaspoons pure vanilla extract. so the mixing goes smoothly. It rounds out the sweetness so the recipe does not taste one-dimensional.
- 1 1/2 cups chocolate chips. so the mixing goes smoothly. I melt it slowly so it stays glossy and does not seize.
- 3 large eggs. so the mixing goes smoothly. It binds the wet and dry ingredients and adds a slight richness.
- 2 1/4 teaspoons baking powder. so the mixing goes smoothly.
- 2 1/4 teaspoons baking soda. so the mixing goes smoothly.
- 1 1/2 cups granulated sugar. so the mixing goes smoothly. It does more than sweeten—it helps browning and affects how tender the final texture is.
How I make it
Step 1 — Preheat the oven
I preheat the oven to 350°F (177°C). Grease and flour three 9-inch round cake pans.
Step 2 — Beat until smooth
I beat the eggs in a large bowl with an electric mixer until light yellow, about 5 minutes. Gradually add the granulated sugar and mix on medium speed until blended.
Step 3 — Combine the ingredients
In a separate bowl, combine baking powder, baking soda, softened butter, oil, cocoa powder, buttermilk, and vanilla until well mixed.
Step 4 — Add the remaining ingredients
I add the flour and salt to the egg mixture and stir just until blended.
Step 5 — Pour and combine
I mix in the chocolate chips on low speed for about 2 minutes, then gradually pour in the boiling water and mix until the batter is combined.
Step 6 — Bake
I divide the batter evenly among the three pans and bake for 30 minutes, or until a toothpick inserted in the center comes out clean.
Step 7 — Frost the cake
I cool in the pans for 10 minutes, turn onto wire racks, cool completely, and frost as desired.
Timing and texture cues I watch for
I do not rely only on the timer. I watch the color, the smell, and the way the center responds because ovens and pans are never as identical as recipes pretend. If something looks done a few minutes early, I check it; if it still looks loose, I give it the extra time it needs.
Before I start, I read through the full method and pull out the pan, bowls, measuring cups, and cooling rack. That sounds basic, but it prevents the kind of scrambling that leads to missed salt, overheated chocolate, overworked batter, or noodles that sit too long. I would rather spend two quiet minutes setting up than fix a rushed mistake later.
I also try to respect the cooling or resting time even when the kitchen smells good. Warm food is tempting, but many recipes finish setting after the heat turns off. Slices cut cleaner, frosting stays put, crumbs settle, and broths taste rounder when I give them the pause written into the method.
If I am cooking for company, I make the recipe once exactly as written before changing it. After that, I know which parts can bend and which parts should stay alone. It is the easiest way I have found to keep a reliable base recipe while still making room for my own pantry and taste.
The other cue I trust is how the recipe behaves the next time I make it. If a batter feels thicker than usual, if a dough warms too fast, or if a pot reduces harder than expected, I slow down and adjust gently instead of forcing the clock. A familiar recipe still deserves attention, and that attention is what makes the repeat batches better.
I write those observations down when a recipe earns a repeat spot. A short note about pan color, chill time, or salt level saves me from relearning the same lesson months later.
Tips from my kitchen
- I grease, flour, and line the pans because chocolate layers love to cling at the edges.
- Boiling water makes the batter loose; I pour slowly so it does not splash cocoa up the bowl.
- The layers need to be completely cool before frosting or the filling slides.
- I weigh or visually level the batter between pans so the finished stack is not lopsided.
Variations I have actually tried
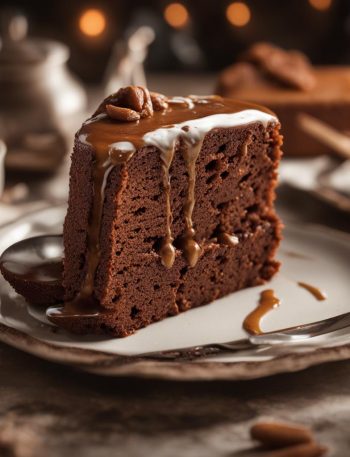
- Mocha layer cake: replace 1/2 cup of the boiling water with hot coffee.
- Dark chocolate chips: use bittersweet chips for a less sweet finish.
- Sheet cake: bake in a large rectangular pan and start checking early.
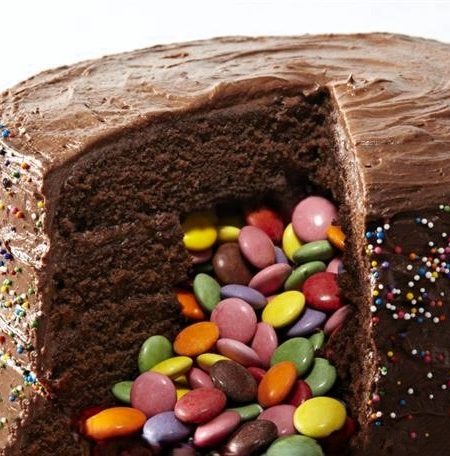
- Chocolate crunch: press chopped chocolate cookies onto the frosted sides.
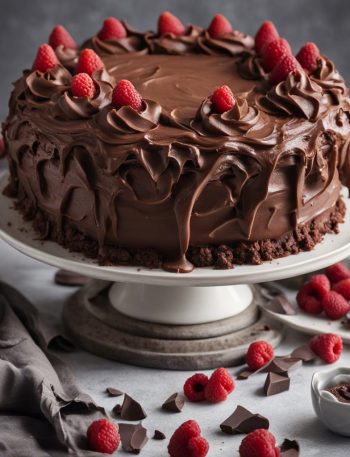
- Berry plate: serve slices with raspberries to cut the richness.
Storing and reheating
Unfrosted layers can be wrapped and refrigerated overnight or frozen for up to 2 months. Once frosted, I keep the cake covered at cool room temperature for a day or refrigerate longer, then let slices sit before serving.
What I serve with it
I cut narrow slices because this is a tall, rich cake. A glass of cold milk or strong coffee is enough; the cake does not need much help.
Frequently asked questions
What frosting should I use?
I use a sturdy chocolate buttercream or ganache-style frosting. The cake itself is rich, so I avoid anything too runny between the layers.
Can I bake only two layers?
The batter is written for three 9-inch pans. Two pans would be very full, so I would rather use three pans or bake extra batter as cupcakes.
Why add boiling water?
Hot water blooms the cocoa and loosens the batter. I notice a darker color and smoother chocolate flavor when I do not skip it.
Can I make the layers ahead?
Yes. I wrap cooled layers tightly and refrigerate them overnight. Chilled layers are easier for me to frost cleanly.
How do I keep the cake from sticking?
I use parchment rounds, grease, and flour. For chocolate cakes, I sometimes dust with cocoa instead of flour so the sides stay dark.
If you make this Claim Jumper-style chocolate motherlode cake, I would love to hear what variation you tried and what you served with it.
Claim Jumper-style chocolate motherlode cake
Description
Claim jumper-style chocolate motherlode cake is the way I make this recipe at home, with the source amounts preserved and the method rewritten in my own kitchen voice. I include the cues I watch for so the texture, timing, and storage are easy to manage.
Ingredients You’ll Need
Instructions
- Preheat the oven to 350°F (177°C). Grease and flour three 9-inch round cake pans.
- Beat the eggs in a large bowl with an electric mixer until light yellow, about 5 minutes. Gradually add the granulated sugar and mix on medium speed until blended.
- In a separate bowl, combine baking powder, baking soda, softened butter, oil, cocoa powder, buttermilk, and vanilla until well mixed.
- Add the flour and salt to the egg mixture and stir just until blended.
- Mix in the chocolate chips on low speed for about 2 minutes, then gradually pour in the boiling water and mix until the batter is combined.
- Divide the batter evenly among the three pans and bake for 30 minutes, or until a toothpick inserted in the center comes out clean.
- Cool in the pans for 10 minutes, turn onto wire racks, cool completely, and frost as desired.
Note
I grease, flour, and line the pans because chocolate layers love to cling at the edges..
Boiling water makes the batter loose; I pour slowly so it does not splash cocoa up the bowl..
The layers need to be completely cool before frosting or the filling slides..
I weigh or visually level the batter between pans so the finished stack is not lopsided..
Frequently Asked Questions
I use a sturdy chocolate buttercream or ganache-style frosting. The cake itself is rich, so I avoid anything too runny between the layers.
The batter is written for three 9-inch pans. Two pans would be very full, so I would rather use three pans or bake extra batter as cupcakes.
Hot water blooms the cocoa and loosens the batter. I notice a darker color and smoother chocolate flavor when I do not skip it.
Yes. I wrap cooled layers tightly and refrigerate them overnight. Chilled layers are easier for me to frost cleanly.
I use parchment rounds, grease, and flour. For chocolate cakes, I sometimes dust with cocoa instead of flour so the sides stay dark.
You may also like...