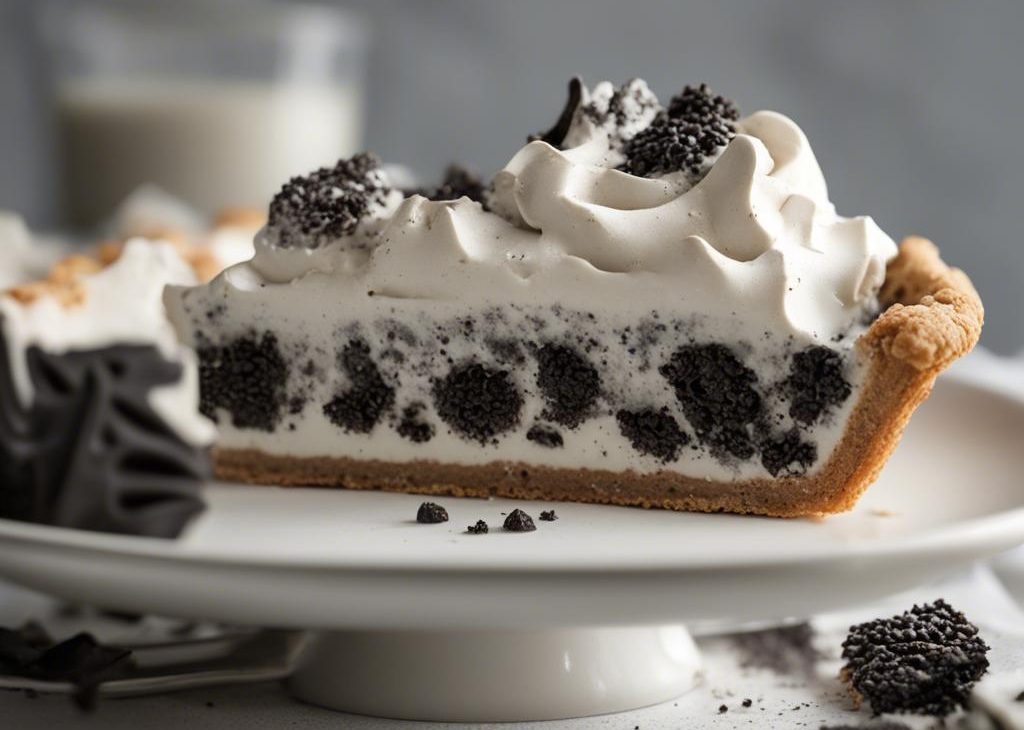

I make this cookies and cream pie when I want a dessert that feels generous but does not require a fussy pastry crust. The crust is crushed Oreos and butter, the filling is whipped cream folded into sweetened cream cheese, and the whole pie rests in the refrigerator until it slices like a cold cream pie should.
The first time I tested it, I cut into it too early and the center slumped right onto the plate. It still tasted good, but I learned my lesson. Six hours in the refrigerator is not a suggestion here; the chill is what turns a soft bowl of filling into neat wedges.
I like that the flavor is clearly cookies and cream without turning heavy. The cream cheese adds a quiet tang, the whipped cream keeps the filling light, and the chopped cookies soften just enough to taste like the middle of an Oreo.
Why I keep coming back to this
- The crust bakes for 10 minutes, so it holds together better than a fully no-bake crumb crust.
- Cold heavy cream gives lift without gelatin, pudding mix, or a long ingredient list.
- Cream cheese makes the filling sliceable and keeps the sweetness in check.
- Chopped Oreos soften in the filling, so every bite has cookie flavor instead of hard chunks.
- I can make the pie a full day ahead, cover it, and forget about dessert until serving time.
- A wiped knife gives clean slices, which matters with a dark crust and pale filling.
What I use and why it matters
I like to line up the ingredients for cookies and cream pie before I start. It keeps me from rushing, and it also makes the small texture cues easier to notice.
- 22 regular Oreo cookies.not Double-Stuf; for the crust
- 5 Tablespoons unsalted butter, melted.71g
- 1 cup cold heavy cream.240ml
- 8 ounces full-fat brick cream cheese, softened.226g
- 3/4 cup confectioners’ sugar.90g
- 1 teaspoon pure vanilla extract.
- 12 whole Oreos, chopped.about 1.5 cups, or 135g
- homemade whipped cream.optional, for topping
How I make it
Step 1 — Bake the Oreo crust
I preheat the oven to 350°F (177°C), pulse 22 regular Oreos with their filling into fine crumbs, and stir in the 5 Tablespoons melted butter. The mixture should look wet and thick. I press it firmly into an ungreased 9-inch pie dish, pushing it up the sides before baking for 10 minutes, then I let it cool while I work on the filling.
Step 2 — Whip the cream
I beat the 1 cup cold heavy cream on medium-high speed until stiff peaks form, about 4 minutes. I stop as soon as the peaks stand up because over-whipped cream turns grainy and makes the filling feel heavy.
Step 3 — Make the cream cheese base
In another bowl, I beat the softened 8 ounces cream cheese until it looks smooth with no visible lumps. Then I add the 3/4 cup confectioners’ sugar and vanilla and beat again. If I see even a few stubborn bits on the side of the bowl, I scrape and mix once more.
Step 4 — Fold and fill
I fold the whipped cream and 12 chopped Oreos into the cream cheese mixture with a spatula. I go slowly because I want the air from the cream to stay in the filling. Once it is combined, I spread it into the cooled crust and smooth the top.
Step 5 — Chill and slice
I cover the pie tightly and refrigerate it for at least 6 hours, though overnight gives me the neatest slices. For serving, I add whipped cream if I have it, cut with a clean sharp knife, and wipe the blade between slices.
The cues I watch for
The crust should feel compact before it goes into the oven. If it is loose and sandy under my fingers, I keep pressing with the bottom of a measuring cup until the corners and sides feel packed.
The filling should hold soft ridges when I spread it into the shell. If it pours, the cream was not whipped enough or the cream cheese was too warm. I would rather pause and chill the bowl for 10 minutes than serve a pie that cannot stand up.
Tips from my kitchen
- Use regular Oreos.Double-Stuf makes the crust greasier and softer than I like.
- Start with softened cream cheese.Cold cream cheese leaves little beads in the filling that no amount of folding will hide.
- Chill the bowl for cream.If my kitchen is warm, I put the mixing bowl in the freezer for 10 minutes first.
- Do not rush the chill.Six hours is the difference between a scoopable pie and a sliceable pie.
- Wipe the knife.A clean blade keeps the white filling from streaking through the dark crust.
Variations I have actually tried
- Mint cookies and cream:I use mint Oreos in the filling and keep regular Oreos for the crust.
- Chocolate drizzle:I drizzle cooled melted chocolate over the chilled pie right before serving.
- Peanut butter ribbon:I fold in 2 Tablespoons creamy peanut butter with the cream cheese base.
- Birthday version:I add 2 Tablespoons rainbow sprinkles with the chopped cookies.
- Frozen slices:I freeze the chilled pie for 4 hours when I want a firmer icebox-style dessert.
Storing and reheating
I cover the pie tightly and keep it in the refrigerator for up to 5 days. The crust softens slightly after day 2, but I do not mind that because the flavor gets more blended.
For freezer storage, I chill the pie first, then freeze it well wrapped. I let slices sit at room temperature for 10-15 minutes before eating so the filling is creamy instead of icy.
How I like to serve it
I serve this pie cold, usually with a small swirl of whipped cream and a few crushed cookie crumbs. Coffee cuts the sweetness nicely, and a plain glass of milk is the choice I make when kids are at the table.
Frequently asked questions
Can I skip baking the crust?
I have tried it, and the crust is softer. The 10-minute bake at 350°F (177°C) helps the butter set into the crumbs, so I keep that step.
Can I use whipped topping instead of heavy cream?
Yes, but I prefer real whipped cream for a cleaner dairy flavor. If using whipped topping, fold it in gently and keep the pie well chilled.
Why is my filling lumpy?
The cream cheese was probably too cold. I let it soften until it gives slightly when pressed, then beat it smooth before adding sugar.
How far ahead can I make it?
I like making it the day before. It needs at least 6 hours to set and is still in good shape after 24 hours in the refrigerator.
Can I freeze the pie?
Yes. Freeze it after it has chilled and set. The crust is a little firmer frozen, so I let slices sit out briefly before serving.
If you make this pie, I would love to hear whether you served it chilled or frozen.
A few extra notes from my testing
When I write this kind of recipe down for myself, I include the small things that are easy to forget: how the mixture should look, when the pan should be turned down, and what I would do differently if the ingredients were slightly different. Those notes are not fancy, but they are what help me repeat the dish on a busy night.
I also try to leave a little room for judgment. Ovens run hot, skillets heat unevenly, and produce changes from week to week. I use the listed times as my starting point, then I look for the color, aroma, thickness, or tenderness described above before I call the recipe done.
Cookies and Cream Pie
Description
This cookies and cream pie has a baked Oreo crust, a cold whipped cream cheese filling, and plenty of chopped cookies folded through the middle. I chill it until the slices cut clean and creamy.
Ingredients You’ll Need
Instructions
- Preheat the oven to 350°F (177°C). Pulse 22 regular Oreos into fine crumbs, stir with 5 Tablespoons melted butter, and press firmly into an ungreased 9-inch pie dish.
- Bake the crust for 10 minutes. Let it cool while you prepare the filling.
- Whip the cold heavy cream to stiff peaks, about 4 minutes. In a separate bowl, beat the softened cream cheese until smooth, then beat in confectioners' sugar and vanilla.
- Fold the whipped cream and chopped Oreos into the cream cheese mixture gently, then spread the filling into the cooled crust.
- Cover and refrigerate for at least 6 hours or up to 2 days. Garnish with whipped cream if desired and slice with a clean sharp knife.
- Store leftover pie covered in the refrigerator or freezer for up to 5 days.
Nutrition Facts
Servings 9
- Amount Per Serving
- Calories 57kcal
- % Daily Value *
- Total Fat 6g10%
- Saturated Fat 4g20%
- Trans Fat 0.3g
- Cholesterol 17mg6%
- Sodium 1mg1%
- Potassium 3mg1%
- Calcium 2 mg
- Iron 0.0 mg
* Percent Daily Values are based on a 2,000 calorie diet. Your daily value may be higher or lower depending on your calorie needs.
Note
Cookie choice. Regular Oreos give me the best crust texture; Double-Stuf can make it oily.
Chill time matters. I do not cut this pie before 6 hours.
Cream cheese texture. Beat it smooth before folding in cream.
Clean slices. Wipe the knife between cuts.
Frequently Asked Questions
I have tried it, and the crust is softer. The 10-minute bake at 350°F (177°C) helps the butter set into the crumbs, so I keep that step.
Yes, but I prefer real whipped cream for a cleaner dairy flavor. If using whipped topping, fold it in gently and keep the pie well chilled.
The cream cheese was probably too cold. I let it soften until it gives slightly when pressed, then beat it smooth before adding sugar.
I like making it the day before. It needs at least 6 hours to set and is still in good shape after 24 hours in the refrigerator.
Yes. Freeze it after it has chilled and set. The crust is a little firmer frozen, so I let slices sit out briefly before serving.
You may also like...