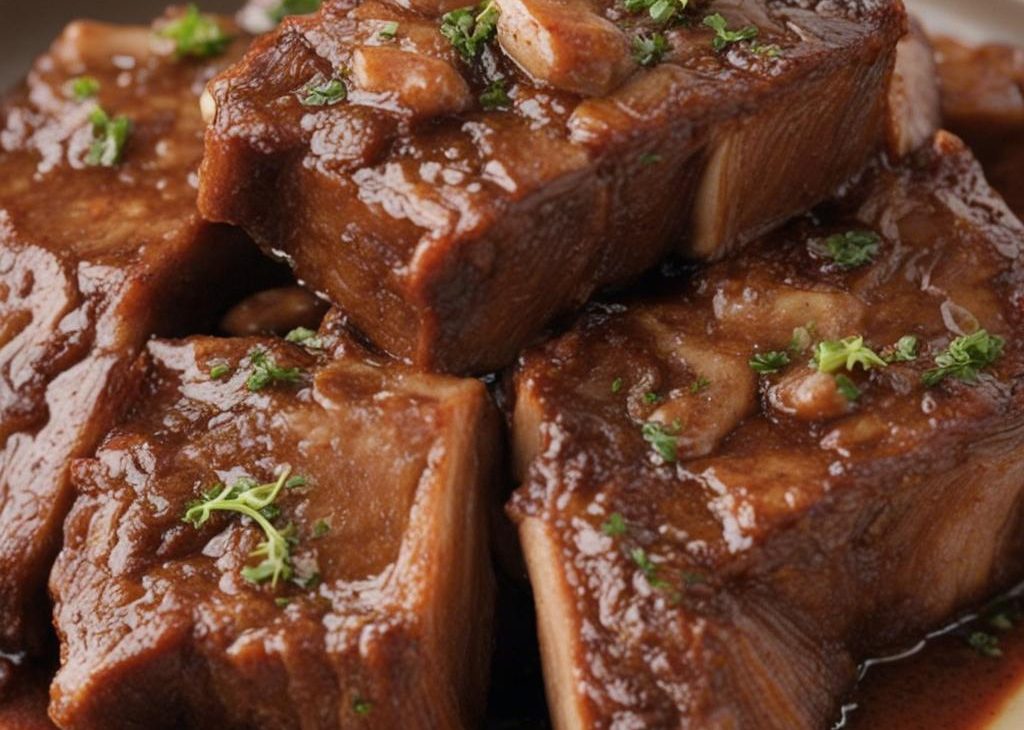

I make these Costco-style boneless short ribs when I want a low-effort dinner that still feels deeply cooked. The work happens at the beginning: seasoning, mixing a sweet-salty braising liquid, covering the pan tightly, and letting the oven take over. After that, I mostly leave it alone and wait for the kitchen to smell like ginger, garlic, beef, and soy sauce.
Boneless short ribs are forgiving, but they do ask for time. Once tried to rush them and pulled the pan early because the sauce looked dark and glossy. The flavor was there, but the meat still had fight in it. Now I plan for the full 2-3 hours at 325°F and check tenderness with a fork, not with the clock alone.
This version is rich from the beef broth and soy sauce, sweet from brown sugar, warm from ginger and black pepper, and just a little sharp from red pepper flakes. I serve it over something plain because the pan juices are the point.
Why I keep coming back to this
- Boneless short ribs are easier to serve than bone-in cuts and fit neatly in one pan.
- The oven temperature stays gentle at 325°F, which gives the meat time to soften.
- Soy sauce, beef broth, brown sugar, garlic, and ginger make a bold sauce without a long ingredient hunt.
- The pan is covered tightly, so the ribs braise instead of drying out.
- It scales well for a family dinner because the recipe starts with 6 pounds of beef.
- Leftovers turn into excellent rice bowls, noodles, or sandwiches the next day.
What I use and why it matters
- Boneless short ribs, 6 pounds. I look for pieces with visible marbling. Very lean pieces can turn firm before they turn tender.
- Extra-virgin olive oil, 2 tablespoons. I use it to coat the beef so the seasoning clings and the surface does not dry at the start.
- Ginger powder, 2 teaspoons. Ground ginger spreads evenly through the sauce and gives steady warmth.
- Freshly ground black pepper, 2 teaspoons. This is a generous amount, and I like the low heat it brings against the sugar.
- Onions, 2, finely chopped. They soften into the braising liquid and give the sauce body.
- Garlic, 8 cloves, minced. Eight cloves sounds like a lot, but the long cooking time mellows the bite.
- Beef broth, 2 cups. This is the braising liquid. I use a broth I would actually sip because it concentrates in the oven.
- Brown sugar, 1 cup. It balances the soy sauce and helps the sauce turn glossy.
- Soy sauce, 1 cup. This seasons the whole pan, so I do not add extra salt.
- Red pepper flakes, 2 teaspoons. They bring a slow warmth. I keep them as written unless I know spice-sensitive eaters are at the table.
How I know the ribs are done
I do not judge short ribs by color alone. They get dark fairly early because of the soy sauce and brown sugar. The real test is tenderness. A fork should slide in with little resistance, and the meat should bend when I lift a piece with tongs. If it still feels springy, I cover the pan again and give it more time.
The sauce also tells me something. Early in cooking it looks thin and separate. Near the end, the onions are soft, the fat has risen, and the liquid tastes round instead of sharp. I skim only if there is a heavy layer of fat on top; a little richness belongs here.
How I make it
Step 1 — Preheat the oven
I preheat the oven to 325°F. In a large oven-safe pan, I rub the boneless short ribs with the olive oil, then season them with ginger powder, black pepper, chopped onions, minced garlic, beef broth, soy sauce, brown sugar, and red pepper flakes so every piece is coated.
Step 2 — Arrange the pan
I spread the ribs in a single layer as much as the pan allows. Crowding is fine with this amount of beef, but stacking too high keeps some pieces from sitting in the sauce. I spoon liquid over the top before covering.
Step 3 — Cover tightly and bake
I cover the pan tightly with aluminum foil and bake for 2-3 hours. I start checking at 2 hours, then continue until the ribs are tender and juicy. If the foil is loose, I crimp it again because steam loss makes the sauce reduce too fast.
Step 4 — Rest before serving
I remove the pan from the oven and let the ribs rest for 10 minutes before serving. That short rest calms the bubbling sauce and makes the meat easier to move without shredding every piece.
Step 5 — Serve
I serve the ribs with plenty of pan sauce and softened onions. If the sauce tastes too intense, I splash in a little hot water or unsalted broth and stir before serving.
Tips from my kitchen
- Use a deep pan. The sauce bubbles under the foil, and a shallow pan can leak onto the oven floor.
- Seal the foil tightly. I press it around the rim so the ribs braise instead of roast dry.
- Check tenderness, not just time. Some pieces need closer to 3 hours depending on thickness.
- Skim gently. If there is a lot of fat, I skim the top after resting, but I leave enough richness for flavor.
- Balance at the end. If the sauce tastes too salty, a small splash of hot water smooths it out.
Variations I have actually tried
- Less sweet: I reduce the brown sugar slightly when serving with sweet sides, but I keep enough for gloss.
- More heat: I add extra red pepper flakes at the table instead of making the whole pan fiery.
- Ginger-forward: I add a few slices of fresh ginger along with the ground ginger, then remove them before serving.
- Rice bowl style: I shred a few pieces and serve them over rice with cucumbers and scallions.
- Noodle night: I toss chopped leftovers with cooked noodles and a spoonful of the pan sauce.
Storing and reheating
I cool leftovers in the sauce, then refrigerate them in a covered container for up to 4 days. The fat firms on top, which makes it easy to lift off if I want a cleaner sauce the next day.
To reheat, I use a covered skillet over low heat with a splash of broth or water. The microwave works for single portions, but I cover the bowl and heat in short bursts so the beef does not tighten. For freezing, I pack meat and sauce together for up to 3 months.
What I serve with it
Plain rice is my first choice because it catches the sauce. Mashed potatoes, buttered noodles, steamed broccoli, roasted carrots, or a crisp cucumber salad all work. I keep the sides simple because the ribs are rich.
Frequently asked questions
Can I use bone-in short ribs?
I can, but the cooking time may run longer and the yield changes. I still look for fork tenderness before serving.
Why are my ribs tough after 2 hours?
They probably need more time. Short ribs soften after the connective tissue breaks down, so I cover the pan again and keep baking.
Can I make this ahead?
Yes. I actually like it better the next day because the sauce settles. I reheat gently with a splash of broth or water.
Is the sauce supposed to be sweet?
It is sweet-salty because of the brown sugar and soy sauce. I serve it with plain sides to keep the meal balanced.
Can I freeze cooked short ribs?
Yes. I freeze the meat with sauce in airtight containers for up to 3 months, then thaw overnight in the fridge.
If you make these ribs, I would like to hear what side caught all that sauce on your table.
Costco boneless short ribs
Description
These Costco-style boneless short ribs bake low and slow in beef broth, soy sauce, brown sugar, garlic, ginger, onions, and red pepper flakes. I serve them with plenty of pan sauce.
Ingredients You’ll Need
Instructions
- Preheat the oven to 325°F. Rub the boneless short ribs with olive oil, then season and coat them with ginger powder, black pepper, onion, garlic, beef broth, soy sauce, brown sugar, and red pepper flakes.
- Arrange the ribs in a single layer in an oven-safe pan and spoon some of the sauce over the top.
- Cover the pan tightly with aluminum foil.
- Bake for 2-3 hours, or until the ribs are tender and juicy when pierced with a fork.
- Remove the pan from the oven and let the ribs rest for 10 minutes before serving with the pan sauce.
Note
Seal the foil. A tight cover keeps the ribs braising instead of drying.
Use tenderness as the guide. Thick pieces may need the full 3 hours.
Rest 10 minutes. The sauce settles and the meat is easier to serve.
Store meat in sauce. It reheats more gently that way.
Frequently Asked Questions
Yes, but they may need more time and the serving yield will change because of the bones.
They need more time. Cover the pan tightly again and bake until a fork slides in easily.
Yes. Cool the ribs in the sauce, refrigerate, and reheat gently with a splash of broth or water.
Yes. Freeze cooked ribs with sauce in airtight containers for up to 3 months.
Rice, mashed potatoes, noodles, steamed vegetables, or a crisp salad all work well with the rich sauce.