This Costco Green Chili Chicken Bowl is the kind of dinner I pull out when the day has already used up my patience. I am not pretending it is a from-scratch stew. I am giving the bowl enough oven time and space so it tastes hot, browned, and worth sitting down.
The source method is simple: a parchment-lined tray, a 375°F oven, and about 40 minutes. I have found that the tray matters. If I crowd the bowl or set it in a tight dish, the edges steam instead of picking up color.
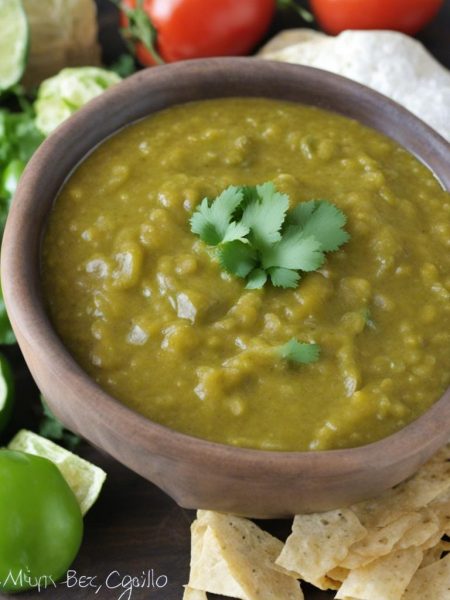
I serve the dipping sauce at the end because I like the contrast of creamy, tangy sauce against the green chile heat. It turns a boxed meal into something I can plate with rice, greens, or tortillas and still feel like I cooked dinner.
Before I start Costco Green Chili Chicken Bowl, I take a minute to think about what the recipe is really asking for. Some of these Costco-style recipes are more about careful heating, chilling, or assembly than complicated cooking.
Why I keep coming back to this
- The oven heats the bowl more evenly than a quick microwave blast.
- Parchment makes cleanup easy and catches any bubbling edges.
- Forty minutes gives the center time to get hot while the top turns golden.
- The dipping sauce keeps each serving from feeling dry.
- I can add a side while the bowl bakes without babysitting it.
- It is a useful weeknight meal when I need dinner to mostly handle itself.
What I use and why it matters
- 1 box Costco Green Chili Chicken Bowl. This is the base of the meal, so I treat it like a prepared bowl that needs even heat and a little browning.
- 1 cup dipping sauce. I keep the sauce for finishing so the top stays lively instead of drying out in the oven.
I do not treat the ingredient list as a place to casually rewrite the recipe. The quantities are here for a reason, even when the original source was a little awkwardly parsed. When I want a different result, I change the handling first: I cut pieces smaller, drain something better, warm a sauce more gently, or give the food a few extra minutes to settle before I change the amount of an ingredient.
How I make it
Step 1 — Set up the tray
I line a baking tray with parchment and set the Costco Green Chili Chicken Bowl on it with room around the edges. That little bit of space helps the heat move around the bowl instead of trapping steam underneath.
Step 2 — Bake at 375°F
I heat the oven to 375°F and slide the tray onto the middle rack. I bake the bowl for 40 minutes, looking for a hot center and lightly browned edges. If the top is browning quickly, I tent it loosely with foil for the last stretch.
Step 3 — Let it rest
When the bowl comes out, I let it sit for a few minutes before scooping. That short pause keeps the hottest sauce from running everywhere and makes the portions easier to move to plates.
Step 4 — Finish with sauce
I spoon the dipping sauce over each serving rather than dumping all of it on the tray. This lets everyone control how rich or spicy their bowl tastes, and it keeps leftovers from getting soggy.
Timing and texture cues I watch
The times in this Costco Green Chili Chicken Bowl method are the frame, but I still pay attention while I cook. I look for the cue that matches the food: fruit should look glossy but not bruised, sauce should thicken enough to coat a spoon, chicken should reach its safe temperature, pasta should stay al dente, and baked desserts should set before I slice them. That habit keeps me from overcorrecting a simple recipe.
I also set up the serving pieces before the final step whenever I can. A hot skillet dish loses its best texture if it waits around, while a chilled salad or pie needs enough cold time to taste settled. Having the plates, bowl, knife, sauce, or side dish ready makes the last few minutes calmer, and the food gets to the table the way I intended.
Tips from my kitchen
- Use the middle rack. I get the most even heating there, especially with prepared bowls that have a dense center.
- Do not skip parchment. Green chile sauce can bubble over and bake onto the tray.
- Check the center. I make sure the middle is steaming hot before serving, not just the edges.
- Add sauce at the table. The bowl keeps a better texture when the dipping sauce is fresh.
Mistakes I avoid
- Changing the quantities too soon. I make the recipe once close to the listed amounts before deciding what needs adjusting.
- Crowding the pan or bowl. When food needs browning, folding, or chilling, extra space usually gives me a better texture.
- Skipping the final check. I taste sauces, check the center of hot dishes, and look for set edges on desserts before I call anything done.
- Serving without a pause. A short rest, chill, or gentle toss often fixes texture in a way more seasoning cannot.
The other mistake I try to avoid is making the dish harder than it needs to be. If the recipe is a shortcut, I let it be a shortcut and focus on the details that matter most: even pieces, clean heat, enough salt, a dry surface when browning is the goal, and a serving plan that keeps the texture from fading before anyone eats. I would rather do a simple thing carefully than add noise that does not improve the plate.
Variations I have actually tried
- Rice bowl: I serve it over plain rice when I want the sauce to stretch.
- Tortilla night: I spoon the hot filling into warm tortillas with shredded lettuce.
- Extra vegetable plate: I add roasted peppers or zucchini on the side while the oven is already on.
- Cheese finish: I sprinkle a little Monterey Jack over the top near the end if I want a richer crust.
- Bright finish: I add cilantro and lime after baking when I want a fresher bite.
When I make a variation, I keep the main method steady. I swap one flavor at a time, then pay attention to whether the texture changes. That keeps the recipe dependable, and it also tells me which change actually helped instead of turning dinner into a guessing game.
Storing and make-ahead notes
I cool leftovers quickly, cover them, and refrigerate them. I reheat individual portions in the microwave until steaming hot, adding the dipping sauce after reheating. If I have time, I reheat the bowl covered in a 325°F oven so the edges do not dry out.
What I serve with it
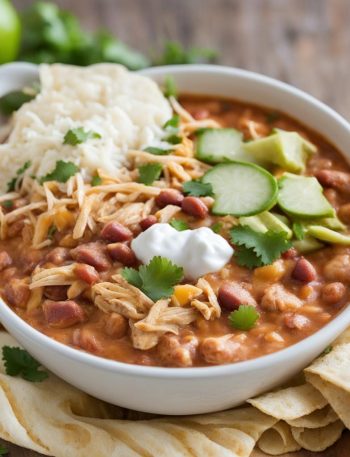
I like this with rice, warm tortillas, shredded cabbage, avocado, or a small salad with lime. The bowl already has plenty of flavor, so I keep the sides plain and let the green chile carry the meal.
Frequently asked questions
Can I microwave it instead?
I can, but I prefer the oven because it heats more evenly and gives the edges better texture. The microwave is faster, but the bowl can come out softer.
How do I know it is heated through?
I check the center, not the browned edges. The middle should be steaming hot before I serve it.
Can I add vegetables?
Yes. I add cooked vegetables on the side or stir them in after baking. Raw vegetables release water, so I avoid burying them in the bowl before the 40-minute bake.
What dipping sauce works best?
I use the sauce from the package or a creamy salsa verde-style sauce. I keep it on the side so the bowl does not turn soupy.
Can I make it less spicy?
I serve it over rice or with sour cream, avocado, or extra sauce. Those additions soften the chile heat without changing the cooking method.
If this saves one tired weeknight dinner, I count it as a useful recipe.
Costco Green Chili Chicken Bowl
Description
A simple heat-and-serve Costco Green Chili Chicken Bowl method with a hot oven, a parchment-lined tray, and dipping sauce on the side. I use this when I want the bowl browned, heated through, and easy to plate.
Ingredients You’ll Need
Instructions
- Place the Costco Green Chili Chicken Bowl on a parchment-lined baking tray with space for air circulation.
- Heat the oven to 375°F and bake the bowl on the middle rack for 40 minutes, until golden at the edges and hot through the center.
- Let the bowl cool slightly so the sauce settles and the portions scoop cleanly.
- Plate the hot bowl and finish each serving with dipping sauce.
Note
Use parchment because green chile sauce can bubble onto the tray.
The center should be steaming hot before serving.
Add dipping sauce after baking for the best texture.
Plain rice is my easiest side for stretching the meal.
Frequently Asked Questions
I can, but I prefer the oven because it heats more evenly and gives the edges better texture. The microwave is faster, but the bowl can come out softer.
I check the center, not the browned edges. The middle should be steaming hot before I serve it.
Yes. I add cooked vegetables on the side or stir them in after baking. Raw vegetables release water, so I avoid burying them in the bowl before the 40-minute bake.
I use the sauce from the package or a creamy salsa verde-style sauce. I keep it on the side so the bowl does not turn soupy.
I serve it over rice or with sour cream, avocado, or extra sauce. Those additions soften the chile heat without changing the cooking method.