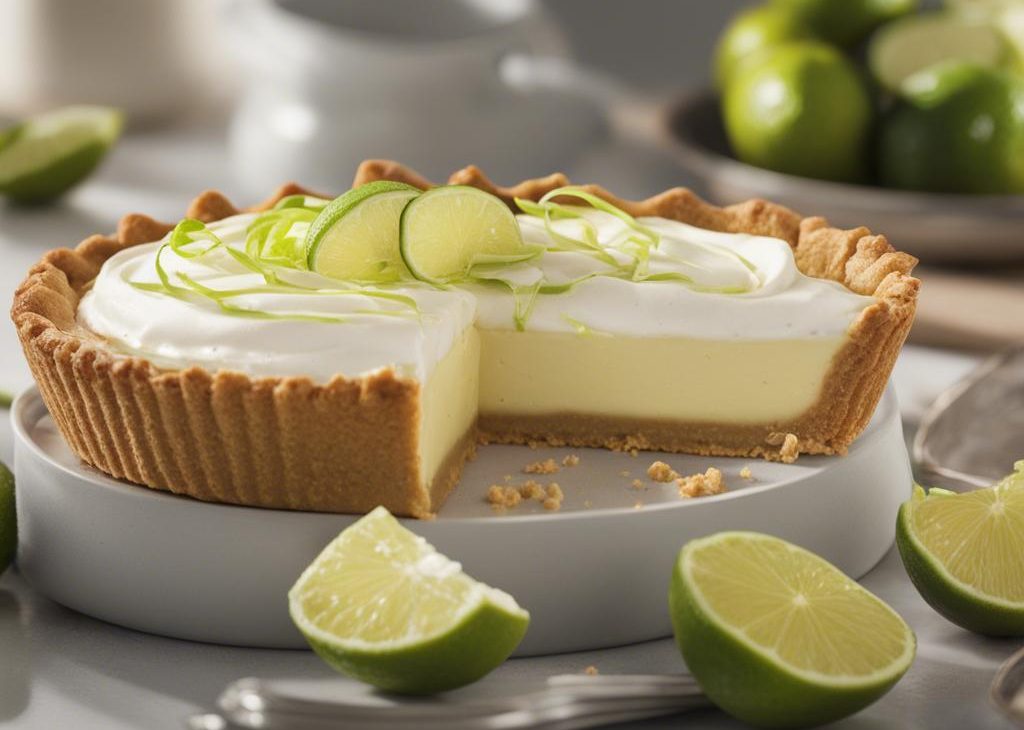

Costco Key Lime Pie is the dessert I think about when I want something cold, creamy, and tart enough to wake up the table after dinner. This homemade version keeps the same idea but lets me control the crust, the lime punch, and the way the filling sets.
I bake the graham cracker crust first because a pale, loose crumb crust is the one thing that can make a good filling feel messy. Ten minutes in the oven gives it structure and a faint toasted smell.
The filling is simple: condensed milk, sour cream, key lime juice, and lime zest. I only bake it for 5-8 minutes after the filling goes in. I do not want color on top; I want a smooth pie that chills into clean slices.
Before I start Costco Key Lime Pie, I take a minute to think about what the recipe is really asking for. Some of these Costco-style recipes are more about careful heating, chilling, or assembly than complicated cooking.
Why I keep coming back to this
- The ingredient list is short and the flavor is clear.
- A pre-baked crust helps the slices hold together.
- Sour cream keeps the filling from tasting one-note sweet.
- Lime zest adds aroma without making the filling loose.
- The 5-8 minute filling bake sets the pie without browning it.
- It is a dessert I can make early and serve cold.
What I use and why it matters
- 1 1/2 cups condensed milk.Condensed milk makes the filling creamy and sweet enough to balance the lime.
- 2 tablespoons unsalted butter, melted.Butter binds the crumbs so the crust cuts cleanly.
- 1/4 cup sour cream, at room temperature.Sour cream softens the sweetness and gives the filling a smooth tang.
- 1 1/2 teaspoons grated lime zest.Zest gives the pie bright lime aroma without adding more liquid.
- 3/4 cup graham cracker crumbs.The crumbs make a simple press-in crust.
- 6 tablespoons key lime juice.Key lime juice brings the sharp tart flavor I want in each bite.
- 1/4 cup granulated white sugar.Sugar sweetens the crust and helps it toast.
I do not treat the ingredient list as a place to casually rewrite the recipe. The quantities are here for a reason, even when the original source was a little awkwardly parsed. When I want a different result, I change the handling first: I cut pieces smaller, drain something better, warm a sauce more gently, or give the food a few extra minutes to settle before I change the amount of an ingredient.
How I make it
Step 1 — Heat the oven
I preheat the oven to 350°F (175°C). While it warms, I set out the sour cream so it is not icy cold when I stir it into the condensed milk.
Step 2 — Press and bake the crust
I mix the graham cracker crumbs, granulated sugar, and melted butter until the crumbs look evenly damp. Then I press the mixture into a 9-inch pie plate and bake the crust for 10 minutes. I let it cool before adding the filling.
Step 3 — Mix the lime filling
I stir together the condensed milk, room-temperature sour cream, key lime juice, and lime zest. I use a spatula at the end to scrape the bowl well because thick condensed milk likes to hide at the bottom.
Step 4 — Bake without browning
I pour the filling into the cooled crust and bake for 5-8 minutes. I look for a filling that is just set around the edges and still smooth on top. If it starts to brown, it has gone too far for my taste.
Step 5 — Chill before slicing
I cool the pie and chill it before serving. Cold time is what turns the filling from soft custard into slices. I garnish with whipped cream and lime slices only after the pie is cold.
Timing and texture cues I watch
The times in this Costco Key Lime Pie method are the frame, but I still pay attention while I cook. I look for the cue that matches the food: fruit should look glossy but not bruised, sauce should thicken enough to coat a spoon, chicken should reach its safe temperature, pasta should stay al dente, and baked desserts should set before I slice them. That habit keeps me from overcorrecting a simple recipe.
I also set up the serving pieces before the final step whenever I can. A hot skillet dish loses its best texture if it waits around, while a chilled salad or pie needs enough cold time to taste settled. Having the plates, bowl, knife, sauce, or side dish ready makes the last few minutes calmer, and the food gets to the table the way I intended.
Tips from my kitchen
- Use room-temperature sour cream.It blends more smoothly into the condensed milk.
- Press the crust firmly.I use the bottom of a measuring cup to pack the crumbs into the pie plate.
- Do not brown the filling.The bake is short; the pie should look pale and glossy.
- Chill before cutting.A warm slice will slump, even if the flavor is good.
Mistakes I avoid
- Changing the quantities too soon.I make the recipe once close to the listed amounts before deciding what needs adjusting.
- Crowding the pan or bowl.When food needs browning, folding, or chilling, extra space usually gives me a better texture.
- Skipping the final check.I taste sauces, check the center of hot dishes, and look for set edges on desserts before I call anything done.
- Serving without a pause.A short rest, chill, or gentle toss often fixes texture in a way more seasoning cannot.
The other mistake I try to avoid is making the dish harder than it needs to be. If the recipe is a shortcut, I let it be a shortcut and focus on the details that matter most: even pieces, clean heat, enough salt, a dry surface when browning is the goal, and a serving plan that keeps the texture from fading before anyone eats. I would rather do a simple thing carefully than add noise that does not improve the plate.
Variations I have actually tried
- Regular lime version:I use regular lime juice when key limes are not available.
- Extra-tart version:I add a little more zest, not more juice, so the filling still sets.
- Whipped topping:I pipe whipped cream around the edge for a bakery-style finish.
- Berry plate:I serve slices with raspberries or strawberries for color and acidity.
- Gluten-free crust:I use gluten-free graham-style crumbs and keep the filling the same.
When I make a variation, I keep the main method steady. I swap one flavor at a time, then pay attention to whether the texture changes. That keeps the recipe dependable, and it also tells me which change actually helped instead of turning dinner into a guessing game.
Storing and make-ahead notes
I keep the pie covered in the refrigerator and slice it cold. The crust softens slowly as it sits, but it still tastes good for a few days. I do not leave it at room temperature for long because the filling is dairy-rich.
What I serve with it
I like this after grilled chicken, tacos, seafood, or any dinner with spice. A small slice is enough because the condensed milk makes it rich. Coffee is good with it, but iced tea is what I usually pour.
Frequently asked questions
Can I use bottled key lime juice?
Yes. I use bottled key lime juice when fresh key limes are not worth the squeezing. Fresh zest still helps the pie taste brighter.
Why did my pie brown?
The filling baked too long or too hot. I pull it when it is just set and still pale. The 5-8 minute window is short on purpose.
Can I make it gluten-free?
Yes. I use gluten-free graham-style crumbs for the crust. The filling ingredients are naturally gluten-free, but I always check labels.
Can I make it dairy-free?
I have made dairy-free versions with non-dairy condensed milk and dairy-free sour cream, but the texture changes. I chill it extra well before slicing.
How do I get clean slices?
I chill the pie thoroughly and wipe the knife between cuts. A warm knife also helps glide through the filling.
If you make it, tell me whether you like the slice plain or with whipped cream.
Costco Key Lime Pie
Description
A creamy Costco-style key lime pie with a graham cracker crust, condensed milk, sour cream, key lime juice, and lime zest. I bake the crust first, keep the filling from browning, and chill it before slicing.
Ingredients You’ll Need
Instructions
- Preheat the oven to 350°F (175°C).
- Mix the graham cracker crumbs, granulated sugar, and melted butter, then press into a 9-inch pie plate.
- Bake the crust for 10 minutes and let it cool.
- Stir together condensed milk, sour cream, key lime juice, and lime zest until smooth.
- Pour the filling into the crust and bake for 5-8 minutes, avoiding browning.
- Chill before serving and garnish with cream and lime slices if desired.
Nutrition Facts
Servings 4
- Amount Per Serving
- Calories 78kcal
- % Daily Value *
- Total Fat 8g13%
- Saturated Fat 5g25%
- Trans Fat 0.3g
- Cholesterol 24mg8%
- Sodium 12mg1%
- Potassium 20mg1%
- Total Carbohydrate 1g1%
- Sugars 1g
- Calcium 16 mg
- Iron 0.0 mg
* Percent Daily Values are based on a 2,000 calorie diet. Your daily value may be higher or lower depending on your calorie needs.
Note
Bake the crust first so it holds together.
Do not brown the filling; 5-8 minutes is enough.
Room-temperature sour cream mixes more smoothly.
Slice the pie cold for neat pieces.
Frequently Asked Questions
Yes. I use bottled key lime juice when fresh key limes are not worth the squeezing. Fresh zest still helps the pie taste brighter.
The filling baked too long or too hot. I pull it when it is just set and still pale. The 5-8 minute window is short on purpose.
Yes. I use gluten-free graham-style crumbs for the crust. The filling ingredients are naturally gluten-free, but I always check labels.
I have made dairy-free versions with non-dairy condensed milk and dairy-free sour cream, but the texture changes. I chill it extra well before slicing.
I chill the pie thoroughly and wipe the knife between cuts. A warm knife also helps glide through the filling.
You may also like...