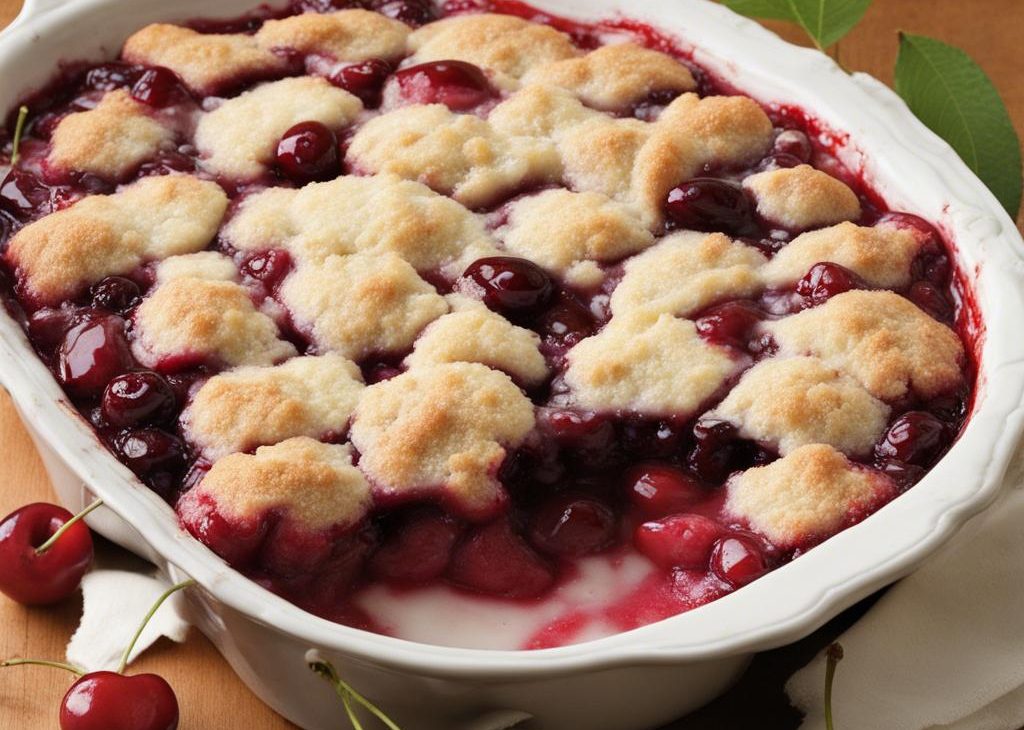

Made from just 9 ingredients, this easy cherry cobbler is one of the simplest desserts you could make with fresh cherries. Pit and halve cherries, whisk together a batter, and bake—it really is that easy. When cherries aren’t in season, you can use frozen. Enjoy warm with a scoop of vanilla ice cream—dessert is served!
Now don’t get me wrong, I love homemade cherry pie, but for most of us it is a special-occasion dessert, because it takes a good while to make (and cool) before you can dive in. If you like to make the most of fresh cherry season while it lasts, this quick and easy cherry dessert recipe is the one that you will make on repeat.
Here’s Why You Will Love This Cherry Cobbler:
- Quick to prep; pitting the cherries is the hardest part of the entire recipe
- Can use fresh or frozen cherries
- No mixer required
- 1-bowl batter
- An egg-free baking recipe
- Tastes incredible warm, topped with vanilla ice cream
Cobbler, crisp, and crumble recipes are wonderfully versatile and a great way to enjoy ripe fruits and berries. I have several dessert recipes on my website in this category, including peach cobbler and berry cobbler, both of which have a biscuit-style topping.
But when we were developing this cherry cobbler recipe, team member Beth introduced me to the way her grandmother used to make cobbler with the fruits and berries her grandfather grew in his garden, and I absolutely fell in love with this batter-based, rise-to-the-top style of fruit cobbler.
It’s almost unfair how something so delicious can be so easy. It’s even easier than my apple cobbler, which also uses a batter-style topping.
Grab These 9 Ingredients:
I Use & Recommend This Cherry Pitter
Pitting fresh cherries can be a tedious—and finger-staining—task, so if you want to save time and prep work, pick up a cherry pitter. And, if you really want to save time, here’s a 7-cherry-at-a-time cherry pitter. I just got this and it’s AWESOME. If you’re anything like me, you don’t like stuffing your kitchen drawers with endless gizmos and gadgets, but a cherry pitter is most definitely an exception. I don’t bake with cherries all the time, but when I do, I’m VERY thankful I have a pitter!
It’s also a timesaver if you’re baking bourbon cherry crisp or my cake-like cherry buckle.
How to Make It
After pitting and halving your cherries, it’s just a few easy steps to get to cherry cobbler first-bite bliss!
Melt the butter in the baking dish in the preheated oven, then whisk together the batter. Spread cherries on top of melted butter, then pour the batter over them:
The batter is a little thinner than pancake batter.
And, bake! I like to sprinkle the top with coarse sugar before baking for a little extra sparkle and sweet crunch on the surface, but this is optional.
Best Pan Size to Use
The best pan to use for this cobbler is a 2.5-quart baking dish, such as a 9-inch square baking pan, 10-inch cast iron skillet, or a 10-inch pie dish or cake pan. Glass, metal, or ceramic are all fine.
I don’t know who coined the phrase “easy as pie,” but it really should be “easy as cobbler!” I still can’t believe how something this tasty could come together with so little effort. It’s a “piece of cake”… nope, that phrase should be about this cobbler, too. LOL.
Easy Cherry Cobbler Recipe
Description
Made from just 9 ingredients, this cherry cobbler is one of the easiest desserts you could make with fresh cherries. See Notes if using frozen cherries or if you want to try other fruits. Enjoy warm with a scoop of vanilla ice cream!
Ingredients You’ll Need
Instructions
- Preheat the oven to 350°F (177°C). Place the butter in a deep-dish 9-inch pie dish, 9-inch square pan, 10-inch cast iron skillet, or any 2.5-quart baking dish. Melt it in the oven as it preheats.
- In a large bowl preferably with a pour spout, whisk the flour, sugar, baking powder, and salt together. Add the milk, vanilla, and almond extract and whisk until batter is smooth.
- Remove the pan from the oven, and spread the cherries over the melted butter in an even layer. Pour the batter evenly over the top of the cherries. Sprinkle the top with coarse sugar, if using.
- Bake for 55–60 minutes. The cobbler is done when a toothpick inserted in the center comes out mostly clean, with just a few moist crumbs. If you find the top of the cobbler is browning too quickly in the oven, loosely cover it with aluminum foil (I usually do this about halfway through baking).
- Remove from the oven and set it on a wire rack. Cool for 5 minutes before serving.
- Cover leftover cobbler tightly and store in the refrigerator for up to 5 days. Because of the fresh fruit, this dessert tastes best within the first couple days.
Frequently Asked Questions
Yes, but you'll need to extend the baking time, and let it cool for a bit before serving, to allow it some extra time to fully set. See recipe Notes for instructions. Do not thaw the frozen cherries, and no need to halve them. The finished cobbler won't look quite as pretty, but I promise it tastes just as delicious!
Yes, but the amount of sugar may need to change depending on what you use. If you use sour cherries, increase sugar to 1 cup (200g). You can also make this with berries instead. (But for more tart berries like boysenberries/marionberries, increase sugar to 1 cup.) If you want to use raspberries, I recommend mixing them with another berry because they're so fragile and delicate. I'm sure you could use sliced peaches, apricots, or plums; we just haven't tested it yet.
Yes, and in fact, that's what Beth's grandmother's recipe calls for. Because self-rising flour includes baking powder and salt, omit those two added ingredients if using self-rising flour. The rest of the recipe is the same.
You may also like...