
Small Chocolate Cake is the kind of recipe I pull out when I want a dependable result without pretending the kitchen is a studio set. I like food that gives clear signs as it cooks: edges that set, sauce that thickens, dough that changes from shaggy to smooth, or a blender that finally stops rattling over chunks of ice.
I keep the process close to the way I actually cook at home. I care about the small moments: when to stop mixing, what the center should look like, how long to cool it, and what I do when a batch looks a little different from the last one.
For this cake, I keep the flavor direct and the method honest. If there is a wait time, I say why it matters. If a step is easy to rush, I point it out. That is usually the difference between food that is fine and food I want to make again.
Why I keep coming back to this
- It feels special without needing bakery equipment.
- The make-ahead window helps me avoid rushing the finish.
- The slices hold cleaner when I cool it properly.
- The flavor improves after the crumb or filling has time to settle.
- I can decorate simply and still bring it to the table with confidence.
What you need and what each ingredient is doing
- 1/2 cup all-purpose flour (63g). I rely on it for structure, and I measure it lightly so the crumb does not turn heavy.
- 1/4 cup unsweetened natural cocoa powder (21g).
- 1/4 teaspoon baking soda. This is the lift, so I check that it is fresh before I start.
- 1/2 teaspoon espresso powder (optional).
- 1/4 teaspoon salt. I add it even to sweets because it keeps the flavors from tasting flat.
- 1/4 cup vegetable oil (60ml).
- 1/2 cup granulated sugar (100g). It sweetens, but it also affects moisture and chew, so I do not treat it as decoration.
- 1 large egg, at room temperature. It binds the mixture and gives the finished texture a little lift.
- 1/2 teaspoon pure vanilla extract. A small amount rounds out the sweet flavors without making the batch taste perfumed.
- 1/4 cup buttermilk (60ml). It carries flavor and helps the edges brown; I keep it at the texture the method calls for.
- 1 4-ounce semi-sweet chocolate bar, chopped (113g).
- 1/2 cup heavy cream (120ml). It brings tenderness and moisture; cold dairy can slow mixing, so I plan ahead when needed.
- optional garnish: raspberries, mint, and/or sprinkles.
How I make it
Step 1 — Set up the pan and oven
Preheat oven to 350°F (177°C). Grease a 6-inch round cake pan, line with a parchment paper round, then grease the parchment paper. Parchment paper helps the cake seamlessly release from the pan.) I slow down here if the mixture is not matching the cue, because a minute of patience is easier than repairing the texture later.
Step 2 — Whisk the dry ingredients
Whisk the flour, cocoa powder, baking soda, espresso powder, and salt together in a large bowl. In a medium bowl, whisk the oil, sugar, egg, vanilla extract, and buttermilk together in a medium bowl. Pour the wet ingredients into the flour mixture and whisk until smooth and combined.
Step 3 — Pour and combine
Pour the cake batter evenly into prepared cake pan.
Step 4 — Bake and check the center
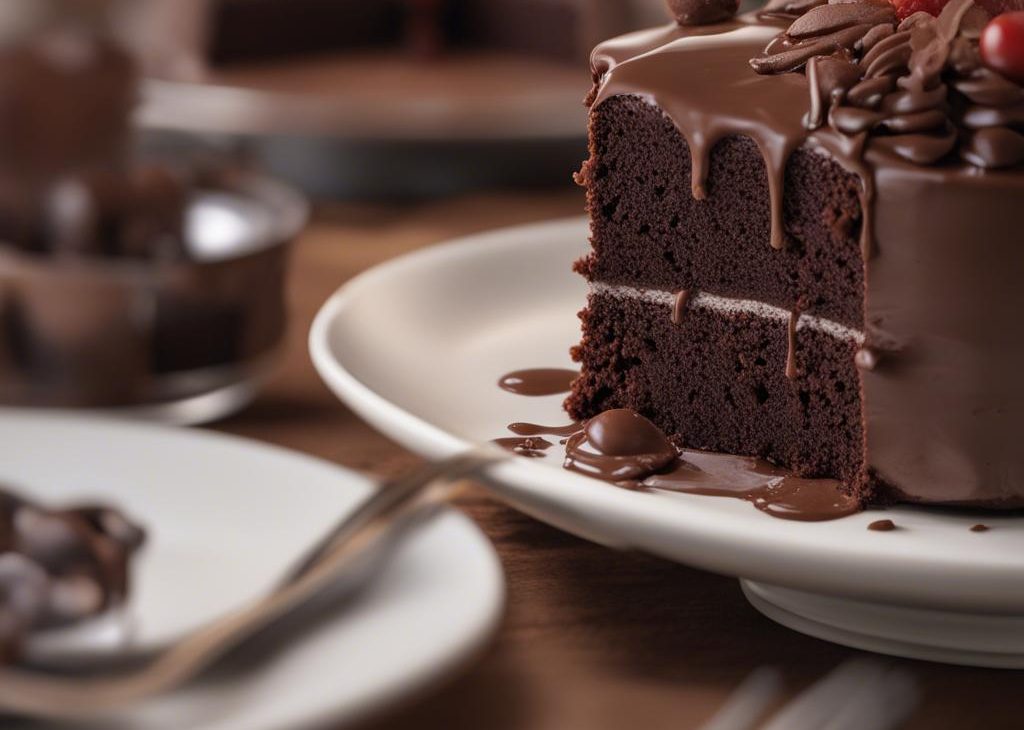
Bake for around 27-30 minutes or until the cake is baked through. To test for doneness, insert a toothpick into the center of the cake. If it comes out clean, it’s done. Avoid over-baking. Cake is thick and moist, so the center may slightly sink. That’s normal. Allow cake to cool in the pan set on a wire cooling rack. Cool completely before frosting.
Step 5 — Bring to a boil
Make the chocolate ganache as the cake cools because the ganache must cool too: Place chopped chocolate in a medium heat-proof bowl. Heat the cream in a small saucepan over medium heat until it begins to gently simmer. (Do not let it come to a rapid boil–that’s too hot!) Pour over chocolate, then let it sit for 2-3 minutes to gently soften the chocolate.
Step 6 — Serve
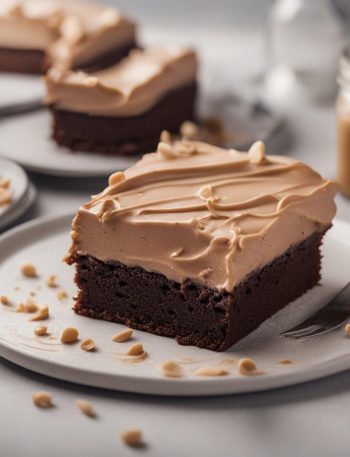
Spread ganache on cooled cake. If ganache has cooled and thickened enough (or if you whipped it), you could pipe it with a piping bag/tip. Decorate with optional garnishes, if desired. Slice and serve.
Step 7 — Store leftovers
Cover leftover cake tightly and store at room temperature for 1 day or in the refrigerator for up to 5 days.
Tips from my kitchen
- I measure before I start; the calm counter keeps me from missing the small ingredients.
- I trust the visual cues more than the timer when my oven or pan is acting different.
- I let the finished food cool or rest before judging the texture. Heat can make it seem softer than it really is.
- I run a thin knife around chilled edges before slicing for cleaner pieces.
- For neat slices, I wipe the knife between cuts instead of sawing through crumbs.
Variations I have actually tried
- Garnish with berries when I want a brighter finish.
- Use a simple chocolate drizzle instead of a full frosting layer.
- Add toasted nuts around the edge for texture.
- Serve with lightly sweetened whipped cream when the dessert is rich.
- Chill overnight for the cleanest slices.
Storing, reheating, and making ahead
I chill the dessert before covering it so condensation does not drip onto the top. Slices keep best in a covered container in the refrigerator. For freezing, I wrap individual pieces tightly, then thaw overnight in the refrigerator. I avoid microwaving frosted or filled slices because the texture goes uneven fast.
How I like to serve it
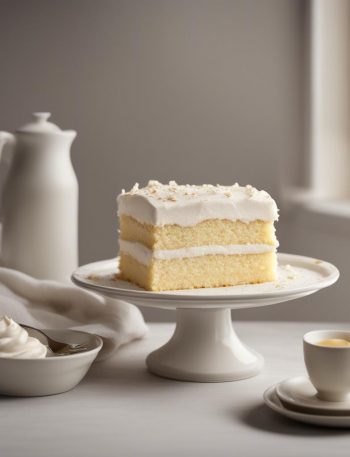
I like clean slices and simple plates. A few berries, a little whipped cream, or a small pinch of flaky salt can do more than a heavy decoration.
Frequently asked questions
Can I make it the day before?
Yes. I prefer that for this kind of dessert because the crumb or filling settles and slicing is cleaner.
Why did the center sink or crack?
It is usually overmixing, a quick temperature change, or cutting before it has cooled. I give it time and avoid rushing the finish.
Can I use a different pan?
Sometimes, but I keep the depth close to the original pan and start checking early. A deeper pan needs more time and can change the texture.
How should I slice it neatly?
I chill it well, use a sharp knife, and wipe the blade between cuts. That small pause makes a big difference.
Can I freeze leftovers?
Yes. I wrap individual slices tightly and thaw in the refrigerator so the texture comes back gently.
If you make Small Chocolate Cake, leave a comment with the change you tried or the cue that helped most. I read those notes because they make the next batch better.
Small Chocolate Cake
Description
This is my practical rewrite for Small Chocolate Cake, built around all-purpose flour, unsweetened natural cocoa powder, baking soda, espresso powder. I keep the method clear, call out the texture cues I watch for, and include storage notes so the leftovers are not an afterthought.
Ingredients You’ll Need
Instructions
- Preheat oven to 350°F (177°C). Grease a 6-inch round cake pan, line with a parchment paper round, then grease the parchment paper. Parchment paper helps the cake seamlessly release from the pan.).
- Whisk the flour, cocoa powder, baking soda, espresso powder, and salt together in a large bowl. In a medium bowl, whisk the oil, sugar, egg, vanilla extract, and buttermilk together in a medium bowl. Pour the wet ingredients into the flour mixture and whisk until smooth and combined.
- Pour the cake batter evenly into prepared cake pan.
- Bake for around 27-30 minutes or until the cake is baked through. To test for doneness, insert a toothpick into the center of the cake. If it comes out clean, it's done. Avoid over-baking. Cake is thick and moist, so the center may slightly sink. That's normal. Allow cake to cool in the pan set on a wire cooling rack. Cool completely before frosting.
- Make the chocolate ganache as the cake cools because the ganache must cool too: Place chopped chocolate in a medium heat-proof bowl. Heat the cream in a small saucepan over medium heat until it begins to gently simmer. (Do not let it come to a rapid boil--that's too hot!) Pour over chocolate, then let it sit for 2-3 minutes to gently soften the chocolate. With a metal spoon or small silicone spatula, very slowly stir until.
- Spread ganache on cooled cake. If ganache has cooled and thickened enough (or if you whipped it), you could pipe it with a piping bag/tip. Decorate with optional garnishes, if desired. Slice and serve.
- Cover leftover cake tightly and store at room temperature for 1 day or in the refrigerator for up to 5 days.
Nutrition Facts
Servings 4
- Amount Per Serving
- Calories 395kcal
- % Daily Value *
- Total Fat 25g39%
- Saturated Fat 10g50%
- Trans Fat 0.4g
- Cholesterol 34mg12%
- Sodium 232mg10%
- Potassium 149mg5%
- Total Carbohydrate 42g15%
- Dietary Fiber 2g8%
- Sugars 27g
- Protein 4g8%
- Calcium 46 mg
- Iron 1.4 mg
* Percent Daily Values are based on a 2,000 calorie diet. Your daily value may be higher or lower depending on your calorie needs.
Note
I measure before I start; the calm counter keeps me from missing the small ingredients.
I trust the visual cues more than the timer when my oven or pan is acting different.
I let the finished food cool or rest before judging the texture. Heat can make it seem softer than it really is.
I run a thin knife around chilled edges before slicing for cleaner pieces.
Frequently Asked Questions
Yes. I prefer that for this kind of dessert because the crumb or filling settles and slicing is cleaner.
It is usually overmixing, a quick temperature change, or cutting before it has cooled. I give it time and avoid rushing the finish.
Sometimes, but I keep the depth close to the original pan and start checking early. A deeper pan needs more time and can change the texture.
I chill it well, use a sharp knife, and wipe the blade between cuts. That small pause makes a big difference.
Yes. I wrap individual slices tightly and thaw in the refrigerator so the texture comes back gently.
You may also like...