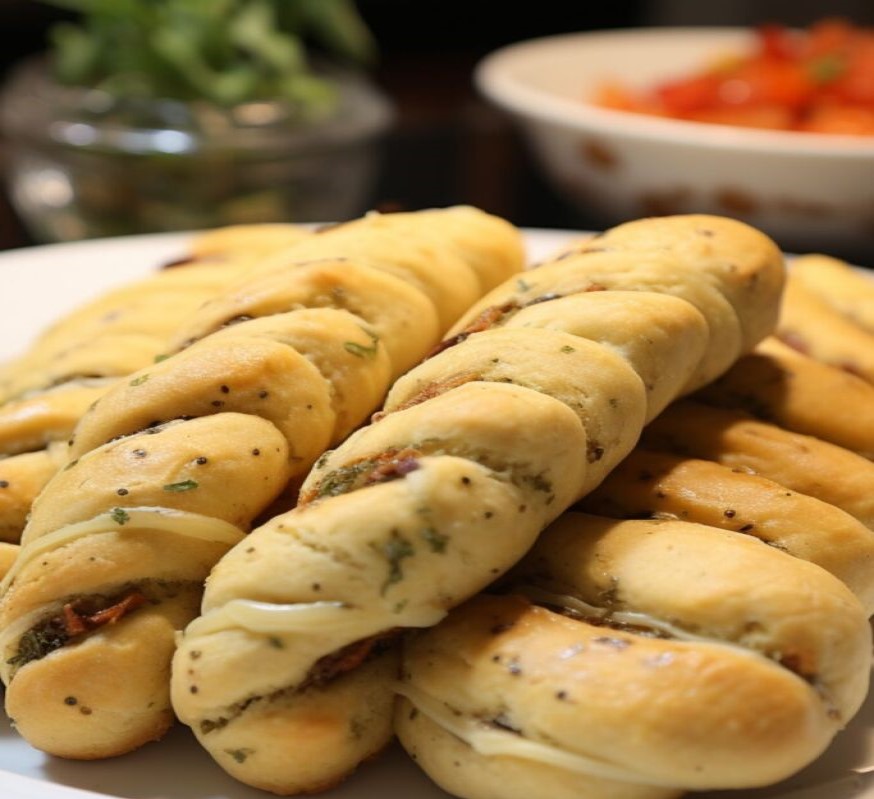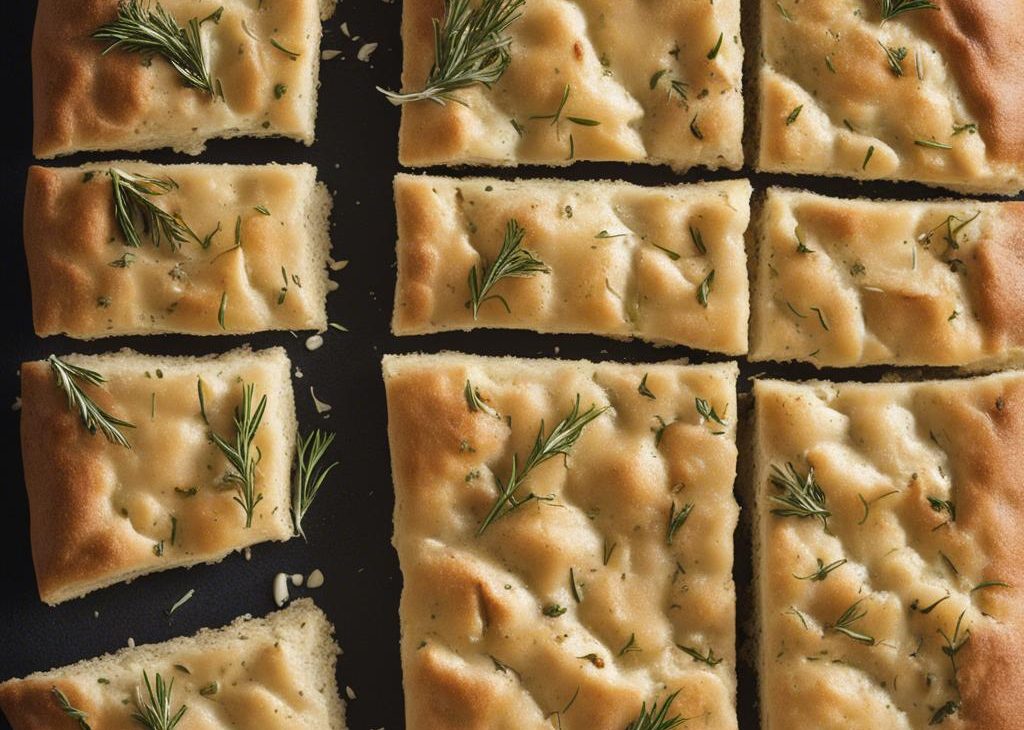

I make Garlic Rosemary Herb Focaccia when I want a baking project that feels special but still gives me clear cues along the way.
I have learned to trust the texture more than the clock. A timer gets me close, but the surface, edges, and smell tell me when to stop.
This rewrite keeps the original amounts and temperature cues, then adds the practical kitchen notes I wish every recipe included.
Why I keep coming back to this
- I can prep the ingredients before I start, which keeps garlic rosemary herb focaccia from feeling chaotic.
- The recipe has clear visual cues, so I am not relying only on a timer.
- It is flexible enough for small swaps without losing the main character of the dish.
- The leftovers hold up better when I cool and store them the right way.
- The ingredient list is familiar, but the finished flavor still feels worth the effort.
- I can tell when something is off early, which makes the recipe easier to rescue.
What you need (and what each one is doing)
- 2 cups warm water (480ml).
- 2 teaspoons granulated sugar.It sweetens, but it also helps browning and gives the finished batch a softer bite.
- 2 teaspoons instant or active dry yeast (slightly less than 1 standard packet).This is the lift, and I check dates because old leavening has ruined more than one pan for me.
- 1/4 cup olive oil (60ml).
- 1 Tablespoon kosher salt.
- 4 1/2-5 cups bread flthe or all-purpose flour (563-625g).I measure it carefully because it decides whether the crumb stays tender or turns heavy.
- 5 Tablespoons olive oil, divided (75ml).
- 2 garlic garlic cloves, minced.I want the spice to be present but not dusty, so I whisk it into the dry ingredients.
- 3 Tablespoons chopped fresh herbs such as basil, thyme, and rosemary (or 2 Tablespoons dried herbs).
- sprinkle of coarse salt and freshly ground black pepper.
How I make it
Step 1 — Mix with a light hand
Whisk half of the water (1 cup; 240ml), 2 teaspoons sugar, and 2 teaspoons yeast together in the bowl of ythe stand mixer fitted with a dough hook or paddle attachment. Cover and allow to rest for 5 minutes. Add the remaining water, olive oil, salt, and 1 cup (130g) flour. Beat on low speed for 20 seconds, then add 3 and 1/2 cups (440g) more flour. Beat on low speed for 2 minutes. If the dough is still sticking to the sides. Keep the dough in the mixer and beat for an additional 5 full minutes, or knead by hand on a lightly floured surface for 5 full minutes..) If the dough becomes too sticky during the kneading process, sprinkle 1 teaspoon. I pause here and look at the mixture instead of rushing to the next bowl.
Step 2 — Prep the pan and heat
Lightly grease a large bowl with a teaspoon of oil or some nonstick spray—just use the same bowl you used for the dough. Place the dough in the bowl, turning it to coat all sides in the oil. Cover the bowl with. Generously grease a 12×17-inch baking pan (with at least 1-inch-tall sides) with 2 Tablespoons of olive oil. This is the base layer of the bread, so be generous with the oil. A pastry brush is helpful to spread it. When the dough is ready, punch it down to release any air bubbles. Place on the oiled baking pan, then stretch and flatten the dough to fit the pan. Don’t tear the dough. If it’s shrinking (mine always does), cover it.
Step 3 — Prep the pan and heat
Cover the dough tightly and let it rest in the refrigerator for at least 1 hthe and up to 24 hours. The longer it rests, the better the flavor. I recommend at least 12 hours. Remove the dough from the refrigerator and let it sit at room temperature as you preheat the oven and prepare the toppings. Keep it covered. It may rise a little during this time, but not much. Preheat oven to 450°F (232°C). Allow it to heat for at least 10-15 minutes so every inch of the oven is very hot.
Step 4 — Whisk the 3 remaining Tablespoons
Whisk the 3 remaining Tablespoons of olive oil with the minced garlic and herbs. Set aside. Using ythe fingers, dimple the dough all over the surface.. Drizzle on the olive oil topping and use ythe hands or a pastry brush to spread it all over the top. Add a little more olive oil if needed so the dough is. Bake for 20-23 minutes or until lightly browned on top. If desired, broil on high for the last minute to really brown the top.
Step 5 — Finish and serve
Cut and serve hot or let it come to room temperature before slicing and serving. Focaccia tastes wonderful warm or at room temperature. Cover leftover focaccia tightly and store at room temperature for 2 days or in the.
My timing notes
I set out every bowl, pan, and measuring spoon before I begin. That sounds fussy, but it keeps me from discovering a missing whisk or cold ingredient halfway through.
When a recipe gives a range, I start checking at the early end. My oven runs a little hot on the back left corner, so I rotate pans when browning looks uneven.
I also build in cooling time even when the source rest time is blank. Hot food is still cooking from carryover heat, and a short pause usually gives cleaner slices, steadier frosting, or a better first bite.
Tips from my kitchen
- Read the recipe once before starting.I catch most mistakes before they happen when I know which steps move quickly.
- Use the pan size listed.Changing the pan changes timing, browning, and the way the center sets.
- Stop mixing as soon as the texture looks even.Overmixing is the fastest way I know to make baked goods tough or sauces loose.
- Start checking early.I set the timer for the low end of the range and let color, aroma, and texture make the final call.
- Let it rest before serving.A few quiet minutes make slices cleaner and flavors calmer.
Variations I have actually tried
- Nutty version:I add chopped pecans, walnuts, or almonds when crunch fits the recipe.
- Chocolate version:A small amount of chopped chocolate changes the mood without rewriting the base.
- Fruit version:Apples, berries, or citrus zest are my easiest flavor swaps.
- Less sweet:I reduce sweet toppings first before changing the batter or dough.
- Make-ahead:I prep the dry ingredients ahead and finish the wet ingredients right before cooking.
Storing and reheating
I cool the batch fully before covering it. Most baked leftovers keep well for a few days at room temperature if unfrosted, while frosted or dairy-heavy pieces go into the refrigerator.
Frequently asked questions
Can I make garlic rosemary herb focaccia ahead?
Yes, but I choose the make-ahead point based on texture. For baked recipes I often prep components ahead, then bake or finish the day I serve. For drinks and sauces, I keep the base cold and stir or blend again before serving.
How do I know when it is done?
The recipe should look finished before I pull it.
Can I change the sweetness?
I make small changes first. I adjust glaze, toppings, honey, or serving sauce before changing the main batter or dough, because sugar often affects browning and moisture.
What should I do if the texture looks wrong?
I stop and fix the smallest thing. A splash of liquid helps a stiff batter or blender jar; a spoonful of flour or a few extra minutes of chilling helps a sticky dough.
Can I freeze it?
Many baked versions freeze well once completely cool. I wrap individual portions tightly, label them, and thaw in the refrigerator or at room temperature before reheating gently.
If you make garlic rosemary herb focaccia, I would love to hear what you changed and what you kept exactly the same.
Garlic Rosemary Herb Focaccia
Description
Garlic Rosemary Herb Focaccia is written the way I make it in my own kitchen: exact source amounts, clear timing, and the texture cues I check before serving. I included practical swaps, storage notes, and the small fixes that help the recipe behave.
Ingredients You’ll Need
Instructions
- Whisk half of the water (1 cup; 240ml), 2 teaspoons sugar, and 2 teaspoons yeast together in the bowl of ythe stand mixer fitted with a dough hook or paddle attachment. Cover and allow to rest for 5 minutes.
- Add the remaining water, olive oil, salt, and 1 cup (130g) flour. Beat on low speed for 20 seconds, then add 3 and 1/2 cups (440g) more flour. Beat on low speed for 2 minutes. If the dough is still sticking to the sides of the bowl, add the last 1/2 cup (60g) of flour.
- Keep the dough in the mixer and beat for an additional 5 full minutes, or knead by hand on a lightly floured surface for 5 full minutes..) If the dough becomes too sticky during the kneading process, sprinkle 1 teaspoon of flthe at a time on the dough or on the work surface/in the bowl to make a soft, slightly tacky dough. Do not add more flthe than you need because you do not want a dry dough. After kneading, the dough should still feel a little soft. Poke it with ythe finger—if it slowly bounces back, ythe dough is ready to rise. You can also do a “windowpane test” to see if ythe dough has been kneaded long enough: tear off a small (roughly golfball-size) piece of dough and gently stretch it out until it’s thin enough for light to pass through it. Hold it up to a window or light. Does light pass through the stretched dough without the dough tearing first? If so, ythe dough has been kneaded long enough and is ready to rise. If not, keep kneading until it passes the windowpane test.
- Lightly grease a large bowl with a teaspoon of oil or some nonstick spray—just use the same bowl you used for the dough. Place the dough in the bowl, turning it to coat all sides in the oil. Cover the bowl with aluminum foil, plastic wrap, or a clean kitchen towel. Allow the dough to rise at room temperature for 2-3 hours or until double in size. (Tip: For the warm environment on a particularly cold day, heat ythe oven to 150°F (66°C). Turn the oven off, place the dough inside, and keep the door slightly ajar. This will be a warm environment for ythe dough to rise. After about 30 minutes, close the oven door to trap the air inside with the rising dough. When it’s doubled in size, remove from the oven.).
- Generously grease a 12×17-inch baking pan (with at least 1-inch-tall sides) with 2 Tablespoons of olive oil. This is the base layer of the bread, so be generous with the oil. A pastry brush is helpful to spread it.
- When the dough is ready, punch it down to release any air bubbles. Place on the oiled baking pan, then stretch and flatten the dough to fit the pan. Don’t tear the dough. If it’s shrinking (mine always does), cover it with a clean towel and let it rest for 5-10 minutes before continuing. This lets the gluten settle and it’s much easier to shape after that.
- Cover the dough tightly and let it rest in the refrigerator for at least 1 hthe and up to 24 hours. The longer it rests, the better the flavor. I recommend at least 12 hours.
- Remove the dough from the refrigerator and let it sit at room temperature as you preheat the oven and prepare the toppings. Keep it covered. It may rise a little during this time, but not much.
- Preheat oven to 450°F (232°C). Allow it to heat for at least 10-15 minutes so every inch of the oven is very hot.
- Whisk the 3 remaining Tablespoons of olive oil with the minced garlic and herbs. Set aside.
- Using ythe fingers, dimple the dough all over the surface.. Drizzle on the olive oil topping and use ythe hands or a pastry brush to spread it all over the top. Add a little more olive oil if needed so the dough is completely covered. (This creates the crisp crust!) Sprinkle with a little coarse salt and freshly ground black pepper.
- Bake for 20-23 minutes or until lightly browned on top. If desired, broil on high for the last minute to really brown the top.
- Cut and serve hot or let it come to room temperature before slicing and serving. Focaccia tastes wonderful warm or at room temperature. Cover leftover focaccia tightly and store at room temperature for 2 days or in the refrigerator for 1 week. You can also freeze the baked and cooled focaccia for up to 3 months. Thaw in the refrigerator or at room temperature. To reheat the slices, you can use the microwave or bake in a 300°F (149°C) oven for 5 minutes.
Nutrition Facts
Servings 2
- Amount Per Serving
- Calories 549kcal
- % Daily Value *
- Total Fat 60g93%
- Saturated Fat 8g40%
- Trans Fat 0.0g
- Sodium 2867mg120%
- Potassium 1mg1%
- Total Carbohydrate 4g2%
- Sugars 4g
- Calcium 2 mg
- Iron 0.4 mg
* Percent Daily Values are based on a 2,000 calorie diet. Your daily value may be higher or lower depending on your calorie needs.
Note
Read the recipe once before starting. I catch most mistakes before they happen when I know which steps move quickly.
Use the pan size listed. Changing the pan changes timing, browning, and the way the center sets.
Stop mixing as soon as the texture looks even. Overmixing is the fastest way I know to make baked goods tough or sauces loose.
Start checking early. I set the timer for the low end of the range and let color, aroma, and texture make the final call.
Frequently Asked Questions
Yes, but I choose the make-ahead point based on texture. For baked recipes I often prep components ahead, then bake or finish the day I serve. For drinks and sauces, I keep the base cold and stir or blend again before serving.
The recipe should look finished before I pull it.
I make small changes first. I adjust glaze, toppings, honey, or serving sauce before changing the main batter or dough, because sugar often affects browning and moisture.
I stop and fix the smallest thing. A splash of liquid helps a stiff batter or blender jar; a spoonful of flour or a few extra minutes of chilling helps a sticky dough.
Many baked versions freeze well once completely cool. I wrap individual portions tightly, label them, and thaw in the refrigerator or at room temperature before reheating gently.