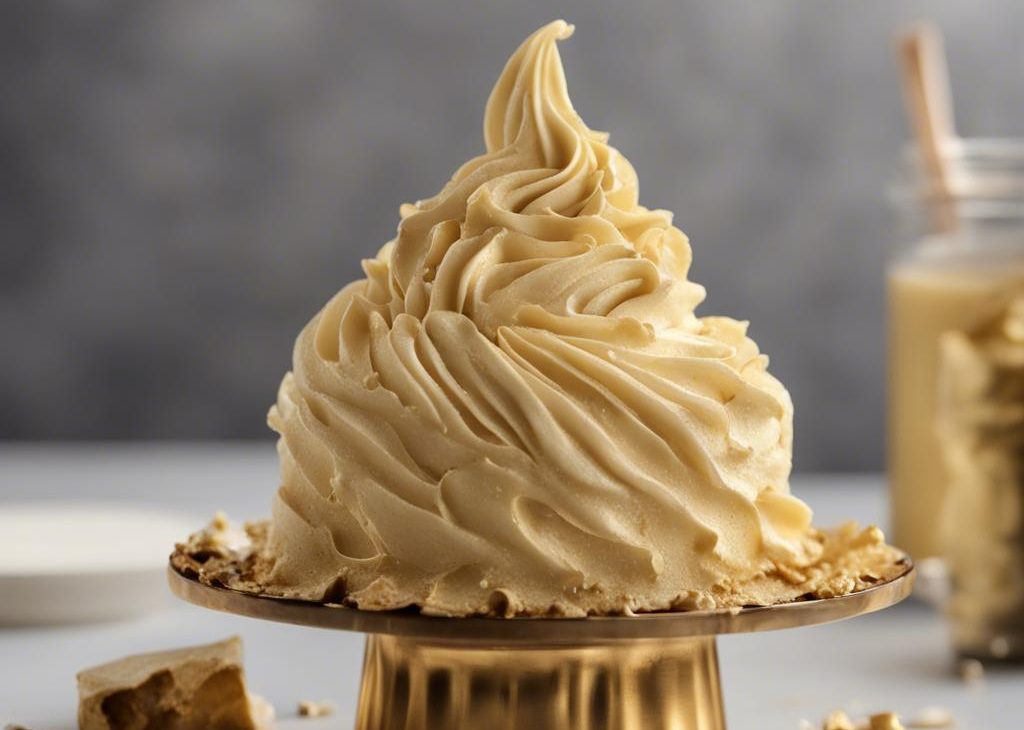

I use Gold Buttercream Frosting when I want a cake or cupcakes to look dressed up, but I still want the frosting to taste like butter and vanilla.
Color can distract from texture, so I mix the base until it is smooth before I add the gold finish.
The biggest thing I watch is the cream. I add it gradually because frosting can go from fluffy to loose faster than people expect.
Why I keep coming back to this
- I can prep the ingredients before I start, which keeps Gold Buttercream Frosting from feeling chaotic.
- The recipe has clear visual cues, so I am not relying only on a timer.
- It is flexible enough for small swaps without losing the main character of the dish.
- The leftovers hold up better when I cool and store them the right way.
- The ingredient list is familiar, but the finished flavor still feels worth the effort.
- I can tell when something is off early, which makes the recipe easier to rescue.
What you need (and what each one is doing)
- Gold luster.
- 2 cups finely powdered sugar. It sweetens, but it also helps browning and gives the finished batch a softer bite.
- 2 cups fresh cream (carefully sourced from high-quality dairy, providing a luscious and creamy element to the recipe.). The dairy loosens the mixture and keeps the inside from tasting dry.
- table salt (pinch, to taste). A small amount makes the sweet and savory notes clearer.
- 6 drops of pure vanilla extract. This is where richness and moisture come from, so I do not rush the mixing here.
How I make it
Step 1 — Beat until smooth
In a bowl, beat the butter on medium speed until it becomes light and fluffy. This should take about 2 minutes. Gradually add the powdered sugar, 1 cup at a time, beating constantly until all of the sugar has been added. I pause here and look at the mixture instead of rushing to the next bowl.
Step 2 — Add the remaining ingredients
Add in the gold luster or shimmer or color and mix until fully incorporated. Add in the pure vanilla extract and mix until fully incorporated.
Step 3 — Add the cream
Gradually add in the cream and mix until fully incorporated. Finally, add a pinch of table salt to bring out the flavors, and mix until fully incorporated.
Step 4 — Cook
Once all ingredients are mixed together, ythe Gold Buttercream Frosting is ready to use!
My timing notes
I set out every bowl, pan, and measuring spoon before I begin. That sounds fussy, but it keeps me from discovering a missing whisk or cold ingredient halfway through.
When a recipe gives a range, I start checking at the early end. My oven runs a little hot on the back left corner, so I rotate pans when browning looks uneven.
I also build in cooling time even when the source rest time is blank. Hot food is still cooking from carryover heat, and a short pause usually gives cleaner slices, steadier frosting, or a better first bite.
Tips from my kitchen
- Read the recipe once before starting. I catch most mistakes before they happen when I know which steps move quickly.
- Add cream slowly. I can always loosen frosting, but fixing a runny bowl takes longer.
- Stop mixing as soon as the texture looks even. Overmixing is the fastest way I know to make baked goods tough or sauces loose.
- Start checking early. I set the timer for the low end of the range and let color, aroma, and texture make the final call.
- Let it rest before serving. A few quiet minutes make slices cleaner and flavors calmer.
Variations I have actually tried
- Nutty version: I add chopped pecans, walnuts, or almonds when crunch fits the recipe.
- Chocolate version: A small amount of chopped chocolate changes the mood without rewriting the base.
- Fruit version: Apples, berries, or citrus zest are my easiest flavor swaps.
- Less sweet: I reduce sweet toppings first before changing the batter or dough.
- Make-ahead: I prep the dry ingredients ahead and finish the wet ingredients right before cooking.
Storing and reheating
I keep the frosting covered in the refrigerator and let it come back toward room temperature before rewhipping. If it looks stiff, I add cream a teaspoon at a time.
Frequently asked questions
Can I make Gold Buttercream Frosting ahead?
Yes, but I choose the make-ahead point based on texture. For baked recipes I often prep components ahead, then bake or finish the day I serve. For drinks and sauces, I keep the base cold and stir or blend again before serving.
How do I know when it is done?
The recipe should look finished before I pull it.
Can I change the sweetness?
I make small changes first. I adjust glaze, toppings, honey, or serving sauce before changing the main batter or dough, because sugar often affects browning and moisture.
What should I do if the texture looks wrong?
I stop and fix the smallest thing. A splash of liquid helps a stiff batter or blender jar; a spoonful of flour or a few extra minutes of chilling helps a sticky dough.
Can I freeze it?
Many baked versions freeze well once completely cool. I wrap individual portions tightly, label them, and thaw in the refrigerator or at room temperature before reheating gently.
If you make Gold Buttercream Frosting, I would love to hear what you changed and what you kept exactly the same.
Gold Buttercream Frosting
Description
Gold Buttercream Frosting is written the way I make it in my own kitchen: exact source amounts, clear timing, and the texture cues I check before serving. I included practical swaps, storage notes, and the small fixes that help the recipe behave.
Ingredients You’ll Need
Instructions
- In a bowl, beat the butter on medium speed until it becomes light and fluffy. This should take about 2 minutes.
- Gradually add the powdered sugar, 1 cup at a time, beating constantly until all of the sugar has been added.
- Add in the gold luster or shimmer or color and mix until fully incorporated.
- Add in the pure vanilla extract and mix until fully incorporated.
- Gradually add in the cream and mix until fully incorporated.
- Finally, add a pinch of table salt to bring out the flavors, and mix until fully incorporated.
- Once all ingredients are mixed together, ythe Gold Buttercream Frosting is ready to use!
Note
Read the recipe once before starting. I catch most mistakes before they happen when I know which steps move quickly.
Add cream slowly. I can always loosen frosting, but fixing a runny bowl takes longer.
Stop mixing as soon as the texture looks even. Overmixing is the fastest way I know to make baked goods tough or sauces loose.
Start checking early. I set the timer for the low end of the range and let color, aroma, and texture make the final call.
Frequently Asked Questions
Yes, but I choose the make-ahead point based on texture. For baked recipes I often prep components ahead, then bake or finish the day I serve. For drinks and sauces, I keep the base cold and stir or blend again before serving.
The recipe should look finished before I pull it.
I make small changes first. I adjust glaze, toppings, honey, or serving sauce before changing the main batter or dough, because sugar often affects browning and moisture.
I stop and fix the smallest thing. A splash of liquid helps a stiff batter or blender jar; a spoonful of flour or a few extra minutes of chilling helps a sticky dough.
Many baked versions freeze well once completely cool. I wrap individual portions tightly, label them, and thaw in the refrigerator or at room temperature before reheating gently.
You may also like...