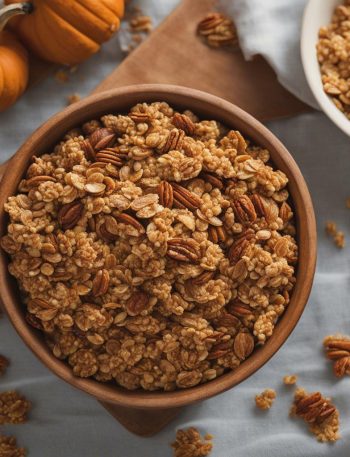

This Granola Clusters is the kind of recipe I keep for days when I want familiar food without making the kitchen feel like a project. I like recipes with a few honest signals: a clear smell when they are close, a texture I can test with a spoon or fingertip, and leftovers that still taste good the next day.
The ingredient list is straightforward once I write it in plain kitchen language: old-fashioned rolled oats, almond flour, salt, sliced almonds, coconut oil. I measure those pieces carefully, then use my eyes and nose for the final call. That combination is usually what keeps Granola Clusters from tasting either timid or overworked.
I also keep the equipment and heat the same. The pan cue I watch for is 13-inch. Small details like that make the difference between a tidy batch and one that cooks unevenly.
Why I keep coming back to this
- It uses familiar ingredients, but the finished Granola Clusters tastes like I paid attention.
- The timing is forgiving as long as I check texture instead of blindly walking away.
- I can prep most of the small pieces before the stove or oven really needs me.
- Leftovers behave well, which matters more to me than a fussy presentation.
- The recipe scales down nicely for a small table and still feels worth the effort.
- The recipe uses a 13-inch, and I stick with that size so the thickness stays right.
What you need (and what each one is doing)
- 3 cups old-fashioned rolled oats.
- 3/4 cup almond flour. This gives the loaf, cake, or pancake its structure, so I measure it instead of scooping loosely.
- 1/2 teaspoon salt.
- 3/4 cup sliced almonds.
- 1/3 cup coconut oil. Fat keeps the crumb tender and carries the flavor.
- 1/3 cup packed brown sugar.
- 1/3 cup pure maple syrup.
- 1 teaspoon pure vanilla extract.
How I make it
Step 1 — Preheat the oven
Preheat oven to 300°F (149°C). Line a 9×13-inch baking pan with parchment paper. Set aside.
Step 2 — Combine the ingredients
I mix the oats, almond flour, salt, and almonds together in a large bowl. Set aside.
Step 3 — Whisk together
I combine coconut oil, brown sugar, and maple syrup in a medium saucepan over medium heat. Whisk until sugar dissolves. It’s ok if there’s a layer of oil on top. Remove from heat, whisk in the vanilla, and pour over oat mixture. Stir until.
Step 4 — Pour and combine
I pour into prepared baking pan and, using a spatula, press mixture tightly into an even layer in the pan.
Step 5 — Bake and check the center
I bake for 40 minutes, rotating the pan every 10 minutes to ensure the granola “slab” bakes evenly. Remove the baking pan, but do not turn off the oven. Let the granola slab cool in the pan for 5–10 minutes. (The cooling is crucial!) Lift.
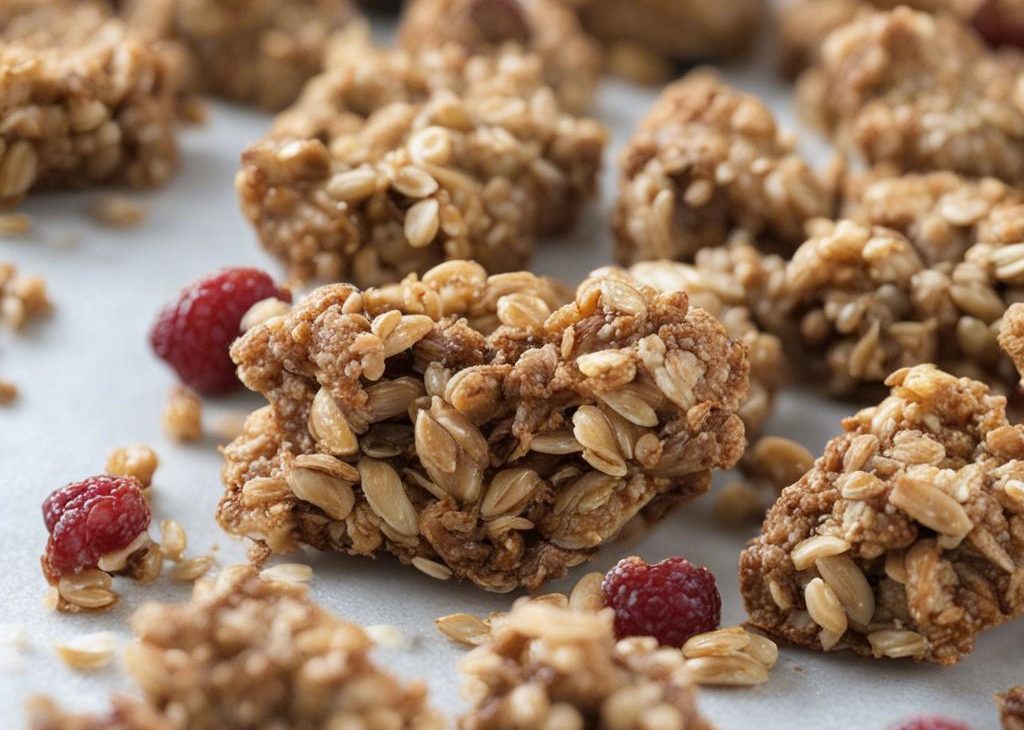
Step 6 — Cool completely
I remove clusters from the oven and cool completely. Clusters become crunchier the longer they cool.
Step 7 — Store leftovers
I cover and store the cooled clusters at room temperature for up to 1 week, or freeze for up to 3 months. Thaw at room temperature.
How I keep the texture honest
With Granola Clusters, I pay attention to how the mixture feels in the bowl and how it looks when it hits the pan or serving dish. That moment tells me whether it needs a little more time, a firmer press, or a gentler hand.
I try not to over-correct. Most home recipes need one small adjustment, not three big ones. A short rest, a clean knife, or a final sprinkle of herbs often does more than adding another ingredient.
Tips from my kitchen
- Measure the odd amounts. Some of these amounts look quirky, but I keep them because the texture depends on the ratio.
- Pause before serving. Even a short rest lets juices, crumbs, or sauce settle instead of running everywhere.
- Taste where it makes sense. For raw batters I taste the add-ins only; for sauces and dressings I season at the end.
- Use the visual cue. Time gets me close, but color, smell, and firmness tell me when the dish is actually done.
- Cut or portion with a clean edge. A wiped knife or scoop keeps the pieces looking cared for.
Variations I have actually tried
- Spicy: I add a small pinch of cayenne or red pepper flakes when the dish can handle heat.
- Herb-forward: I finish with fresh herbs so the flavor tastes fresher without changing the base recipe.
- Make-ahead: I prep the dry ingredients or chopped pieces the night before and cook as written.
- Brunch version: I serve smaller portions with fruit, salad, or eggs alongside.
- Dairy-light: When dairy is not central, I use the closest plain unsweetened substitute and keep the amount the same.
Storing and reheating
I let Granola Clusters cool or settle, then store it airtight. The first serving is good, but the second one usually tells me whether I seasoned carefully.
What I serve with it
I keep the sides simple for Granola Clusters: crisp vegetables, toasted bread, eggs, fruit, or whatever balances the richness.
My final check is simple: I take one small bite the way I plan to serve it. Warm food should taste rounded, cold food should taste a little brighter, and anything sliced should hold together without being stiff. That bite tells me whether I need a pinch of salt, a squeeze of citrus, or just a few more minutes of patience.
My make-ahead rhythm
I do not always cook Granola Clusters from start to finish in one stretch. If the recipe has chopped ingredients, I handle those first and keep them covered. If it has dry ingredients, I measure them into one bowl. If it has a sauce or topping, I make that early so the last few minutes feel calm instead of crowded.
Right before serving, I look for the one thing that makes it taste freshly made: a warm slice, a quick stir, a crisp edge, a cold glass, or a small spoonful of sauce. That little reset is often enough to make leftovers or prepped pieces feel intentional.
Frequently asked questions
Can I make Granola Clusters ahead?
Yes. I usually prep the measured ingredients first and finish the recipe close to serving time. If it is a baked or simmered dish, I cool it completely before covering so condensation does not make the top soggy.
What is the biggest mistake to avoid?
Rushing the texture check. I use the listed time as a guide, then look for the cues in the recipe: set center, softened vegetables, thickened sauce, or a clean slice.
Can I double the recipe?
Usually, yes, but I use two pans or a wider pot instead of making one extra-deep batch. A deeper dish changes the cooking time and can leave the center underdone.
Can I change the salt or sweetness?
I adjust in small steps. A little extra salt can wake up a savory dish, and a small reduction in sugar is usually fine, but large changes can affect browning and texture.
How do I know it is done?
I trust the visual cue more than the clock. The recipe should smell finished, look set or glossy in the right places, and hold its shape when I test a small portion.
If you make this Granola Clusters, I would love to hear what little adjustment made it yours.
Granola Clusters
Description
This granola clusters is written the way I make it at home: clear steps, honest texture cues, and practical notes for serving it well. I keep the listed amounts and timing intact while explaining what I watch for in the kitchen.
Ingredients You’ll Need
Instructions
- Preheat oven to 300°F (149°C). Line a 9×13-inch baking pan with parchment paper. Set aside.
- I mix the oats, almond flour, salt, and almonds together in a large bowl. Set aside.
- I combine coconut oil, brown sugar, and maple syrup in a medium saucepan over medium heat. Whisk until sugar dissolves. It’s ok if there’s a layer of oil on top. Remove from heat, whisk in the vanilla, and pour over oat mixture. Stir until.
- I pour into prepared baking pan and, using a spatula, press mixture tightly into an even layer in the pan.
- I bake for 40 minutes, rotating the pan every 10 minutes to ensure the granola “slab” bakes evenly. Remove the baking pan, but do not turn off the oven. Let the granola slab cool in the pan for 5–10 minutes. (The cooling is crucial!) Lift the.
- I remove clusters from the oven and cool completely. Clusters become crunchier the longer they cool.
- I cover and store the cooled clusters at room temperature for up to 1 week, or freeze for up to 3 months. Thaw at room temperature.
Note
Measure the odd amounts. Some of these amounts look quirky, but I keep them because the texture depends on the ratio.
Pause before serving. Even a short rest lets juices, crumbs, or sauce settle instead of running everywhere.
Taste where it makes sense. For raw batters I taste the add-ins only; for sauces and dressings I season at the end.
Use the visual cue. Time gets me close, but color, smell, and firmness tell me when the dish is actually done.
Frequently Asked Questions
Yes. I usually prep the measured ingredients first and finish the recipe close to serving time. If it is a baked or simmered dish, I cool it completely before covering so condensation does not make the top soggy.
Rushing the texture check. I use the listed time as a guide, then look for the cues in the recipe: set center, softened vegetables, thickened sauce, or a clean slice.
Usually, yes, but I use two pans or a wider pot instead of making one extra-deep batch. A deeper dish changes the cooking time and can leave the center underdone.
I adjust in small steps. A little extra salt can wake up a savory dish, and a small reduction in sugar is usually fine, but large changes can affect browning and texture.
I trust the visual cue more than the clock. The recipe should smell finished, look set or glossy in the right places, and hold its shape when I test a small portion.
You may also like...