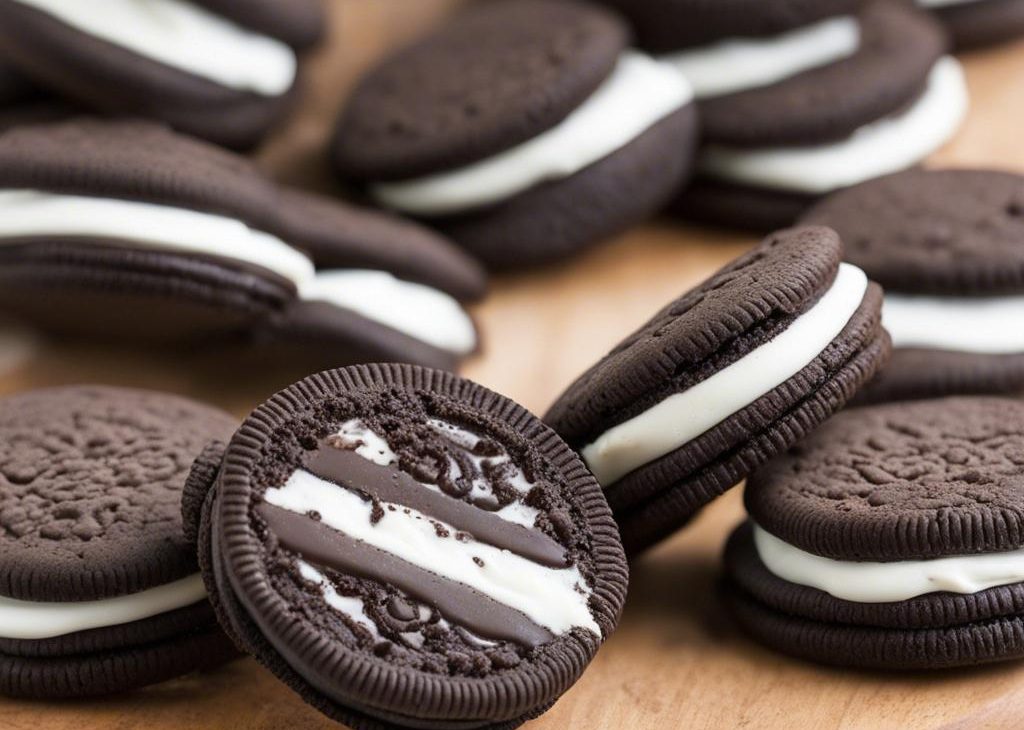

Homemade Oreos taste just like the classic packaged cookies, but with a homemade touch. Dark cocoa cookies are sandwiched with sweet cream filling for a nostalgic taste of Americana. With only 10 minutes of dough-chilling time and no rolling pin required, making a batch of these iconic sandwich cookies from scratch is quicker and easier than you think!
. The only change I have made over the years is reducing the chill time, so they’re even quicker now.
Arguably the most recognizable cookie on the planet, there’s something about Oreo cookies that brings out the kid in everyone. From the classic black-and-white sandwich cookie in the blue package, to the dozens of flavor variations available now, Oreos have securely held their place of honor on American grocery store shelves for over a century. What could be better?
A fresh-baked homemade version, that’s what. 🙂
These Homemade Oreos Feature:
- Soft, buttery, dense chocolate cookies
- Sweet, thick cream filling
- The same comfortingly familiar flavor as the original
- A demand for a glass of milk
Are They an Exact Copycat? No.
While the flavor is all there, my homemade version is a touch softer than the store-bought kind. Don’t think of whoopie pies or anything; they’re much crunchier and crispier than cake-style cookies. Today’s sandwich cookies still have a nice crunch on the edges. And if you leave them lightly covered overnight, they develop a crunchier crust.
They also have a fresher-tasting flavor, something you can really only achieve with a homemade dough and cream filling. The cream filling tastes extremely similar to the packaged cookies. It’s also nice and thick, so it doesn’t really spill out the sides when you bite into the cookie.
Make the Cookies First
To shape them, take a small piece of dough, just about 2 teaspoons (13–15g each), and roll it into a ball. Place the balls of dough onto a lined baking sheet. Flatten gently with the bottom of a measuring cup. Chill the shaped cookies on the baking sheet for 10 minutes in the refrigerator before baking as you preheat the oven. The cookies should spread out nicely into little round discs. Like double chocolate chip cookies, but crispier and flatter.
Before baking:
After baking:
Use Dutch-Process Cocoa Powder
Today’s cookies, while made with baking soda (base), also contain a little brown sugar (acid) to help the cookies slightly rise and then fall as they cool. If you made these with natural cocoa (acid), the cookies would rise more, making them a little too puffy. You would also lose some of the flavor, and the cookies would be lighter in color.
You could also use something called black cocoa, which I have learned over the years, is heavily-Dutched/extra-alkalized cocoa. I really like this brand, and I purchase right there on Amazon.
Now, the Thick Filling:
While the cookies are cooling, make the filling. Did you know that Oreo creme filling is spelled that way because there’s no dairy in the filling, so they can’t call it “cream”? But in this homemade version, we’re using a mix of butter and shortening. Which I think makes this filling, well, the crème de la crème of creme fillings!
Why shortening? Using half butter and half shortening in the filling creates a flavorful cream that’s sturdy, thick, and not overly rich. It’s more comparable to the store-bought filling. If you prefer to skip the shortening, use all butter. The filling won’t taste as similar to the packaged kind.
I use a round piping tip to pipe the filling. You could also just spread it on with a knife or icing spatula.
P.S. Do you like Nutter Butters? Try my peanut butter cookie sandwiches next, for another homemade version of a familiar packaged cookie.
Homemade Oreos Recipe
Description
Originally published on my website in 2013, my homemade version of store-bought Oreo cookies feature two dark cocoa cookies with a sweet cream filling. With only 10 minutes of dough-chilling time and no rolling pin required, making a batch of these iconic sandwich cookies from scratch is quicker and easier than you think!
Ingredients You’ll Need
Instructions
- Whisk the flour, cocoa powder, baking soda, and salt together in a large bowl. Set aside.
- Using a handheld or stand mixer fitted with a paddle attachment, beat the butter, granulated sugar, and brown sugar on medium-high speed until combined and creamed, about 3 minutes. Scrape down the sides and the bottom of the bowl as needed. Beat in the egg and vanilla extract. Pour the dry ingredients into the wet ingredients and beat on low speed until a thick dough forms.
- Line large baking sheets with parchment paper or silicone baking mats. Roll the dough into small balls, 2 teaspoons or 13–15g of dough each. Place the cookie dough balls on the lined baking sheets, and feel free to squeeze as many as you can onto one (since you’re refrigerating these and may not have space in your refrigerator for multiple baking sheets). Using the flat bottom of a measuring cup or drinking cup, flatten the balls into discs that are about 1.5 inches in diameter (doesn’t need to be exact). Place the baking sheet(s) in the refrigerator for just 10 minutes to help set the cookies’ shape.
- Meanwhile, preheat oven to 350°F (177°C).
- Space the cold flattened cookies out to be 3 inches apart on the baking sheets. There will be a couple batches of these cookies, so keep the shaped cookies in the refrigerator while the first batches bake. Bake for 8–10 minutes, or until the edges appear set and the tops are slightly cracking. Remove from the oven and allow to cool for at least 5 minutes on the baking sheets before transferring to a wire rack to cool completely.
- In a small bowl using a handheld or stand mixer with a paddle attachment, beat the butter and shortening together on high speed until totally combined and creamy, about 2 minutes. Add the confectioners’ sugar and vanilla. Beat on low speed for 1 minute and then switch to high and beat for 1–2 more minutes until creamy and combined. The filling is very thick.
- Spread or pipe the cream filling on the bottom sides of half of the cookies. I usually use Wilton piping tip #12. Sandwich the remaining unfrosted cookies on top of the cream filling, pressing down gently.
- Cookies stay fresh covered at room temperature for up to 1 week.
Frequently Asked Questions
Absolutely. To make these homemade Oreos "Double-Stuf" style, simply double the filling and pipe/spread extra on the cookies. Keep in mind that the more filling you use, the more it will squish out the sides when you take that first bite.
Yes! Add in 1/4 teaspoon of your favorite flavor extract, and/or add a couple drops of gel food coloring if you wish. Peppermint extract + green food coloring = mint Oreos!
You may also like...