
I first put Mocha Nutella cupcakes on my list because I wanted a bake that gave me clear signals instead of vague promises. I pay attention to the way the batter or dough moves, how the edges set, and whether the aroma changes from raw flour to something warm and finished.
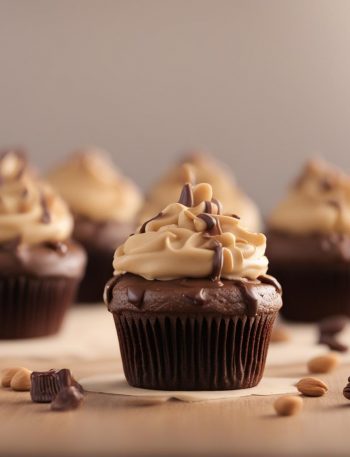
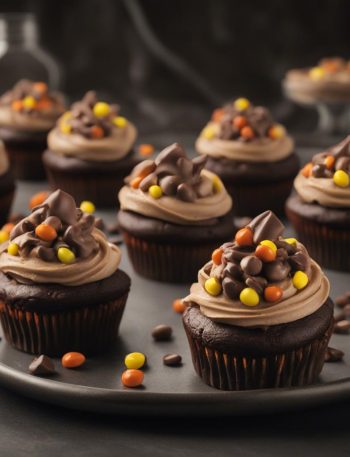
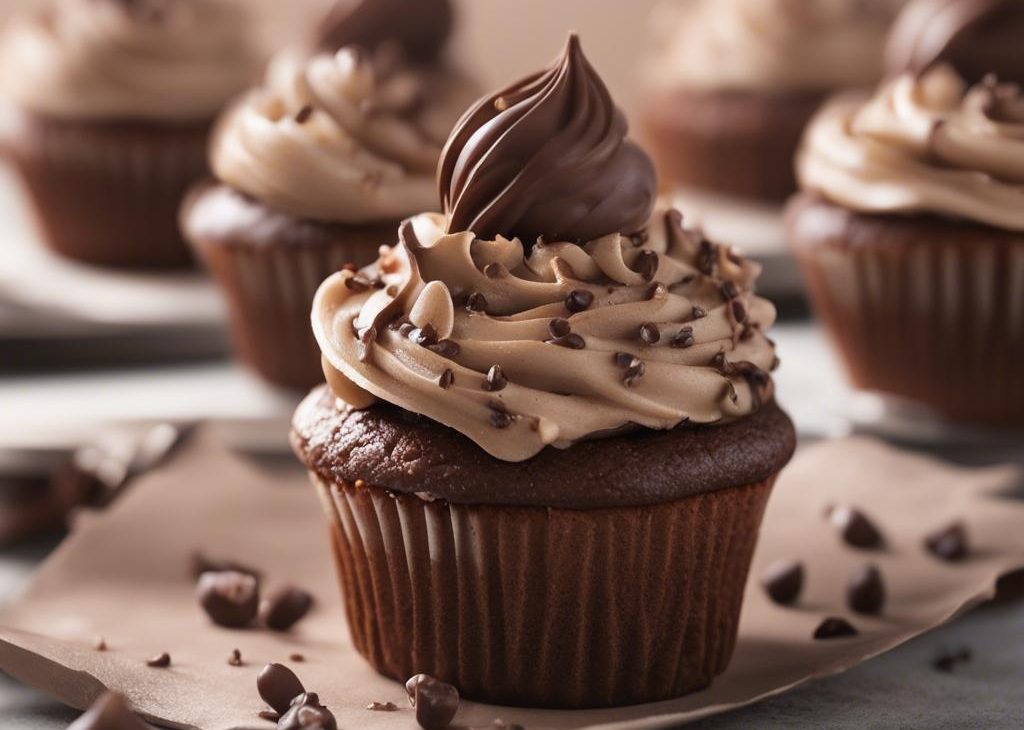
This is my working version of Mocha Nutella cupcakes.
The biggest thing I watch for is texture. A recipe can list minutes, but my oven and pans do not always behave the same way twice. I use the time as a guide and the visual cues as the final decision.
Why I keep coming back to this
- The flavor is clear and not fussy; I can taste the main ingredient instead of just sugar.
- The steps give me useful stopping points, which matters when I am baking around a messy counter.
- The texture holds after cooling, so I do not feel rushed to serve it immediately.
- It handles small swaps well as long as I respect the ratios and do not overmix.
- Leftovers still feel worth eating the next day, which is my real test for a bake.
What you need and what each ingredient is doing
- 1 and all-purpose flour (156g). Structure matters here.
- 2 teaspoons baking powder. It keeps the flavor balanced.
- 1/4 teaspoon salt. It sharpens the flavor.
- 6 Tablespoons unsalted butter, softened (85g). It carries flavor.
- 3/4 cup granulated sugar (150g). It sweetens and browns.
- 3 large egg whites, room temperature. It binds the mixture.
- 1 teaspoon pure vanilla extract. It keeps the flavor balanced.
- 6 Tablespoons sour cream (85g). It adds moisture and richness.
- 3 Tablespoons espresso powder (15g). It keeps the flavor balanced.
- 2 Tablespoons hot water (30ml). It keeps the flavor balanced.
- 6 Tablespoons whole milk (90ml). It adds moisture and richness.
- 1 cup unsalted butter, softened (16 Tbsp; 226g). It carries flavor.
- 4 cups confectioners sugar (460g). It sweetens and browns.
- 3/4 cup Nutella (225g). It brings the deep flavor.
- 1/3 cup heavy cream (80ml). It adds moisture and richness.
- 1 teaspoon pure vanilla extract. It keeps the flavor balanced.
- salt. It sharpens the flavor.
- chocolate sprinkles and raspberries. It brings the deep flavor.
How I make it
Step 1 — Preheat the oven
Preheat the oven to 350°F (177°C). Line a 12-count muffin pan with cupcake liners. Line a second pan with 2 liners—this recipe makes about 14 cupcakes. Set aside.
Step 2 — Whisk the dry ingredients
Whisk the flour, baking powder, and salt together. Set aside.
Step 3 — Beat until smooth
Using a handheld or stand mixer fitted with a paddle attachment, beat the butter on high speed until smooth and creamy—about 1 minute. Add the granulated sugar and beat on high speed for 2 minutes until creamed together. Scrape down the sides and up the bottom of the bowl with a silicone spatula as needed. Add the egg whites and vanilla extract. Beat on high speed until combined, then beat in the sour cream. Scrape down the sides and up the bottom of the bowl as needed so everything is incorporated.
Step 4 — Stir the espresso powder
Stir the espresso powder and hot water together until smooth, then stir this into the milk. Set aside for a second.
Step 5 — Whisk together
With the mixer running on low speed, add the dry ingredients until just incorporated. With the mixer still running on low, slowly pour in the espresso/milk mixture until combined. Do not overmix. You may need to whisk it all by hand to make sure there are no lumps at the bottom of the bowl. The batter will be on the thin side.
Step 6 — Bake
Pour/spoon the batter into the liners—fill only halfway with batter to avoid spilling over the sides. Bake for 18-20 minutes, or until a toothpick inserted in the center comes out clean. Allow to cool completely before frosting.
Step 7 — Cool completely
Following the remaining shaping, baking, cooling, decorating, or serving cues in order. I do not rush this last part because the final texture usually depends on cooling and resting as much as cooking.
What I watch for while it cooks
I look for a change in smell before I trust the timer. Butter smells nutty, spices open up, chocolate turns glossy, and the raw flour smell fades. Those little signs tell me I am close.
If the surface is browning before the center is ready, I lower the heat slightly or tent with foil when that makes sense for the dish. If nothing is happening at the listed time, I give it a few more minutes and check again instead of cranking the heat.
Tips from my kitchen
- Room temperature matters. I set out butter, eggs, and dairy early when the recipe calls for it; cold ingredients can make a lumpy batter.
- I stop mixing early. Once the flour disappears, I put the spatula down unless the recipe specifically needs more beating.
- I trust the center cue. Edges set first, but the middle tells me whether the bake needs a few more minutes.
- I cool before cutting. Warm bakes smell better, but clean slices happen after the structure has had time to settle.
Variations I have actually tried
- Chocolate note: I add a small handful of chopped chocolate or mini chips when I want a deeper bite.
- Nutty version: Toasted pecans, walnuts, almonds, or hazelnuts work if they already fit the flavor.
- Citrus lift: A little orange or lemon zest brightens rich batters without changing the structure.
- Less sweet finish: I skip extra drizzle or heavy decoration and let the base recipe stand on its own.
- Holiday batch: I add warm spice or colored sprinkles, then keep the baking time exactly the same.
How I store and reheat it
I let it cool completely before covering because trapped steam softens the top. Most leftovers keep best in the refrigerator for several days, and individual portions reheat more evenly than a whole pan.
I label leftovers when I freeze them because future me never remembers what is in the foil packet. For anything crisp, I reheat uncovered for the last few minutes so steam can escape.
What I serve with it
I serve it with coffee, tea, cold milk, or a small scoop of plain yogurt when the bake is sweet. If I am packing it up, I wait until every piece is fully cool so the wrapping does not trap steam.
Frequently asked questions
Can I make Mocha Nutella cupcakes ahead?
Yes. I usually bake it earlier in the day or the night before, then store it tightly covered once cool. For the cleanest texture, I wait to add delicate toppings until serving.
Can I freeze it?
Most baked pieces freeze well once fully cool. I wrap portions tightly, freeze them flat, and thaw in the refrigerator or at room temperature so condensation does not soften the outside.
Why did the texture turn dry?
In my kitchen that usually means too much flour, overbaking, or cutting while very hot. I measure carefully and start checking a few minutes before the listed time.
Can I reduce the sugar?
I would only reduce it a little. Sugar affects moisture, browning, and structure, not just sweetness, so big cuts can change the result more than expected.
What is the best way to serve it?
I like it once the center has settled but the flavor is still fresh. For frosted or filled bakes, a short chill often gives the neatest slices.
If you make Mocha Nutella cupcakes, I would love to hear what you changed, what you served with it, and whether the timing cues matched your kitchen.
Mocha Nutella cupcakes
Description
Mocha Nutella cupcakes with first-person notes, clear timing cues, practical ingredient guidance, and storage advice from my kitchen. I kept the source quantities intact and rewrote the method so it feels usable at the counter.
Ingredients You’ll Need
Instructions
- Preheat the oven to 350°F (177°C). Line a 12-count muffin pan with cupcake liners. Line a second pan with 2 liners—this recipe makes about 14 cupcakes. Set aside.
- Whisk the flour, baking powder, and salt together. Set aside.
- Using a handheld or stand mixer fitted with a paddle attachment, beat the butter on high speed until smooth and creamy—about 1 minute. Add the granulated sugar and beat on high speed for 2 minutes until creamed together. Scrape down the sides and up the bottom of the bowl with a silicone spatula as needed. Add the egg whites and vanilla extract. Beat on high speed until combined, then beat in the sour cream. Scrape down the sides and up the bottom of the bowl as needed so everything is incorporated.
- Stir the espresso powder and hot water together until smooth, then stir this into the milk. Set aside for a second.
- With the mixer running on low speed, add the dry ingredients until just incorporated. With the mixer still running on low, slowly pour in the espresso/milk mixture until combined. Do not overmix. You may need to whisk it all by hand to make sure there are no lumps at the bottom of the bowl. The batter will be on the thin side.
- Pour/spoon the batter into the liners—fill only halfway with batter to avoid spilling over the sides. Bake for 18-20 minutes, or until a toothpick inserted in the center comes out clean. Allow to cool completely before frosting.
- In a large bowl using a handheld or stand mixer fitted with a paddle attachment, beat the butter on medium speed until smooth, about 2 minutes. Stop the mixer and add confectioners' sugar, Nutella, heavy cream, and vanilla extract. Beat on low speed for 30 seconds, then increase to medium-high speed and beat for 2 full minutes. Add up to 1/2 cup more confectioners' sugar if frosting is too thin or another Tablespoon of cream if frosting is too thick. Add a pinch of salt if frosting is too sweet. (I always add 1/8 teaspoon salt.).
- Frost and decorate cooled cupcakes. (Another favorite is this Wilton #12 round tip.).
- Serve immediately. Store leftover cupcakes in the refrigerator for up to 5 days. I recommend a cupcake carrier for storing and transporting decorated cupcakes.
Nutrition Facts
Servings 12
- Amount Per Serving
- Calories 446kcal
- % Daily Value *
- Total Fat 10g16%
- Saturated Fat 6g30%
- Trans Fat 0.4g
- Cholesterol 27mg9%
- Sodium 140mg6%
- Potassium 43mg2%
- Total Carbohydrate 90g30%
- Sugars 80g
- Protein 2g4%
- Calcium 73 mg
- Iron 0.7 mg
* Percent Daily Values are based on a 2,000 calorie diet. Your daily value may be higher or lower depending on your calorie needs.
Note
Room temperature matters. I set out butter, eggs, and dairy early when the recipe calls for it; cold ingredients can make a lumpy batter.
I stop mixing early. Once the flour disappears, I put the spatula down unless the recipe specifically needs more beating.
I trust the center cue. Edges set first, but the middle tells me whether the bake needs a few more minutes.
I cool before cutting. Warm bakes smell better, but clean slices happen after the structure has had time to settle.
Frequently Asked Questions
Yes. I usually bake it earlier in the day or the night before, then store it tightly covered once cool. For the cleanest texture, I wait to add delicate toppings until serving.
Most baked pieces freeze well once fully cool. I wrap portions tightly, freeze them flat, and thaw in the refrigerator or at room temperature so condensation does not soften the outside.
In my kitchen that usually means too much flour, overbaking, or cutting while very hot. I measure carefully and start checking a few minutes before the listed time.
I would only reduce it a little. Sugar affects moisture, browning, and structure, not just sweetness, so big cuts can change the result more than expected.
I like it once the center has settled but the flavor is still fresh. For frosted or filled bakes, a short chill often gives the neatest slices.
You may also like...