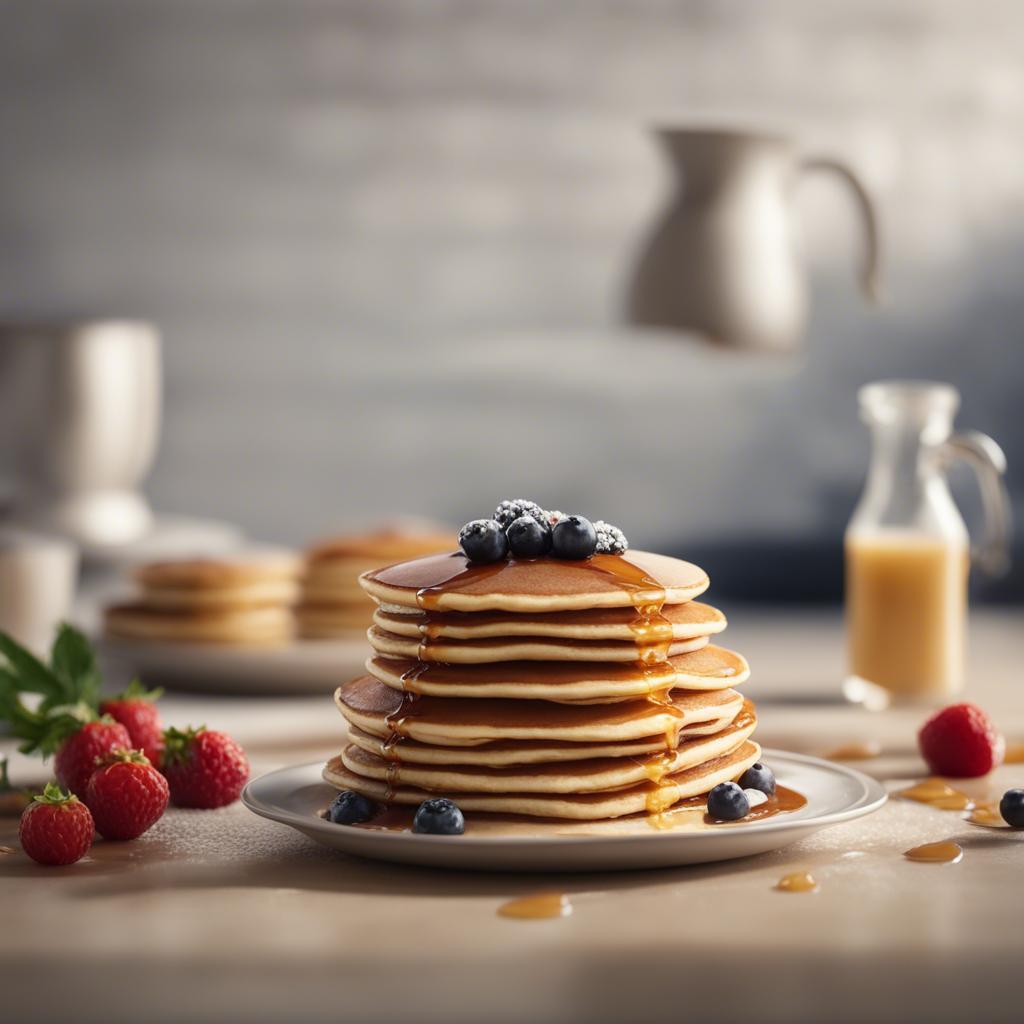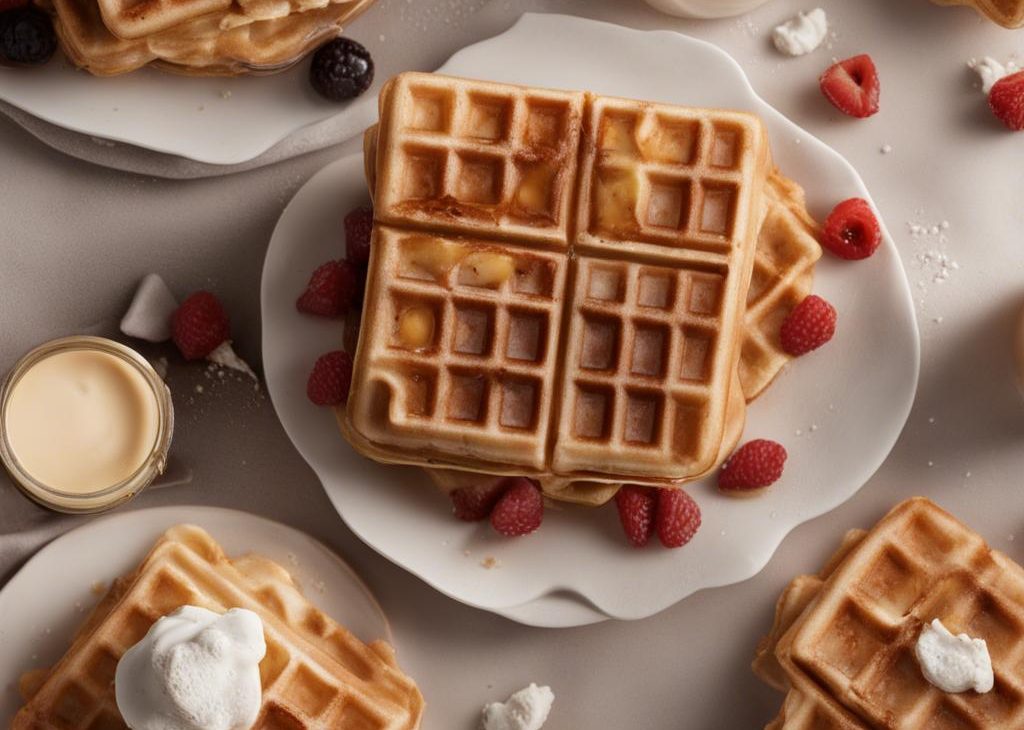

I first put My favorite buttermilk waffles on my list because I wanted a bake that gave me clear signals instead of vague promises. I pay attention to the way the batter or dough moves, how the edges set, and whether the aroma changes from raw flour to something warm and finished.
This is my working version of My favorite buttermilk waffles.
The biggest thing I watch for is texture. A recipe can list minutes, but my oven and pans do not always behave the same way twice. I use the time as a guide and the visual cues as the final decision.
Why I keep coming back to this
- The ingredient list is direct, so the finished dish tastes like itself.
- Most of the work happens before the pan gets busy.
- I get clear visual cues instead of guessing by the clock alone.
- It is flexible enough for a weeknight but still feels considered.
- Leftovers reheat cleanly when I store them with a little care.
What you need and what each ingredient is doing
- 1 and all-purpose flour (219g).Structure matters here.
- 1 and baking powder.It keeps the flavor balanced.
- 1 teaspoon baking soda.It keeps the flavor balanced.
- 1/2 teaspoon salt.It sharpens the flavor.
- 3 large eggs, separated.It binds the mixture.
- 1/2 cup unsalted butter, melted (8 Tbsp; 113g).It carries flavor.
- 1/3 cup granulated sugar (67g).It sweetens and browns.
- 1 and buttermilk (420ml).It carries flavor.
- 1 teaspoon pure vanilla extract.It keeps the flavor balanced.
- butter and maple syrup for topping.It carries flavor.
How I make it
Step 1 — I follow this cue: preheat waffle
I follow this cue: preheat waffle maker on medium-high heat. Preheat oven to 200°F (93°C). Place a wire rack on a baking sheet; set aside.
Step 2 — I follow this cue: in a
I follow this cue: in a large bowl preferably with a pour spout, whisk the flour, baking powder, baking soda, and salt together. Set aside.
Step 3 — I follow this cue: in another
I follow this cue: in another large bowl, whisk the egg yolks, melted butter, and sugar together. Whisk in the buttermilk and vanilla until combined. Pour the wet ingredients into the dry ingredients and then whisk gently until combined. Do not over-mix. Some small lumps are OK.
Step 4 — I follow this cue: with a
I follow this cue: with a handheld or stand mixer fitted with a whisk attachment, whip the egg whites on high speed until fluffy soft peaks form, about 3 minutes. With a spatula, gently fold the egg whites into the batter.
Step 5 — Prep the pan and oven
I follow this cue: grease the preheated waffle maker (I use nonstick spray). Pour about 1/3 cup of the batter into each well of the waffle maker (or less if the waffle maker is smaller) and close the lid. Cook the waffles until crisp, about 4-5 minutes. (Follow the cooking instructions for the waffle maker.) Transfer the cooked waffles to the wire rack and keep warm in the preheated oven as you cook the rest. Repeat to cook the remaining batter.
Step 6 — Cool, serve, and store
I follow this cue: serve the waffles immediately with butter and maple syrup, or the choice of toppings.
What I watch for while it cooks
I look for a change in smell before I trust the timer. Butter smells nutty, spices open up, chocolate turns glossy, and the raw flour smell fades. Those little signs tell me I am close.
If the surface is browning before the center is ready, I lower the heat slightly or tent with foil when that makes sense for the dish. If nothing is happening at the listed time, I give it a few more minutes and check again instead of cranking the heat.
Tips from my kitchen
- I prep first.Once the heat is on, I do not want to stop and mince garlic or measure sauce.
- I taste before serving.Salt, acid, and heat are easiest to adjust at the end.
- I watch the pan.A recipe clock is useful, but color, aroma, and texture tell me more.
- I rest when needed.A few quiet minutes can keep meat juicy, sauces smooth, and vegetables from steaming out.
Variations I have actually tried
- Brighter finish:I add lemon, lime, vinegar, or fresh herbs right before serving.
- More heat:I use a small pinch of chile or extra black pepper rather than overwhelming the base.
- Richer version:I finish with butter, cheese, cream, or olive oil when the dish can handle it.
- Lighter plate:I serve it with greens, rice, or roasted vegetables instead of adding more sauce.
- Meal-prep style:I keep the components separate and combine them after reheating.
How I store and reheat it
I cool leftovers quickly, cover them well, and refrigerate them. When reheating, I use gentle heat and add a splash of water, broth, milk, or sauce if the dish looks tight.
I label leftovers when I freeze them because future me never remembers what is in the foil packet. For anything crisp, I reheat uncovered for the last few minutes so steam can escape.
What I serve with it
I serve it with something simple on the side so the main flavor stays clear. Rice, greens, tortillas, bread, or a crisp salad usually does the job without crowding the plate.
Small things that make a difference
I keep one clean towel nearby, clear a landing spot before the pan comes out, and read the next step before I start the current one. Those habits sound small, but they keep me from overcooking something while I hunt for a rack, bowl, or serving spoon.
I also taste or check texture before I call the recipe finished. A pinch of salt, a little more acid, a few extra minutes of cooling, or a short rest can be the difference between food that is fine and food I want to make again.
When a recipe is simple, I pay more attention rather than less. There are fewer places to hide a scorched edge, watery sauce, under-seasoned bite, or gummy center. I set out the serving dish early, keep the heat moderate, and give myself room to adjust.
I write these little notes because they are the parts I forget when I am tired. The ingredient list tells me what to buy, but the rhythm tells me how to cook without feeling chased by the timer.
Frequently asked questions
Can I make My favorite buttermilk waffles ahead?
Yes, but I separate any crisp, fresh, or saucy parts when possible. That keeps the texture closer to fresh when I reheat or assemble.
Can I double the recipe?
Usually yes. I use a wider pan or cook in batches so the food browns instead of steaming, and I season gradually near the end.
What if I do not have every ingredient?
I swap within the same family: another herb for an herb, another acid for vinegar or citrus, and a similar dairy or oil for richness. I avoid changing the main ingredient.
How do I know it is done?
I look for the cue in the instructions first: bubbling sauce, tender vegetables, flaky fish, or cooked-through chicken. The clock gets me close, but the cue finishes the job.
How should I reheat leftovers?
I reheat gently. A covered skillet, low oven, or short microwave bursts keep the dish from drying out, and I add a spoonful of water or sauce if it needs moisture.
If you make My favorite buttermilk waffles, I would love to hear what you changed, what you served with it, and whether the timing cues matched your kitchen.
My favorite buttermilk waffles
Description
My favorite buttermilk waffles with first-person notes, clear timing cues, practical ingredient guidance, and storage advice from my kitchen. I kept the source quantities intact and rewrote the method so it feels usable at the counter.
Ingredients You’ll Need
Instructions
- I follow this cue: preheat waffle maker on medium-high heat. Preheat oven to 200°F (93°C). Place a wire rack on a baking sheet; set aside.
- I follow this cue: in a large bowl preferably with a pour spout, whisk the flour, baking powder, baking soda, and salt together. Set aside.
- I follow this cue: in another large bowl, whisk the egg yolks, melted butter, and sugar together. Whisk in the buttermilk and vanilla until combined. Pour the wet ingredients into the dry ingredients and then whisk gently until combined. Do not over-mix. Some small lumps are OK.
- I follow this cue: with a handheld or stand mixer fitted with a whisk attachment, whip the egg whites on high speed until fluffy soft peaks form, about 3 minutes. With a spatula, gently fold the egg whites into the batter.
- I follow this cue: grease the preheated waffle maker (I use nonstick spray). Pour about 1/3 cup of the batter into each well of the waffle maker (or less if the waffle maker is smaller) and close the lid. Cook the waffles until crisp, about 4-5 minutes. (Follow the cooking instructions for the waffle maker.) Transfer the cooked waffles to the wire rack and keep warm in the preheated oven as you cook the rest. Repeat to cook the remaining batter.
- I follow this cue: serve the waffles immediately with butter and maple syrup, or the choice of toppings.
Nutrition Facts
Servings 10
- Amount Per Serving
- Calories 108kcal
- % Daily Value *
- Total Fat 9g14%
- Saturated Fat 6g30%
- Trans Fat 0.4g
- Cholesterol 24mg8%
- Sodium 232mg10%
- Potassium 4mg1%
- Total Carbohydrate 7g3%
- Sugars 7g
- Calcium 3 mg
- Iron 0.0 mg
* Percent Daily Values are based on a 2,000 calorie diet. Your daily value may be higher or lower depending on your calorie needs.
Note
I prep first. Once the heat is on, I do not want to stop and mince garlic or measure sauce.
I taste before serving. Salt, acid, and heat are easiest to adjust at the end.
I watch the pan. A recipe clock is useful, but color, aroma, and texture tell me more.
I rest when needed. A few quiet minutes can keep meat juicy, sauces smooth, and vegetables from steaming out.
Frequently Asked Questions
Yes, but I separate any crisp, fresh, or saucy parts when possible. That keeps the texture closer to fresh when I reheat or assemble.
Usually yes. I use a wider pan or cook in batches so the food browns instead of steaming, and I season gradually near the end.
I swap within the same family: another herb for an herb, another acid for vinegar or citrus, and a similar dairy or oil for richness. I avoid changing the main ingredient.
I look for the cue in the instructions first: bubbling sauce, tender vegetables, flaky fish, or cooked-through chicken. The clock gets me close, but the cue finishes the job.
I reheat gently. A covered skillet, low oven, or short microwave bursts keep the dish from drying out, and I add a spoonful of water or sauce if it needs moisture.
You may also like...