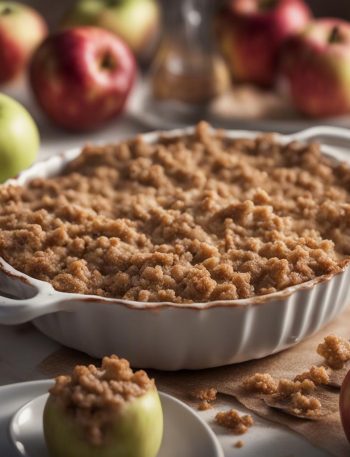

Pumpkin Slab Pie is one of those recipes I like to make when I want something familiar but not careless. I want the flavor to be clear, the texture to make sense, and the instructions to leave room for the small judgment calls that happen in a real kitchen.
I have learned to treat Pumpkin Slab Pie as a recipe of cues, not just minutes. The timer matters, but the better signs are the smell, the way the edges look, the thickness of the mixture, and whether the center has settled.
The version below keeps the original measurements intact and adds the notes I wish I had beside me the first time: where I slow down, what I watch, and how I store the leftovers without losing the best texture.
Why I keep coming back to this
- I can make it without a complicated setup, which matters on a normal week.
- The main flavors – all-purpose flour, granulated sugar, cold unsalted butter, cubed – come through clearly instead of getting buried.
- The method gives me clear stopping points, so I am not guessing the whole time.
- It works for sharing, but I also like it as a practical make-ahead recipe.
- The leftovers hold up better than I expected when stored the right way.
- Small changes are easy once the base recipe is working.
What you need and what each ingredient is doing
- 4 cups all-purpose flour. This gives the recipe its structure; I spoon and level it so the batch does not turn heavy. 500g
- 1 1/2 teaspoons salt.
- 1 teaspoon granulated sugar.
- 1 3/4 cups cold unsalted butter, cubed. Butter brings richness and helps with browning, so I soften or melt it exactly as the method asks. 396g
- 3/4 cup ice water. 180ml
- 1 large egg wash. 1 large egg beaten with 1 Tablespoon water or milk
- 2 15-ounce cans pumpkin puree. Pumpkin adds moisture and earthiness, and I watch the batter because it can soften baked goods quickly. 15 ounce
- 2 cups packed brown sugar. 400g
- 4 large large eggs.
- 2 cups heavy cream. 480ml
- 1/4 cup pure maple syrup. 60ml
- 1 teaspoon pure vanilla extract.
- 2 Tablespoons cornstarch.
- 2 teaspoons ground cinnamon.
- 3/4 teaspoon ground ginger.
- 1/2 teaspoon ground nutmeg.
- 1/2 teaspoon salt.
- 1/8 teaspoon freshly ground black pepper.
- as needed whipped cream.
How I make it
Step 1 — Mix the flour salt
I start here because the rest of the recipe moves better when this part is organized: Mix the flour, salt, and sugar together in a large bowl. Add the butter. Using a pastry cutter or two forks, cut the butter into the mixture until it resembles coarse meal (pea-sized bits with a few larger bits of fat is OK). A pastry cutter makes this step very easy and quick. Drizzle the cold water in, 1 Tablespoon (15ml) at a time.
Step 2 — Whisk all of the filling
For this stage, I focus on even texture rather than rushing: Whisk all of the filling ingredients together in a large bowl. It will be a little thick. Cover and refrigerate until you need it; or refrigerate up to 3 days.
Step 3 — Preheat oven to 375the oven
This is the point where I slow down and watch the visual cues: Preheat oven to 375°F (190°C).
Step 4 — Remove larger disc of pie
I keep the tools close and work steadily through this part: Remove larger disc of pie dough from the refrigerator. Keep the other in the refrigerator as you work. On a lightly floured work surface, roll the dough out into (roughly) an 18×13-inch rectangle. Make sure to turn the dough about a quarter turn after every few rolls. Carefully place the dough into a 10×15-inch jelly roll pan; there will be overhang on the sides.
Step 5 — Bake
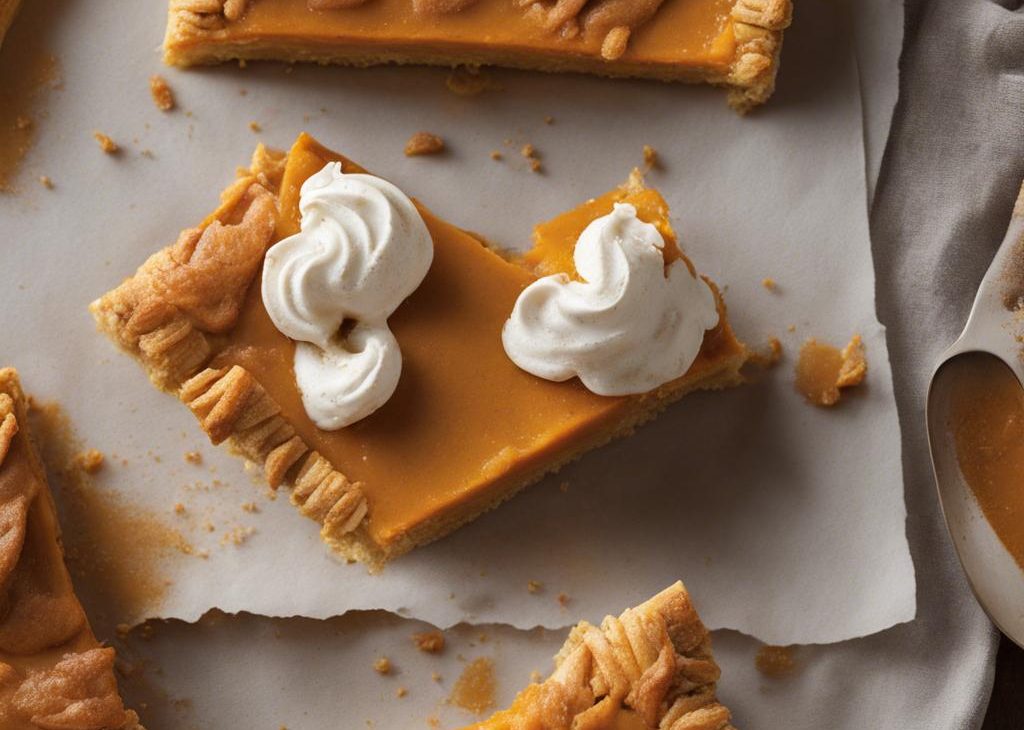
At this stage, I check the edges, aroma, and texture before moving on: Spread filling evenly into the crust. Bake for 35-45 minutes or until the filling is only slightly jiggly in the very center. Remove from the oven, set on a wire rack, and allow to cool completely.
Step 6 — As the pie cools roll
I finish the main work here and avoid fussing with it more than necessary: As the pie cools, roll out remaining dough. Roll out into any shape you really want (doesn’t matter) and 1/8 inch thickness. Using leaf cookie cutters, cut into shapes. Brush each lightly with egg wash. Cut leaf veins into leaves using a sharp knife or toothpick, if desired. Place onto a parchment paper or silicone baking mat-lined baking sheet and bake at 350°F (177°C).
Tips from my kitchen
- Measure first. I set out the ingredients for Pumpkin Slab Pie before I turn on heat or preheat the oven.
- Use the visual cue. Timers help, but I trust browning, bubbling, thickening, or set centers more than the clock alone.
- Do not rush cooling. Warm food is fragile; I give it a short rest so slices, scoops, or spoonfuls hold together better.
- Season at the end. For sauces, soups, and fillings, I taste once more after resting because salt and spice settle in.
Variations I have actually tried
- Extra spice. I add a pinch more cinnamon and ginger when the pumpkin tastes mild out of the can.
- A nut-free direction. I leave out nuts or seeds and use extra fruit, cereal, or chocolate where the texture still needs something.
- A brighter finish. I add lemon or lime zest when the dish tastes rich and needs a clean edge.
- A less-sweet batch. I reduce the garnish or drizzle first, because changing the main sugar can change the structure.
- A make-ahead version. I prep the dry ingredients or filling components separately, then assemble when I am ready to cook.
How I plan the timing
I read through the full method before I start Pumpkin Slab Pie, especially if chilling, cooling, or resting is tucked into the instructions. That small habit keeps me from promising food at one time and serving it much later.
If I am making this for guests, I handle the measuring and chopping early. Then the active cooking feels calm, and I can pay attention to the part that matters most: pulling it off the heat or out of the oven at the right moment.
What I serve with it
I usually keep the sides simple so Pumpkin Slab Pie stays the main thing. For sweet recipes, I like coffee, tea, fruit, or something salty nearby. For savory recipes, I add a crisp salad, warm tortillas, chips, rice, or lemon wedges depending on the direction of the dish.
Storing and reheating
I let Pumpkin Slab Pie cool before I cover it, unless the recipe is a drink or a sauce that needs chilling right away. Trapped steam can make crisp edges soft, and uncovered refrigeration can dry out the surface.
For reheating, I use gentle heat and stop as soon as it is warm. Baked goods do well with a short oven refresh, creamy sauces need low heat and stirring, and rice or soup usually wants a splash of liquid to loosen back up.
Frequently asked questions
Can I make Pumpkin Slab Pie ahead?
Yes. I usually prepare the parts that hold well, then finish or reheat close to serving. The texture is best when I store it tightly covered and keep garnishes separate until the end.
Can I freeze it?
For baked goods, I freeze portions once fully cool. For sauces and drinks, I prefer the refrigerator because thawing can change the texture. If I do freeze it, I thaw overnight in the fridge.
What is the biggest mistake to avoid?
Rushing the texture cue. I look for the specific sign in the method – a set center, smooth sauce, tender seafood, or fragrant edges – before I call it done.
Can I change the sweetness?
A little, yes. I adjust toppings, drizzles, or garnishes first. When sugar is part of the batter or candy base, I keep the listed amount because it affects structure.
How do I keep leftovers from drying out?
I cool them fully, cover tightly, and reheat gently. A splash of milk, broth, or water helps when the recipe is creamy, saucy, or rice-based.
If you make Pumpkin Slab Pie, I would love to hear what little adjustment made it work best in your kitchen.
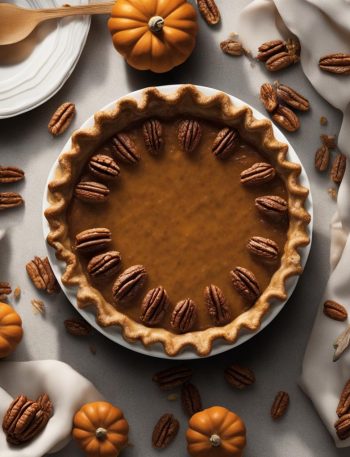
Pumpkin Slab Pie
Description
I make Pumpkin Slab Pie with all-purpose flour, granulated sugar, cold unsalted butter, cubed, clear timing cues, practical storage notes, and swaps I have actually used.
Ingredients You’ll Need
Instructions
- I mix the flour, salt, and sugar together in a large bowl. Add the butter. Using a pastry cutter or two forks, cut the butter into the mixture until it resembles coarse meal (pea-sized bits with a few larger bits of fat is OK). A pastry cutter makes this step very easy and quick. Drizzle the cold water in, 1 Tablespoon (15ml) at a time, and stir with a silicone spatula or wooden spoon after every.
- I whisk all of the filling ingredients together in a large bowl. It will be a little thick. Cover and refrigerate until you need it; or refrigerate up to 3 days.
- I preheat oven to 375°F (190°C).
- I remove larger disc of pie dough from the refrigerator. Keep the other in the refrigerator as you work. On a lightly floured work surface, roll the dough out into (roughly) an 18x13-inch rectangle. Make sure to turn the dough about a quarter turn after every few rolls. Carefully place the dough into a 10x15-inch jelly roll pan; there will be overhang on the sides. Smooth the crust out so it fits nicely into all the.
- I spread filling evenly into the crust. Bake for 35-45 minutes or until the filling is only slightly jiggly in the very center. Remove from the oven, set on a wire rack, and allow to cool completely.
- I as the pie cools, roll out remaining dough. Roll out into any shape you really want (doesn't matter) and 1/8 inch thickness. Using leaf cookie cutters, cut into shapes. Brush each lightly with egg wash. Cut leaf veins into leaves using a sharp knife or toothpick, if desired. Place onto a parchment paper or silicone baking mat-lined baking sheet and bake at 350°F (177°C) for 10 minutes or until lightly browned. Remove and set aside.
- I decorate pie with pie crust leaves and/or whipped cream. Leftovers keep well covered in the refrigerator for up to 1 week.
Nutrition Facts
Servings 24
- Amount Per Serving
- Calories 341kcal
- % Daily Value *
- Total Fat 21g33%
- Saturated Fat 13g65%
- Trans Fat 0.8g
- Cholesterol 58mg20%
- Sodium 130mg6%
- Potassium 56mg2%
- Total Carbohydrate 37g13%
- Dietary Fiber 1g4%
- Sugars 20g
- Protein 3g6%
- Calcium 28 mg
- Iron 1.0 mg
* Percent Daily Values are based on a 2,000 calorie diet. Your daily value may be higher or lower depending on your calorie needs.
Note
Measure first. I set everything out before starting so I do not miss a small ingredient.
Trust the cue. I use the listed time as a guide, then check color, texture, and aroma.
Cool before storing. A short rest keeps steam from making the finished recipe soggy.
Adjust gently. I change toppings and garnishes before changing structural ingredients like sugar, flour, eggs, or cheese.
Frequently Asked Questions
Yes. I usually prepare the parts that hold well, then finish or reheat close to serving. The texture is best when I store it tightly covered and keep garnishes separate until the end.
For baked goods, I freeze portions once fully cool. For sauces and drinks, I prefer the refrigerator because thawing can change the texture. If I do freeze it, I thaw overnight in the fridge.
Rushing the texture cue. I look for the specific sign in the method - a set center, smooth sauce, tender seafood, or fragrant edges - before I call it done.
A little, yes. I adjust toppings, drizzles, or garnishes first. When sugar is part of the batter or candy base, I keep the listed amount because it affects structure.
I cool them fully, cover tightly, and reheat gently. A splash of milk, broth, or water helps when the recipe is creamy, saucy, or rice-based.
You may also like...