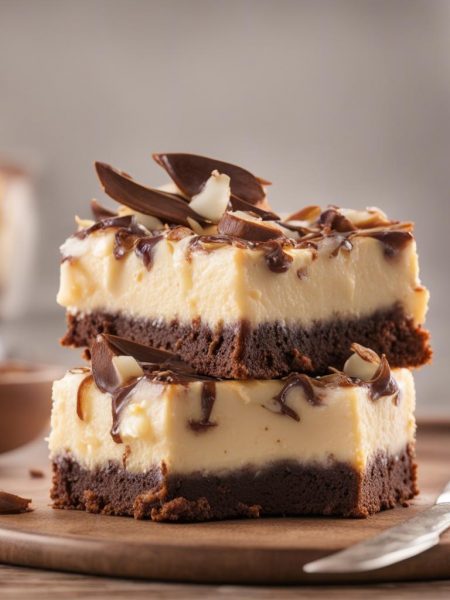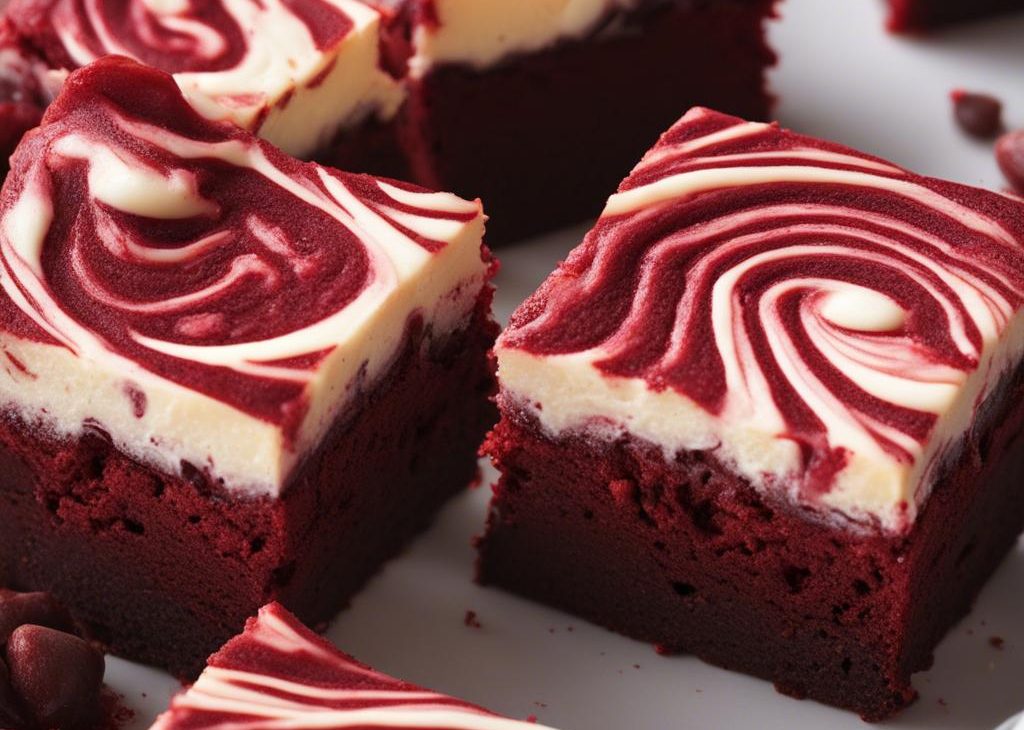

I make red velvet cheesecake swirl brownies when I want a dessert that feels planned but does not require me to hover nervously over the counter all afternoon/p>
The first time I tested this style of recipe, I rushed the cooling step and paid for it with messy slices. Now I build in a little breathing room. I prep for about 20 minutes, keep the oven work steady, and let the dessert settle before I cut or frost it/p>
Why I keep coming back to this
- I can do the prep in about 20 minutes, which makes the recipe realistic on an ordinary day/li>
- The leftovers hold up well when I store them properly instead of leaving them loosely covered.
- It is flexible enough for small swaps without losing the main character of the dish.
- The recipe gives clear texture cues, so I am not depending on the timer alone.
- It slices, scoops, or serves more neatly once I let it cool instead of rushing it.
What you need and what each ingredient does
- 2 large eggs.
- 1/2 cup unsalted butter, melted (8 Tbsp; 113g).
- 1 cup granulated sugar (200g).
- 2 teaspoons pure vanilla extract.so the recipe moves calmly.
- 1/4 cup unsweetened cocoa powder (21g).I add it for the main flavor note, so I use a brand I actually like eating plain.
- 1/8 teaspoon salt.I treat it as seasoning, then taste near the end before deciding whether it needs more.
- 1 and 1/2 teaspoons red gel food coloring.so the recipe moves calmly.
- 3/4 teaspoon white vinegar.
- 3/4 cup all-purpose flour (94g).I measure it carefully because it decides whether the base is tender or heavy.
- 8 ounces brick cream cheese, softened (226g).
- 1/4 cup granulated sugar (50g).
- 1 egg yolk.
- 1/2 teaspoon pure vanilla extract.so the recipe moves calmly.
How I make it
Step 1 — Prep the pan and ingredients
I start by heating the oven and preparing the pan or baking sheet so red velvet cheesecake swirl brownies can go straight in once assembled. I keep the listed timing in mind: 350°F (177°C).
Step 2 — Mix the base
I combine the ingredients in the order given, scraping the bowl and checking the edges so no dry pockets or streaks are hiding.
Step 3 — Build the layers
I combine the ingredients in the order given, scraping the bowl and checking the edges so no dry pockets or streaks are hiding.
Step 4 — Cook until the cues look right
I give the mixture the chill or cooling time it needs before moving on; this is the step that keeps the final texture neat. I keep the listed timing in mind: 28-30 minutes, 3 days, 6 days.
Tips from my kitchen
- Tip 1:I measure flour with a light hand; packed flour is the fastest route to a dry dessert.
- Tip 2:I scrape the bowl after every major addition because streaks hide under the paddle.
- Tip 4:I cool completely before frosting or cutting, even when the kitchen smells unfairly good.
Variations I have actually tried
- Variation 1:Swap part of the chocolate or candy for toasted nuts when I want more crunch.
- Variation 2:Add a pinch of espresso powder to chocolate batters for a deeper cocoa note without making it taste like coffee.
- Variation 3:Use vanilla bean paste in place of extract when I want a more bakery-style aroma.
- Variation 4:Chill the finished dessert and cut smaller pieces for a cleaner party tray.
- Variation 5:Add flaky salt on top when the recipe leans very sweet.
Storing and reheating
I store the cooled pieces in an airtight container. Most keep 3-5 days in the refrigerator, and I separate sticky layers with parchment so the tops stay neat.
When I know leftovers are coming, I portion them before anyone starts picking at the pan. Smaller containers cool faster, reheat more evenly, and make the next meal feel less like an afterthought.
What I serve with it
I usually serve it simply: coffee, cold milk, or a small scoop of vanilla ice cream if the dessert is warm. For a tray, I wipe the knife between cuts so every piece looks intentional.
Frequently asked questions
Can I make this ahead?
Yes. I often bake it the day before, then frost, slice, or serve once it is fully cool.
Can I freeze it?
Most unfrosted pieces freeze well for up to 2 months. I wrap tightly and thaw in the refrigerator.
Why did mine turn dry?
The usual causes are too much flour or a few extra minutes in the oven. I measure lightly and watch the center.
Can I reduce the sugar?
I would not reduce it much because sugar affects moisture and structure, not only sweetness.
Do I need room temperature ingredients?
For butter, eggs, and cream cheese, yes. I get a smoother batter or frosting when they are not cold.
If you make red velvet cheesecake swirl brownies, I would love to hear what you changed and what you would keep exactly the same next time.
Troubleshooting notes I rely on
When red velvet cheesecake swirl brownies does not come out the way I expect, I look at texture first. If it is too thick, too soft, too dry, or too sharp, I make one small adjustment instead of trying to fix everything at once.
For sweet recipes, that usually means checking flour, bake time, and cooling. For savory recipes, it means checking salt, acid, heat, and whether the pan was crowded. The fix is usually simpler than it feels in the moment.
I also write down what I changed. A teaspoon more liquid, a few extra minutes uncovered, or a shorter chill time is easy to forget, and those small notes are why the next batch tastes more consistent.
Before I serve, I pause for one last check. I look for the cue the recipe promised: a set center, a glossy sauce, tender vegetables, a browned edge, or a clean slice. If that cue is missing, I give the dish a few more minutes, a short rest, or a careful stir instead of forcing it onto the table.
I have also learned not to correct seasoning while food is steaming hot. Heat can hide sweetness, salt, and acid. I let a spoonful cool for a moment, taste again, and then decide. That tiny pause has saved me from over-salting more times than I want to admit.
For the next batch, I change only one thing. If I alter the pan, the heat, the liquid, and the seasoning all at once, I cannot tell which choice helped. A recipe becomes dependable in my kitchen when I make small changes and pay attention to the result.
I keep the serving plan simple, too. If the dish is rich, I add something crisp or acidic beside it. If it is light, I add bread, rice, potatoes, or another sturdy side. That balance makes the finished meal feel intentional without adding another complicated recipe.
Red Velvet Cheesecake Swirl Brownies
Description
I wrote this red velvet cheesecake swirl brownies rewrite the way I cook it: with the small timing cues, texture checks, and storage notes that matter once the recipe is in a real kitchen. It is practical, warm, and detailed enough to follow without guessing.
Ingredients You’ll Need
Instructions
- Step 1: I start by heating the oven and preparing the pan or baking sheet so red velvet cheesecake swirl brownies can go straight in once assembled. I keep the listed timing in mind: 350°F (177°C).
- Step 2: I combine the ingredients in the order given, scraping the bowl and checking the edges so no dry pockets or streaks are hiding.
- Step 3: I combine the ingredients in the order given, scraping the bowl and checking the edges so no dry pockets or streaks are hiding.
- Step 4: I give the mixture the chill or cooling time it needs before moving on; this is the step that keeps the final texture neat. I keep the listed timing in mind: 28-30 minutes, 3 days, 6 days.
Nutrition Facts
Servings 16
- Amount Per Serving
- Calories 137kcal
- % Daily Value *
- Total Fat 7g11%
- Saturated Fat 4g20%
- Trans Fat 0.2g
- Cholesterol 46mg16%
- Sodium 28mg2%
- Potassium 40mg2%
- Total Carbohydrate 18g6%
- Dietary Fiber 1g4%
- Sugars 13g
- Protein 2g4%
- Calcium 9 mg
- Iron 0.6 mg
* Percent Daily Values are based on a 2,000 calorie diet. Your daily value may be higher or lower depending on your calorie needs.
Note
Timing. I measure flour with a light hand; packed flour is the fastest route to a dry dessert.
Texture. I scrape the bowl after every major addition because streaks hide under the paddle.
Seasoning. I pull baked sweets when the center still has a little softness, then let the pan finish setting on the rack.
Storage. I cool completely before frosting or cutting, even when the kitchen smells unfairly good.
Frequently Asked Questions
Yes. I often bake it the day before, then frost, slice, or serve once it is fully cool.
Most unfrosted pieces freeze well for up to 2 months. I wrap tightly and thaw in the refrigerator.
The usual causes are too much flour or a few extra minutes in the oven. I measure lightly and watch the center.
I would not reduce it much because sugar affects moisture and structure, not only sweetness.
For butter, eggs, and cream cheese, yes. I get a smoother batter or frosting when they are not cold.
You may also like...