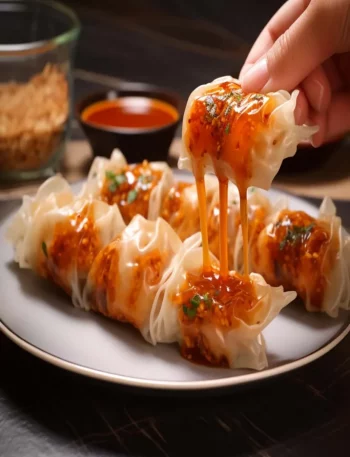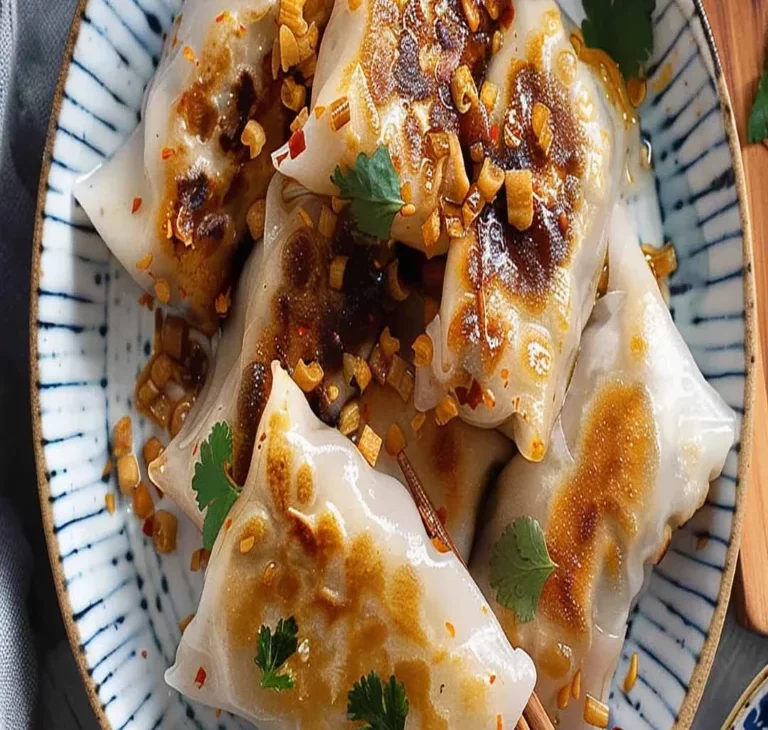

I turn to Rice Paper Dumplings With Meat when I want dinner or a snack plate with a little movement to it: chopping, folding, grilling, saucing, or marinating. It feels hands-on in a good way, and the payoff is a dish with texture instead of another one-note meal.
The prep takes about 25 minutes and the cooking time is about 25 minutes, so I set out the ingredients first and work in batches. That keeps me from overcooking the protein while I am still looking for a sauce bottle.
My rule for this kind of recipe is simple: keep the pieces even, do not drown the main ingredient, and taste the sauce before it touches everything. A few calm checks along the way save the whole dish.
Why I keep coming back to this
- I can do the prep in about 25 minutes, which makes the recipe realistic on an ordinary day.
- The ingredient list is straightforward once everything is measured and grouped by step.
- The leftovers hold up well when I store them properly instead of leaving them loosely covered.
- It is flexible enough for small swaps without losing the main character of the dish.
- It gives me crisp, tender, saucy, or fresh textures in the same dish.
- It tastes better after a short rest, which gives me time to clean the counter before serving.
What you need and what each ingredient does
- 1 lb ground beef. I handle it gently and watch the timing closely so it stays juicy.
- 4 tablespoons light soy sauce.
- 4 teaspoons minced garlic.
- 1 tablespoon rice vinegar.
- 2 teaspoons minced cilantro. so the recipe moves calmly.
- 1/2 teaspoon pepper. I treat it as seasoning, then taste near the end before deciding whether it needs more.
- 2 tablespoons minced green onion.
- 4 teaspoons sugar.
- 2 teaspoons minced ginger. so the recipe moves calmly.
- 1/2 cup minced carrots. I keep the pieces even so they cook at the same pace.
- 2 tablespoons chili oil.
- 1 tablespoon sugar.
- 4 tablespoons light soy sauce.
- minced green onions, optional.
- 2 teaspoons sesame oil.
- sesame seeds, optional. so the recipe moves calmly.
- 1 tablespoon rice vinegar.
- rice paper wrappers. I give it a little patience; rushing this ingredient is where the texture usually suffers.
How I make it
Step 1 — Cook the mixture
I cook over the stated heat, stirring or turning as needed, and I watch for the texture cue rather than only the clock.
Step 3 — Combine the ingredients
I combine the ingredients in the order given, scraping the bowl and checking the edges so no dry pockets or streaks are hiding.
Step 5 — Assemble
I assemble the layers carefully and keep the edges tidy so the pieces slice or serve cleanly after cooking.
Step 8 — Chill
Tips from my kitchen
- Tip 1: I cut the main ingredients evenly so nothing overcooks while a larger piece catches up.
- Tip 2: I keep sauces and fillings ready before heat gets involved.
- Tip 3: I taste the sauce separately, then again after it meets the protein or vegetables.
- Tip 4: I serve crisp items right away because steam softens them quickly.
Variations I have actually tried
- Variation 1: Swap the protein for chicken, shrimp, tofu, or beef when the same seasoning makes sense.
- Variation 2: Add extra herbs at the end for a fresher bite.
- Variation 3: Serve it over rice, greens, noodles, or tucked into wraps when I want a fuller meal.
- Variation 4: Use a spicier sauce for adults and keep a milder portion aside.
- Variation 5: Add crunchy vegetables right before serving so they do not wilt.
Storing and reheating
I refrigerate leftovers in a covered container and eat them within 2-3 days. Crisp wrappers or grilled pieces are best reheated uncovered so steam does not soften them too much.
When I know leftovers are coming, I portion them before anyone starts picking at the pan. Smaller containers cool faster, reheat more evenly, and make the next meal feel less like an afterthought.
What I serve with it
I serve it with rice, noodles, crisp greens, grilled vegetables, or a small dipping sauce on the side. I keep garnishes fresh so the final plate has contrast.
Frequently asked questions
Can I prep components ahead?
Yes. I chop vegetables, mix sauces, and measure seasonings ahead, then cook or assemble close to serving.
How do I keep it from getting soggy?
I avoid over-saucing and let hot fillings cool slightly before wrapping or layering.
Can I change the protein?
Usually, yes. I keep the same seasoning idea and adjust the cooking time for the new protein.
How spicy is it?
That depends on the sauce and peppers. I start mild, then add heat at the table.
What should I serve with it?
Rice, noodles, salad, or crisp vegetables are my usual choices because they catch the sauce without making the plate heavy.
If you make Rice Paper Dumplings With Meat, I would love to hear what you changed and what you would keep exactly the same next time.
Rice Paper Dumplings With Meat
Description
I wrote this rice paper dumplings with meat rewrite the way I cook it: with the small timing cues, texture checks, and storage notes that matter once the recipe is in a real kitchen. It is practical, warm, and detailed enough to follow without guessing.
Ingredients
Instructions
- Step 1:.
- Step 2: I cook over the stated heat, stirring or turning as needed, and I watch for the texture cue rather than only the clock.
- Step 3: I combine the ingredients in the order given, scraping the bowl and checking the edges so no dry pockets or streaks are hiding.
- Step 4: I combine the ingredients in the order given, scraping the bowl and checking the edges so no dry pockets or streaks are hiding.
- Step 5:.
- Step 6:.
- Step 7: I assemble the layers carefully and keep the edges tidy so the pieces slice or serve cleanly after cooking.
- Step 8:.
- Step 9: I cook over the stated heat, stirring or turning as needed, and I watch for the texture cue rather than only the clock.
- Step 10: I cook over the stated heat, stirring or turning as needed, and I watch for the texture cue rather than only the clock.
- Step 11: I combine the ingredients in the order given, scraping the bowl and checking the edges so no dry pockets or streaks are hiding.
- Step 12: I give the mixture the chill or cooling time it needs before moving on; this is the step that keeps the final texture neat.
- Step 13:.
- Step 14:.
- Step 15:.
- Step 16:.
- Step 17:.
- Step 18:.
- Step 19: I cook over the stated heat, stirring or turning as needed, and I watch for the texture cue rather than only the clock.
- Step 20: Serving while the texture is at its best, then I store leftovers tightly covered. I keep the listed timing in mind: 24 hours.
Nutrition Facts
Servings 4
- Amount Per Serving
- Calories 336kcal
- % Daily Value *
- Total Fat 19g30%
- Saturated Fat 7g35%
- Trans Fat 0.8g
- Cholesterol 85mg29%
- Sodium 932mg39%
- Potassium 427mg13%
- Total Carbohydrate 7g3%
- Sugars 4g
- Protein 31g62%
- Vitamin A 1431 IU
- Vitamin C 7 mg
- Calcium 32 mg
- Iron 3.4 mg
* Percent Daily Values are based on a 2,000 calorie diet. Your daily value may be higher or lower depending on your calorie needs.
Note
Timing. I cut the main ingredients evenly so nothing overcooks while a larger piece catches up.
Texture. I keep sauces and fillings ready before heat gets involved.
Seasoning. I taste the sauce separately, then again after it meets the protein or vegetables.
Storage. I serve crisp items right away because steam softens them quickly.
Frequently Asked Questions (FAQs):
Yes. I chop vegetables, mix sauces, and measure seasonings ahead, then cook or assemble close to serving.
I avoid over-saucing and let hot fillings cool slightly before wrapping or layering.
Usually, yes. I keep the same seasoning idea and adjust the cooking time for the new protein.
That depends on the sauce and peppers. I start mild, then add heat at the table.
Rice, noodles, salad, or crisp vegetables are my usual choices because they catch the sauce without making the plate heavy.