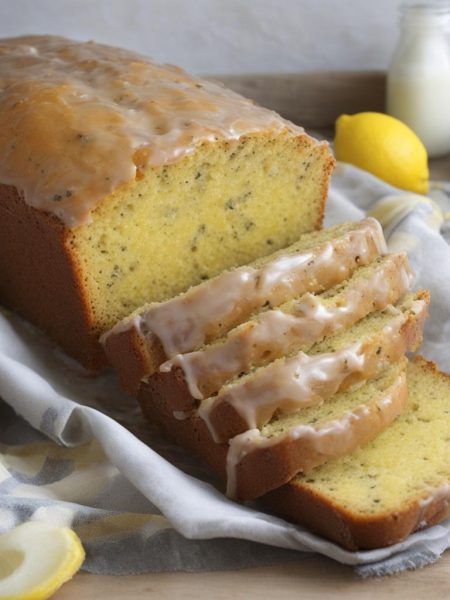
I turn to Rice Paper Sushi Roll when I want dinner or a snack plate with a little movement to it: chopping, folding, grilling, saucing, or marinating. It feels hands-on in a good way, and the payoff is a dish with texture instead of another one-note meal.
The prep takes about 20 minutes and the cooking time is about 15 minutes, so I set out the ingredients first and work in batches. That keeps me from overcooking the protein while I am still looking for a sauce bottle.
My rule for this kind of recipe is simple: keep the pieces even, do not drown the main ingredient, and taste the sauce before it touches everything. A few calm checks along the way save the whole dish.
Why I keep coming back to this
- I can do the prep in about 20 minutes, which makes the recipe realistic on an ordinary day.
- The ingredient list is straightforward once everything is measured and grouped by step.
- The leftovers hold up well when I store them properly instead of leaving them loosely covered.
- It is flexible enough for small swaps without losing the main character of the dish.
- It gives me crisp, tender, saucy, or fresh textures in the same dish.
- It tastes better after a short rest, which gives me time to clean the counter before serving.
What you need and what each ingredient does
- 1/3 piece English cucumber julienned. so the recipe moves calmly.
- 1 whole ripe avocado sliced. so the recipe moves calmly.
- 1 1 sheet nori cut into 4 by 3 cm pieces.
- 1 Large Carrot (peeled). I keep the pieces even so they cook at the same pace.
- 7 sheets rice paper small.
- Salmon mixture.
- 4 ounces Smoked Salmon.
- 3 tablespoon Kewpie mayo. I let it bring richness, body, and the texture that makes the finished dish feel complete.
- Seasoned Sushi Rice.
- 3 cups sushi rice cooked.
- 2 tablespoon rice vinegar.
- 1 teaspoon granulated sugar. I count on it for sweetness, browning, and a softer bite.
- 1/4 teaspoon salt. I treat it as seasoning, then taste near the end before deciding whether it needs more.
How I make it
Step 1 — Beat until smooth
I beat the mixture until it looks cohesive and lighter, stopping once to scrape the bowl because the bottom always holds a little unmixed butter or sugar.
Step 3 — Chill
Tips from my kitchen
- Tip 1: I cut the main ingredients evenly so nothing overcooks while a larger piece catches up.
- Tip 2: I keep sauces and fillings ready before heat gets involved.
- Tip 3: I taste the sauce separately, then again after it meets the protein or vegetables.
- Tip 4: I serve crisp items right away because steam softens them quickly.
Variations I have actually tried
- Variation 1: Swap the protein for chicken, shrimp, tofu, or beef when the same seasoning makes sense.
- Variation 2: Add extra herbs at the end for a fresher bite.
- Variation 3: Serve it over rice, greens, noodles, or tucked into wraps when I want a fuller meal.
- Variation 4: Use a spicier sauce for adults and keep a milder portion aside.
- Variation 5: Add crunchy vegetables right before serving so they do not wilt.
Storing and reheating
I refrigerate leftovers in a covered container and eat them within 2-3 days. Crisp wrappers or grilled pieces are best reheated uncovered so steam does not soften them too much.
When I know leftovers are coming, I portion them before anyone starts picking at the pan. Smaller containers cool faster, reheat more evenly, and make the next meal feel less like an afterthought.
What I serve with it
I serve it with rice, noodles, crisp greens, grilled vegetables, or a small dipping sauce on the side. I keep garnishes fresh so the final plate has contrast.
Frequently asked questions
Can I prep components ahead?
Yes. I chop vegetables, mix sauces, and measure seasonings ahead, then cook or assemble close to serving.
How do I keep it from getting soggy?
I avoid over-saucing and let hot fillings cool slightly before wrapping or layering.
Can I change the protein?
Usually, yes. I keep the same seasoning idea and adjust the cooking time for the new protein.
How spicy is it?
That depends on the sauce and peppers. I start mild, then add heat at the table.
What should I serve with it?
Rice, noodles, salad, or crisp vegetables are my usual choices because they catch the sauce without making the plate heavy.
If you make Rice Paper Sushi Roll, I would love to hear what you changed and what you would keep exactly the same next time.
Rice Paper Sushi Roll
Description
I wrote this rice paper sushi roll rewrite the way I cook it: with the small timing cues, texture checks, and storage notes that matter once the recipe is in a real kitchen. It is practical, warm, and detailed enough to follow without guessing.
Ingredients You’ll Need
Instructions
- Step 1:.
- Step 2: I beat the mixture until it looks cohesive and lighter, stopping once to scrape the bowl because the bottom always holds a little unmixed butter or sugar.
- Step 3:.
- Step 4: I assemble the layers carefully and keep the edges tidy so the pieces slice or serve cleanly after cooking.
- Step 5: I assemble the layers carefully and keep the edges tidy so the pieces slice or serve cleanly after cooking.
- Step 6: I assemble the layers carefully and keep the edges tidy so the pieces slice or serve cleanly after cooking.
- Step 7:.
- Step 8:.
- Step 9: I assemble the layers carefully and keep the edges tidy so the pieces slice or serve cleanly after cooking.
- Step 10: I assemble the layers carefully and keep the edges tidy so the pieces slice or serve cleanly after cooking.
- Step 11:.
- Step 12: I give the mixture the chill or cooling time it needs before moving on; this is the step that keeps the final texture neat.
Nutrition Facts
Servings 16
- Amount Per Serving
- Calories 16kcal
- % Daily Value *
- Total Fat 1g2%
- Trans Fat 0.0g
- Cholesterol 4mg2%
- Sodium 34mg2%
- Potassium 27mg1%
- Protein 1g2%
- Calcium 1 mg
- Iron 0.0 mg
* Percent Daily Values are based on a 2,000 calorie diet. Your daily value may be higher or lower depending on your calorie needs.
Note
Timing. I cut the main ingredients evenly so nothing overcooks while a larger piece catches up.
Texture. I keep sauces and fillings ready before heat gets involved.
Seasoning. I taste the sauce separately, then again after it meets the protein or vegetables.
Storage. I serve crisp items right away because steam softens them quickly.
Frequently Asked Questions
Yes. I chop vegetables, mix sauces, and measure seasonings ahead, then cook or assemble close to serving.
I avoid over-saucing and let hot fillings cool slightly before wrapping or layering.
Usually, yes. I keep the same seasoning idea and adjust the cooking time for the new protein.
That depends on the sauce and peppers. I start mild, then add heat at the table.
Rice, noodles, salad, or crisp vegetables are my usual choices because they catch the sauce without making the plate heavy.