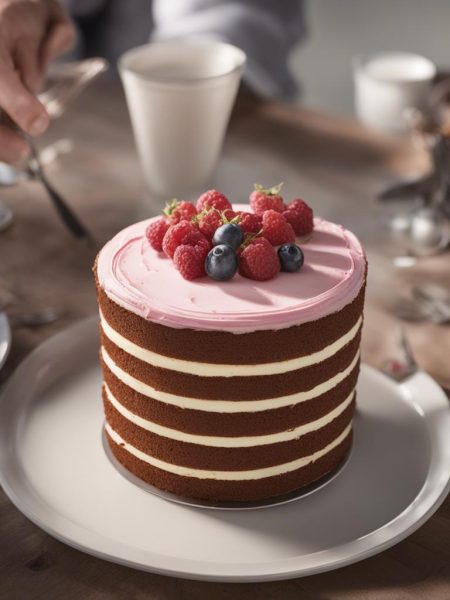

I make Simple Homemade Wedding Cake with a different mindset than a casual layer cake. I slow down, clear the counter, and treat the recipe like a set of small jobs: bake the tiers, cool them completely, make the buttercream, stack with support, then finish the outside.
The reassuring part is that none of the individual jobs is mysterious. The bottom tier uses familiar vanilla cake technique, the top tier follows the same rhythm in smaller pans, and the frosting is a sturdy buttercream that gives me time to adjust.
I do not pretend a wedding cake is a five-minute dessert. I do think a home baker can make one without panic when the pans are prepared, the ingredients are measured, and the cake has enough time to chill before assembly.
Why I like this plan
- It separates the cake into clear stages, which keeps me from rushing the decorating at the end.
- The two tiers bake at 350°F (177°C), so I am not juggling different oven temperatures.
- The ingredient list looks long because the bottom tier, top tier, filling buttercream, and final coat are all included.
- A crumb coat gives me a chance to trap loose crumbs before the outside layer goes on.
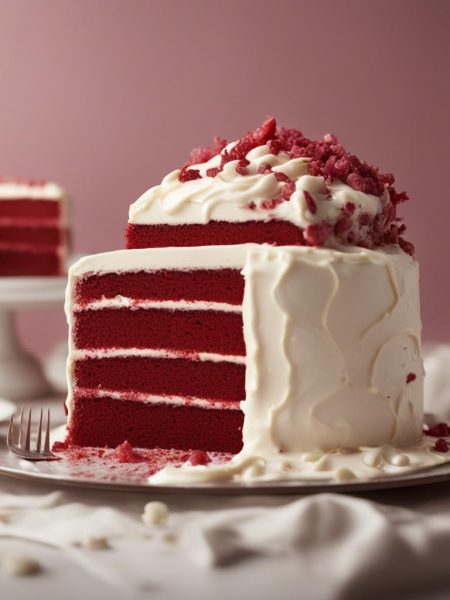
- The finished cake feels special without needing complicated piping or sugar work.
- I can bake the layers ahead, wrap them well, and assemble when the kitchen is calm.
What I measure first
- Cake flour, leaveners, and salt. I whisk the dry ingredients well so the cake bakes evenly instead of getting random pockets of baking soda or flour.
- Butter and sugar. I give them the full creaming time because that is where the batter gets its lift and fine crumb.
- Eggs, egg whites, vanilla, sour cream, and milk. I bring the cold ingredients to room temperature so the batter blends instead of looking split and heavy.
- Buttercream ingredients. I keep the butter soft but not greasy, sift or break up lumpy confectioners’ sugar, and add cream slowly until the frosting spreads smoothly.
- Tools. Parchment rounds, a turntable, offset spatula, cake boards, and dowels make this feel like baking instead of a balancing act.
How I make it
Step 1 — Prepare the pans
I preheat the oven to 350°F (177°C), grease three 9×2-inch round pans, line them with parchment, and grease the parchment too. I repeat that same careful setup later for the three 6×2-inch pans, because clean release matters more here than almost anywhere.
Step 2 — Mix and bake the bottom tier
I whisk the bottom-tier dry ingredients, then beat the butter and sugar until smooth and creamy, about 3 minutes. I add the 3 eggs, 2 egg whites, and vanilla, then alternate the dry mixture with sour cream and milk. Once the batter is divided among the 9-inch pans, I bake until the centers test done and let the layers cool completely.
Step 3 — Frost the cake
I keep the oven on and prepare the 6-inch batter the same way, using the smaller set of ingredients. The layers bake for around 18-22 minutes. I check with a toothpick, cool them in the pans on racks, and do not stack or frost while any warmth remains.
Step 4 — Make the buttercream and fill
I beat the butter until creamy, add confectioners’ sugar, heavy cream, vanilla, and salt, then adjust with a little more cream if it feels too stiff. I level the cooled cakes if needed, fill the layers, and apply a thin crumb coat so the loose crumbs stay put.
Step 5 — Stack, chill, and finish
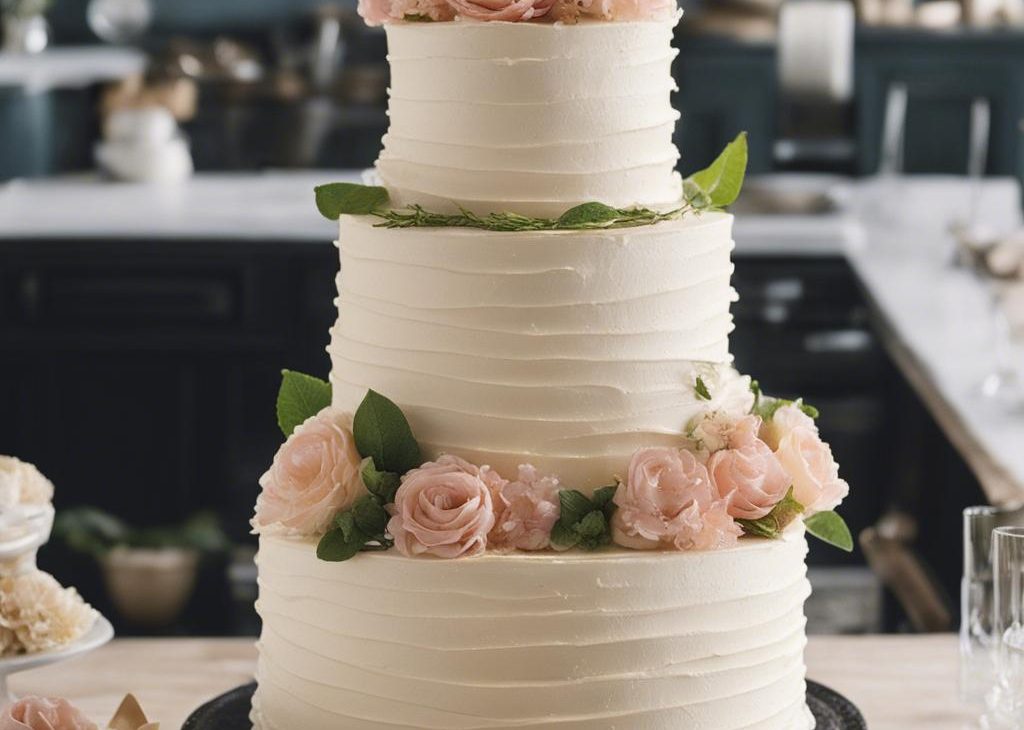
I chill the crumb-coated tiers until firm, add support dowels to the bottom tier, and stack the smaller cake on its board. Then I use the final buttercream coat to smooth the sides and top. I keep the decoration simple because neat edges and a level stack already look elegant.
Tips from my kitchen
- Use parchment rounds. I do not gamble with wedding cake layers sticking to the pan.
- Cool completely. Even slightly warm cake can slide, tear, or melt the buttercream.
- Chill between coats. A cold crumb coat makes the final frosting layer much easier to smooth.
- Support the tiers. Dowels are not optional for a stacked cake; they carry the weight.
- Keep decorations light. Heavy toppings can stress the stack, so I stay simple unless I have tested the plan.
Variations I have actually tried
- Lemon: I add lemon zest to the cake batter and a small spoonful of lemon juice to the buttercream.
- Almond: I replace a little vanilla with almond extract for a bakery-style flavor.
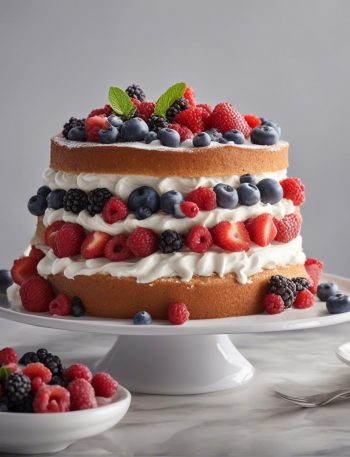
- Berry filling: I spread a thin ring of buttercream as a dam, then add a modest layer of jam inside it.
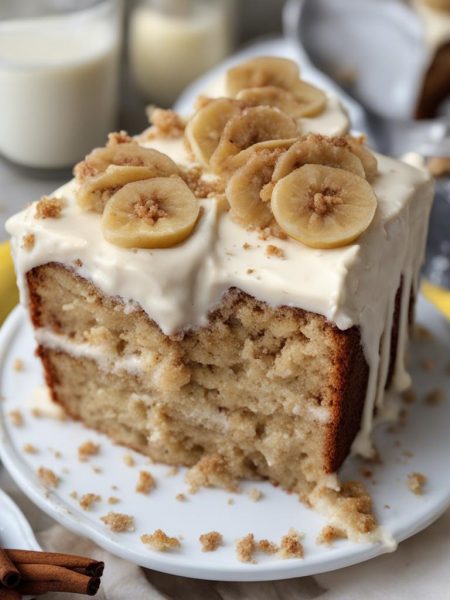
- Textured finish: I use the back of a spoon or offset spatula for swoops instead of chasing a glass-smooth surface.
- Sheet-cake practice: I bake a small test batch first when I want to try a new flavor before making the full cake.
Storing and serving
I store the frosted tiers chilled, loosely covered once the buttercream has firmed. Before serving, I let the cake sit at room temperature long enough for the buttercream to soften slightly. Cold cake can taste muted, while warm buttercream can slump, so I aim for the middle.
Leftover slices keep best in airtight containers in the refrigerator for 3-4 days. I press a small piece of parchment against cut sides when I can; it keeps the exposed cake from drying out.
The schedule matters as much as the mixing. I like to bake the layers one day, make buttercream and crumb coat the next, then finish the outside after the cake has chilled. That rhythm gives me room to fix small problems, like a layer that needs trimming or frosting that needs a little more cream. I also keep the cake out of direct sun and away from a warm stove, because buttercream remembers every bit of heat in the room. Patience helps here.
Frequently asked questions
Can I bake the layers ahead?
Yes. I bake, cool, wrap the layers tightly, and refrigerate them for a day or freeze them for longer storage. Chilled layers are actually easier to trim and frost.
Do I need dowels?
Yes. For a stacked two-tier cake, I use dowels or another cake support system in the bottom tier. Frosting alone should not hold the weight.
Why did my buttercream look airy?
It was probably beaten fast for a long time. I switch to low speed near the end and press the frosting against the bowl with a spatula to knock out large air pockets.
Can I decorate it the same day?
Yes, but I give myself more time than I think I need. I would rather finish early and chill the cake than rush the final coat while guests are arriving.
How do I transport it?
I chill the assembled cake until firm, place it on a flat surface in the car, and drive gently. For a long trip, I transport tiers separately and stack on site.
If you make this cake, I would love to hear which part felt easier than expected and which step you would practice again.
Simple Homemade Wedding Cake
Description
Simple Homemade Wedding Cake written from my kitchen notes with practical timing cues, storage notes, and the original ingredient framework. I use cake flour for bottom tier, salt, baking powder, baking soda and keep the method clear from prep to serving.
Ingredients You’ll Need
Instructions
- . Make sure you're prepared with the recommended special tools, which are listed right above this recipe and in the recipe Notes section.
- Preheat oven to 350°F (177°C). Grease three 9×2 inch round cake pans, line with parchment paper rounds, then grease the parchment paper. Parchment paper helps the cakes seamlessly release from the pans.).
- Whisk the cake flour, salt, baking powder, and baking soda together. Set aside. Using a handheld or stand mixer fitted with a paddle or whisk attachment, beat the butter and sugar together on high speed until smooth and creamy, about 3 minutes. Scrape down the sides and up the bottom of the bowl with a silicone spatula as needed. Beat in the 3 eggs, 2 egg whites, and vanilla extract on high speed until combined, about 2 minutes. (Mixture will look curdled as a result of the egg liquid and solid butter combining.) Beat in the sour cream. Scrape down the sides and up the bottom of the bowl as needed. With the mixer on low speed, add the dry ingredients until just incorporated. With the mixer still running on low, slowly pour in the milk until combined. Do not over-mix. Whisk it all by hand a few times to make sure there are no lumps at the bottom of the bowl. The batter will be slightly thick. You'll have 8-9 cups of cake batter. Pour batter evenly into cake pans. Weigh them to ensure accuracy, if desired. Bake for around 23-26 minutes or until the cakes are baked through. To test for doneness, insert a toothpick into the center of the cake. If it comes out clean, it's done. Allow cakes to cool completely in the pans set on a wire cooling rack. The cakes must be completely cool before frosting and assembling.
- Prepare three 6×2 inch round cake pans just as you did with the 9-inch cake pans in step 2. (Greasing with parchment paper rounds.).
- Prepare the 6-inch cake batter the same exact way as the bottom tier. You'll have about 4 cups of cake batter. The batter will be thinner than the bottom tier's cake batter. Pour batter evenly into cake pans. Weigh them to ensure accuracy, if desired. Bake for around 18-22 minutes or until the cakes are baked through. To test for doneness, insert a toothpick into the center of the cake. If it comes out clean, it's done. Allow cakes to cool completely in the pans set on a wire rack.
- Using a large serrated knife, slice a thin layer off the tops of all the cakes to create a flat surface. This is called leveling off the cakes. Discard the leveled off piece (or crumble over ice cream!).
- In a large bowl using a handheld mixer or stand mixer fitted with a paddle attachment, beat the butter on medium speed until creamy, about 2 minutes. Add confectioners' sugar, milk, vanilla extract, and salt with the mixer running on low. Increase to high speed and beat for 2 minutes. Add more confectioners' sugar if frosting is too thin, more milk if frosting is too thick, or an extra pinch of salt if frosting is too sweet.
- You can prepare the rest of the frosting now (step 11), if desired, or begin decorating the 9-inch tier. Place your 9-10 inch cake board on your cake turner. Place 1 cake layer on your cake board. Using a large icing spatula, evenly cover the top with a scant 1 and 1/2 cups of frosting. Top with 2nd cake layer and evenly cover the top with a scant 1 and 1/2 cups of frosting. Top with the third cake layer. Using about 1-1 and 1/4 cups of frosting, spread it all over the top and sides in a thin layer, also called a crumb coat. A large icing spatula and bench scraper are helpful for applying the crumb coat. Set leftover frosting aside at room temperature. If you are decorating this cake in stages over 1-2 days, cover and refrigerate this leftover frosting.
- Using the cake board to pick up the cake (be careful, it's heavy), place the cake in the refrigerator to help set the crumb coat as you work on the top tier.
- Make the frosting for the 6-inch cake, just as you prepared the 1st batch of frosting. (Step 8.) Before adding any salt, taste the frosting, then add a pinch if desired. I always add a small pinch.
- Place your 6-inch cake board on your cake turner. Place 1 6-inch cake layer on your cake board. Using a small icing spatula, evenly cover the top with a scant 3/4 cup of frosting. Top with 2nd cake layer and evenly cover the top with a scant 3/4 cup of frosting. Top with the third cake layer. Using about 3/4 cup of frosting, spread it all over the top and sides in a thin layer, also called a crumb coat. A small icing spatula and bench scraper are helpful for applying the crumb coat. Set leftover frosting aside at room temperature.
- Using the cake board to pick up the 6-inch cake, carefully place the cake in the refrigerator to help set the crumb coat as you work on the exterior frosting on the top tier.
- Remove the bottom tier from the refrigerator (along with the cake board) and place on the cake turner. Apply the remaining frosting for the bottom tier on the cake, reserving about 6-8 Tablespoons for piping detail. I recommend a large icing spatula and bench scraper to apply the outer layer of frosting. You will love this look because it's very easy, but resembles beautiful ruffles. Carefully lift the cake (with the cake board) and place on your serving platter or cake stand.
- Wash and dry 4 cake dowels. Measure the height of the bottom cake. Measure and cut the cake dowels to match. Staying within a 6 inch circle diameter (you can use another 6 inch cake board to "imprint" a 6-inch circle in the very center of the top of the 9-inch cake), insert the dowels into the cake, spacing them about 2 inches apart to form 4 corners of a square. Push the dowels straight down until each touches the bottom cake board. Set aside.
- Remove the top tier from the refrigerator (along with the cake board) and place on the cake turner. Decorate just as you did the bottom tier, including the ruffled textured frosting. I also turn the cake on the cake turner and apply this ruffled look on top of the 6-inch cake, too. This is optional. Along with the cake board, carefully lift the small cake and gently place it in the very center of the bottom tier.
- After placing the small tier on top, you can pipe leftover frosting around the bottom of it. This covers up any spaces or smears that may have appeared when arranging the top tier. I pipe dots of frosting with Wilton piping tip #12 between the tiers as well as around the bottom of the whole cake. They resemble pretty pearls. To smooth down pointy peaks on these "pearls," moisten your fingertip with water and gently press down on the peak.
- Add any decorative pieces, such as artificial flowers.
- Refrigerate cake until ready to serve. After a few hours, the frosting will "set" and you can lightly cover with plastic wrap.
- Cover any leftover cake tightly and refrigerate for up to 1 week.
Nutrition Facts
Servings 30
- Amount Per Serving
- Calories 57kcal
- % Daily Value *
- Sodium 115mg5%
- Potassium 17mg1%
- Total Carbohydrate 12g4%
- Protein 2g4%
- Calcium 12 mg
- Iron 0.7 mg
* Percent Daily Values are based on a 2,000 calorie diet. Your daily value may be higher or lower depending on your calorie needs.
Note
Prep before heat. I measure everything for Simple Homemade Wedding Cake before I turn on the stove or oven.
Watch the texture. The clock is a guide; color, thickness, and aroma tell me when to move on.
Rest when directed. Cooling or chilling time makes slicing, serving, and storing much easier.
Taste at the end. A small pinch of salt, splash of acid, or fresh garnish can make the flavors clearer.
Frequently Asked Questions
Yes. I usually bake or assemble it earlier, cool it completely, and store it covered. For the cleanest texture, I wait to slice, frost, drizzle, or garnish until it has had the rest the recipe needs.
The usual causes are a pan that is too small, an oven that runs cool, or cutting before the structure has set. I check with the doneness cue in the method and give it more cooling time before judging.
I am careful with that. Sugar affects moisture, browning, and set, especially in cookies, brownies, cakes, and pies. I might reduce it slightly after one successful batch, but I do not make a big cut on the first try.
Most baked portions freeze well once fully cool. I wrap individual pieces tightly, place them in a freezer bag, and thaw overnight in the refrigerator or on the counter depending on the item.
I cool completely, use a sharp knife, and wipe the blade between cuts. For very soft desserts, I chill first and then let the pieces warm slightly before serving.
You may also like...