
Snickerdoodle Cake is the kind of recipe I pull out when I want a dependable result without pretending the kitchen is a studio set. I like food that gives clear signs as it cooks: edges that set, sauce that thickens, dough that changes from shaggy to smooth, or a blender that finally stops rattling over chunks of ice.
I keep the process close to the way I actually cook at home. I care about the small moments: when to stop mixing, what the center should look like, how long to cool it, and what I do when a batch looks a little different from the last one.
For this cake, I keep the flavor direct and the method honest. If there is a wait time, I say why it matters. If a step is easy to rush, I point it out. That is usually the difference between food that is fine and food I want to make again.
Why I keep coming back to this
- It feels special without needing bakery equipment.
- The make-ahead window helps me avoid rushing the finish.
- The slices hold cleaner when I cool it properly.
- The flavor improves after the crumb or filling has time to settle.
- I can decorate simply and still bring it to the table with confidence.
What you need and what each ingredient is doing
- 3 and 2/3 cups cake flour (433g).
- 1 teaspoon salt.
- 2 teaspoons baking powder.
- 3/4 teaspoon baking soda.
- 1 and 1/2 cups unsalted butter, softened (340g).
- 1 and 2/3 cups granulated sugar (330g).
- 3 large 3 eggs + 2 additional egg whites, at room temperature*. It binds the mixture and gives the finished texture a little lift.
- 1 Tablespoon pure vanilla extract (yes, Tbsp!).
- 1 and 1/2 cups buttermilk (360ml).
- 1/2 cup granulated sugar (100g).
- 1/3 cup all-purpose flour (41g).
- 1 Tablespoon ground cinnamon*.
- 1/4 cup unsalted butter, melted (4 Tbsp; 56g).
- 1 and 1/4 cups unsalted butter, softened (282g).
- 8 ounces cream cheese, softened (226g).
- 3/4 cup packed brown sugar (150g).
- 1 Tablespoon ground cinnamon*.
- 5 and 1/2 cups confectioners sugar (660g).
- 1/4 cup heavy cream (60ml).
- 1 teaspoon pure vanilla extract.
- 1/8 teaspoon salt, plus more as needed.
- optional for garnish: snickerdoodle cookies.
How I make it
Step 1 — Set up the pan and oven
Preheat oven to 350°F (177°C). Grease three 9-inch cake pans, line with parchment paper rounds, then grease the parchment paper. Parchment paper helps the cakes seamlessly release from the pans.) I slow down here if the mixture is not matching the cue, because a minute of patience is easier than repairing the texture later.
Step 2 — Whisk together
Whisk the cake flour, salt, baking powder, and baking soda together. Set aside.
Step 3 — Whisk the attachment
Using a handheld or stand mixer fitted with a paddle or whisk attachment, beat the butter and sugar together on high speed until smooth and creamy, about 3 minutes. Scrape down the sides and up the bottom of the bowl with a silicone spatula as needed. Beat in the 3 eggs, 2 egg whites, and vanilla extract on high speed until combined, about 2 minutes.
Step 4 — Pour in the batter
Pour batter evenly into cake pans. If desired, weigh them with a kitchen scale to ensure accuracy. Set aside for a few minutes as you make the cinnamon swirl.
Step 5 — Combine the ingredients
With a fork, mix the brown sugar, flour, and cinnamon together until combined. Pour the melted butter on top and mix just until combined. Use immediately in the cake batter (next step) because the longer it sits out, the harder it will get as a result of the butter solidifying.
Step 6 — Finish and serve
Drop small spoonfuls of the cinnamon swirl on each of the unbaked cakes. Use a knife to gently swirl the spoonfuls into the batter. Some pieces will remain as chunks (that’s fine!) and some will swirl into the batter.
Step 7 — Bake
Bake for around 23-26 minutes or until the cakes are baked through. To test for doneness, insert a toothpick into the center of the cake. If it comes out clean, it’s done. Allow cakes to cool completely in the pans set on a wire rack. The cakes must be completely cool before frosting and assembling.
Step 8 — Add the cream cheese
In a large bowl using a handheld mixer or stand mixer fitted with a whisk or paddle attachment, beat the butter on medium speed until creamy, about 2 minutes. Switch the mixer up to medium-high speed and add the cream cheese one piece at a time, mixing until each has combined before adding the next. Once the cream cheese is combined, add the brown sugar.
Tips from my kitchen
- I measure before I start; the calm counter keeps me from missing the small ingredients.
- I trust the visual cues more than the timer when my oven or pan is acting different.
- I let the finished food cool or rest before judging the texture. Heat can make it seem softer than it really is.
- I run a thin knife around chilled edges before slicing for cleaner pieces.
- For neat slices, I wipe the knife between cuts instead of sawing through crumbs.
Variations I have actually tried
- Garnish with berries when I want a brighter finish.
- Use a simple chocolate drizzle instead of a full frosting layer.
- Add toasted nuts around the edge for texture.
- Serve with lightly sweetened whipped cream when the dessert is rich.
- Chill overnight for the cleanest slices.
Storing, reheating, and making ahead
I chill the dessert before covering it so condensation does not drip onto the top. Slices keep best in a covered container in the refrigerator. For freezing, I wrap individual pieces tightly, then thaw overnight in the refrigerator. I avoid microwaving frosted or filled slices because the texture goes uneven fast.
How I like to serve it
I like clean slices and simple plates. A few berries, a little whipped cream, or a small pinch of flaky salt can do more than a heavy decoration.
Frequently asked questions
Can I make it the day before?
Yes. I prefer that for this kind of dessert because the crumb or filling settles and slicing is cleaner.
Why did the center sink or crack?
It is usually overmixing, a quick temperature change, or cutting before it has cooled. I give it time and avoid rushing the finish.
Can I use a different pan?
Sometimes, but I keep the depth close to the original pan and start checking early. A deeper pan needs more time and can change the texture.
How should I slice it neatly?
I chill it well, use a sharp knife, and wipe the blade between cuts. That small pause makes a big difference.
Can I freeze leftovers?
Yes. I wrap individual slices tightly and thaw in the refrigerator so the texture comes back gently.
If you make Snickerdoodle Cake, leave a comment with the change you tried or the cue that helped most. I read those notes because they make the next batch better.
Snickerdoodle Cake
Description
This is my practical rewrite for Snickerdoodle Cake, built around cake flour, salt, baking powder, baking soda. I keep the method clear, call out the texture cues I watch for, and include storage notes so the leftovers are not an afterthought.
Ingredients You’ll Need
Instructions
- Preheat oven to 350°F (177°C). Grease three 9-inch cake pans, line with parchment paper rounds, then grease the parchment paper. Parchment paper helps the cakes seamlessly release from the pans.).
- Whisk the cake flour, salt, baking powder, and baking soda together. Set aside.
- Using a handheld or stand mixer fitted with a paddle or whisk attachment, beat the butter and sugar together on high speed until smooth and creamy, about 3 minutes. Scrape down the sides and up the bottom of the bowl with a silicone spatula as needed. Beat in the 3 eggs, 2 egg whites, and vanilla extract on high speed until combined, about 2 minutes. (Mixture will look curdled as a result of the egg liquid and solid butter.
- Pour batter evenly into cake pans. If desired, weigh them with a kitchen scale to ensure accuracy. Set aside for a few minutes as you make the cinnamon swirl.
- With a fork, mix the brown sugar, flour, and cinnamon together until combined. Pour the melted butter on top and mix just until combined. Use immediately in the cake batter (next step) because the longer it sits out, the harder it will get as a result of the butter solidifying.
- Drop small spoonfuls of the cinnamon swirl on each of the unbaked cakes. Use a knife to gently swirl the spoonfuls into the batter. Some pieces will remain as chunks (that's fine!) and some will swirl into the batter.
- Bake for around 23-26 minutes or until the cakes are baked through. To test for doneness, insert a toothpick into the center of the cake. If it comes out clean, it's done. Allow cakes to cool completely in the pans set on a wire rack. The cakes must be completely cool before frosting and assembling.
- In a large bowl using a handheld mixer or stand mixer fitted with a whisk or paddle attachment, beat the butter on medium speed until creamy, about 2 minutes. Switch the mixer up to medium-high speed and add the cream cheese one piece at a time, mixing until each has combined before adding the next. Once the cream cheese is combined, add the brown sugar and beat on medium-high speed until combined, about 1 minute. Stop the.
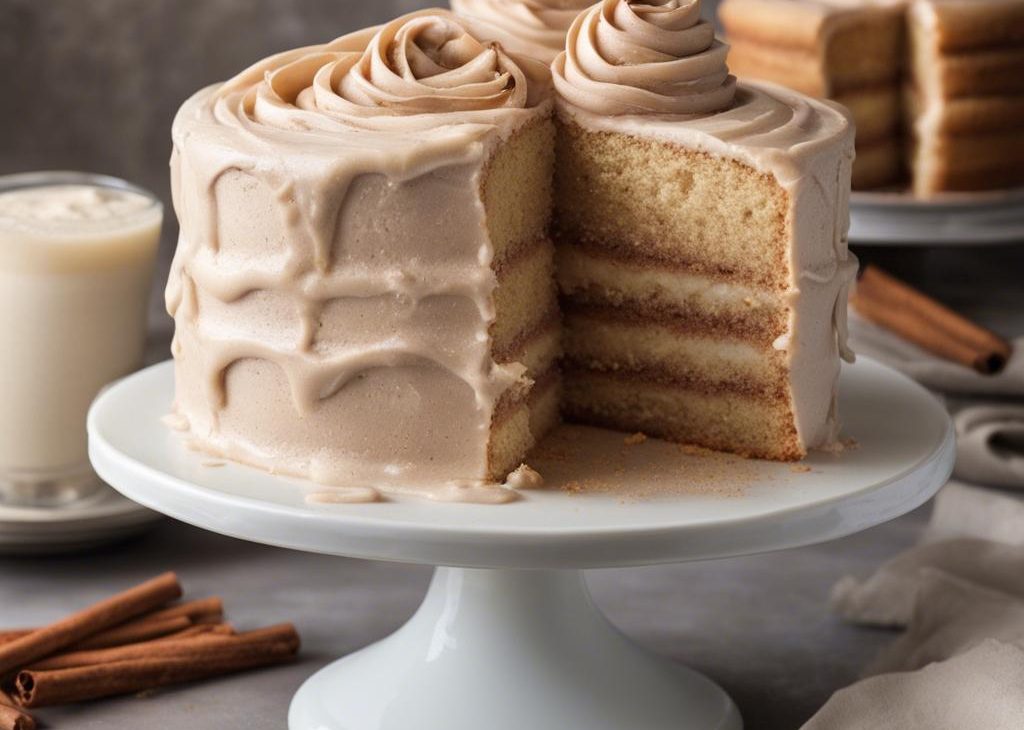
- Using a large serrated knife, slice the domes off the cooled cakes (a semi-thin layer) to create a flat surface. Discard domes (or crumble over ice cream!). Place 1 cake layer on a cake stand, cake turntable, or serving plate. Evenly spread about 1 and 1/2 cups of frosting on top. Top with 2nd cake layer and evenly spread another 1 and 1/2 cups of frosting on top. Top with the third cake layer. I decorated my snickerdoodle.
- Spread a little extra frosting on top of the cake and use any leftover frosting to pipe detail around the edges, if desired. I used Wilton 8B piping tip. Garnish with snickerdoodles if desired.
- Refrigerate cake for at least 30-60 minutes before slicing and serving. This helps the cake hold its shape when cutting.
- Cover leftover cake tightly and store in the refrigerator for up to 5 days.
Nutrition Facts
Servings 12
- Amount Per Serving
- Calories 337kcal
- % Daily Value *
- Total Fat 13g20%
- Saturated Fat 8g40%
- Trans Fat 0.4g
- Cholesterol 40mg14%
- Sodium 427mg18%
- Potassium 118mg4%
- Total Carbohydrate 47g16%
- Dietary Fiber 1g4%
- Sugars 15g
- Protein 6g12%
- Calcium 112 mg
- Iron 2.2 mg
* Percent Daily Values are based on a 2,000 calorie diet. Your daily value may be higher or lower depending on your calorie needs.
Note
I measure before I start; the calm counter keeps me from missing the small ingredients.
I trust the visual cues more than the timer when my oven or pan is acting different.
I let the finished food cool or rest before judging the texture. Heat can make it seem softer than it really is.
I run a thin knife around chilled edges before slicing for cleaner pieces.
Frequently Asked Questions
Yes. I prefer that for this kind of dessert because the crumb or filling settles and slicing is cleaner.
It is usually overmixing, a quick temperature change, or cutting before it has cooled. I give it time and avoid rushing the finish.
Sometimes, but I keep the depth close to the original pan and start checking early. A deeper pan needs more time and can change the texture.
I chill it well, use a sharp knife, and wipe the blade between cuts. That small pause makes a big difference.
Yes. I wrap individual slices tightly and thaw in the refrigerator so the texture comes back gently.
You may also like...