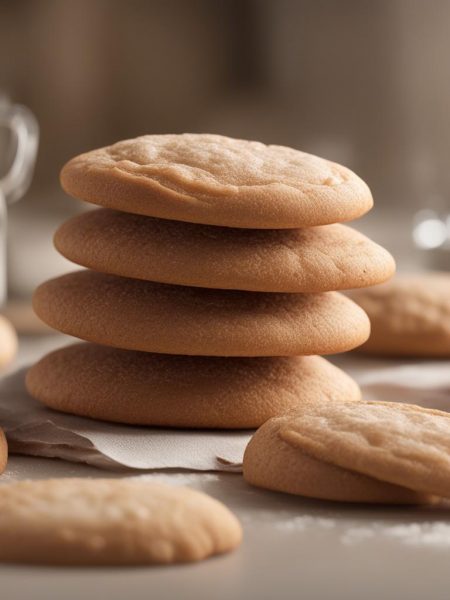
I came back to Sour Cream Peanut Butter Cookies because it solves a real kitchen problem for me: I want something that tastes cared for without making the whole counter look like a project. The first time I made it, I paid close attention to the texture cues instead of just staring at the timer, and that is still how I make it now.
With 10 minutes of prep, 10 minutes of cook time, I can plan it without guessing. I like that the ingredient list starts with familiar things such as peanut butter, shortening, light or dark brown sugar, large eggs at room temperature, then builds flavor in a way that makes sense once everything is in the bowl, pan, or pot.
I am not trying to make Sour Cream Peanut Butter Cookies fancier than it needs to be. I want it steady, repeatable, and good enough that I would make it again on a normal weeknight or a busy baking day. The notes below are the small checks I use so the finished recipe lands where I want it.
Why I keep coming back to this
- I can make it with familiar pantry ingredients instead of a scavenger hunt.
- The baking cues are visible — color, smell, and texture tell me when to move on.
- It scales well for leftovers or sharing, especially with the serving size listed below.
- The recipe leaves room for small swaps without losing the main character of Sour Cream Peanut Butter Cookies.
- I can prep the equipment before mixing, which keeps the pace calm once I start.
- It tastes better when I give it the short rest or cooling time instead of rushing the first bite.
What I use and why it matters
- 1/2 cup peanut butter. It carries flavor and keeps the texture from feeling dry.
- 120 g shortening.
- 230 g light or dark brown sugar. It sweetens, but it also affects browning and moisture.
- 2 large eggs at room temperature. It helps bind the mixture and gives the finished texture a cleaner set.
- 1/2 teaspoon nutmeg.
- 50 g full-fat sour cream at room temperature. It brings body and a little richness without making the recipe fussy.
- 3/4 teaspoon cinnamon powder.
- 1 teaspoon vanilla extract.
- 220 g bread flour (substitute with all purpose flour). I rely on it for structure, and I measure it carefully instead of scooping loosely.
- 3/4 teaspoon baking soda. This is the lift, so I check the date before I start.
- 1/4 teaspoon salt. I use it even in sweet recipes because it keeps the flavor from tasting flat.
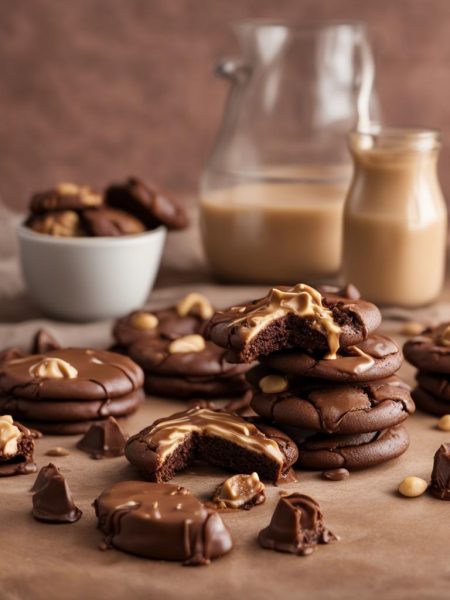
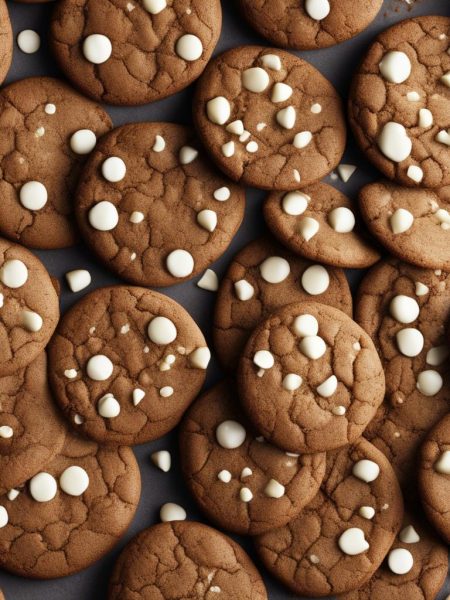
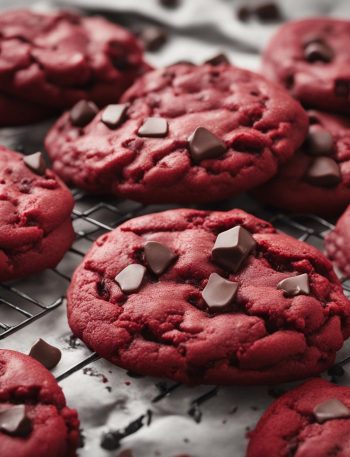
- 190 g chocolate chips. I add it gently so the color and pockets stay distinct.
How I make it
Step 1 — Prepare the pan
I preheat the oven to 350°F (175°C) and line a baking sheet with parchment paper.
Step 2 — Combine the base
In a large mixing bowl, cream together the peanut butter, shortening, and brown sugar until light and fluffy.
Step 3 — Add the remaining ingredients
I add the eggs one at a time, beating well after each addition. This ensures that the eggs are fully incorporated into the mixture.
Step 4 — Add the nutmeg sour
I add the nutmeg, sour cream, cinnamon powder, and vanilla extract to the bowl. Mix until well combined.
Step 5 — Whisk together
In a separate bowl, whisk together the bread flour, baking soda, and salt. Gradually add this dry mixture to the wet ingredients, mixing until just combined.
Step 6 — Fold together
I gently fold in the chocolate chips until evenly distributed throughout the cookie dough.
Step 7 — Shape and assemble
Using a cookie scoop or spoon, drop rounded tablespoons of dough onto the prepared baking sheet, spacing them about 2 inches apart.
Small details from my kitchen
- I check my oven early. My oven runs hot on one side, so I rotate pans when the recipe gives me a window.
- I stop mixing sooner than my instincts want. Once the flour disappears, I switch to a spatula or stop altogether.
- I set out every ingredient first. It prevents the awkward moment when butter is soft and an egg is still cold.
- I respect the cooling time. The center keeps setting after the pan leaves the heat, and cutting too soon usually shows.
- I write one note on the printout. If I changed a pan, brand, or timing, I mark it before I forget.
Variations I have actually tried
- Citrus note: I add a little orange or lemon zest when the base is vanilla-heavy.
- Chocolate version: I fold in chopped chocolate or chips when the dough or batter can handle an extra mix-in.
- Nutty version: Toasted pecans, walnuts, or almonds add crunch without changing the method.
- Holiday version: I use seasonal sprinkles, colored sugar, or a spice blend while keeping the main dough the same.
- Smaller batch: I halve the recipe when I am testing a new pan or ingredient brand.
- Serving swap: I change the garnish or side before I change the core recipe; it is safer and usually enough.
Storing and reheating
I cool everything completely before covering it. For baked goods, trapped steam is the enemy; it softens edges, loosens frosting, and makes bottoms tacky. I use an airtight container once cool, add parchment between layers when anything is frosted or sugared, and freeze only after the pieces are fully set.
When I freeze portions, I write the date on the bag before it goes into the freezer. That one small habit keeps mystery leftovers from taking over the back shelf.
What I serve with it
I usually serve this with coffee, tea, or cold milk, and I keep portions modest because the texture is best when it is not overloaded with extra toppings.
Frequently asked questions
Can I make the dough or batter ahead?
Usually yes. I cover it tightly and chill it, then I let it sit briefly at room temperature if it has firmed up too much.
How do I know it is done?
I use the visual cue from the recipe first, then check the center. A clean toothpick, set edge, or golden crust tells me more than the timer alone.
Can I freeze it?
Yes, I freeze cooled portions in a tight container with parchment between layers. I thaw in the refrigerator or at room temperature so the texture comes back slowly.
What is the biggest mistake to avoid?
For me, it is rushing. Whether it is cooling, simmering, chilling, or resting, the quiet time is usually where the recipe settles.
Do I need special equipment?
I use the equipment named in the instructions when I can, but I also give myself a little flexibility with a similar pan, bowl, or pot size.
If you make Sour Cream Peanut Butter Cookies, leave a note with what you changed or what you served with it; I always like seeing the practical tweaks.
Sour Cream Peanut Butter Cookies
Description
I make Sour Cream Peanut Butter Cookies with peanut butter, shortening, light or dark brown sugar and a method that stays practical from start to finish. The recipe keeps the original timing and gives the texture cues I watch for in my own kitchen.
Ingredients You’ll Need
Instructions
- I preheat the oven to 350°F (175°C) and line a baking sheet with parchment paper.
- In a large mixing bowl, cream together the peanut butter, shortening, and brown sugar until light and fluffy.
- I add the eggs one at a time, beating well after each addition. This ensures that the eggs are fully incorporated into the mixture.
- I add the nutmeg, sour cream, cinnamon powder, and vanilla extract to the bowl. Mix until well combined.
- In a separate bowl, whisk together the bread flour, baking soda, and salt. Gradually add this dry mixture to the wet ingredients, mixing until just combined.
- I gently fold in the chocolate chips until evenly distributed throughout the cookie dough.
- Using a cookie scoop or spoon, drop rounded tablespoons of dough onto the prepared baking sheet, spacing them about 2 inches apart.
- I bake the cookies in the preheated oven for 10-12 minutes, or until golden brown around the edges.
- I remove the cookies from the oven and let them cool on the baking sheet for a few minutes before transferring them to a wire rack to cool completely.
Nutrition Facts
Servings 17
- Amount Per Serving
- Calories 261kcal
- % Daily Value *
- Total Fat 14g22%
- Saturated Fat 5g25%
- Trans Fat 1.3g
- Cholesterol 1mg1%
- Sodium 38mg2%
- Potassium 126mg4%
- Total Carbohydrate 32g11%
- Dietary Fiber 1g4%
- Sugars 20g
- Protein 4g8%
- Calcium 12 mg
- Iron 1.5 mg
* Percent Daily Values are based on a 2,000 calorie diet. Your daily value may be higher or lower depending on your calorie needs.
Note
I check my oven early. My oven runs hot on one side, so I rotate pans when the recipe gives me a window.
I stop mixing sooner than my instincts want. Once the flour disappears, I switch to a spatula or stop altogether.
I set out every ingredient first. It prevents the awkward moment when butter is soft and an egg is still cold.
I respect the cooling time. The center keeps setting after the pan leaves the heat, and cutting too soon usually shows.
Frequently Asked Questions
You may also like...