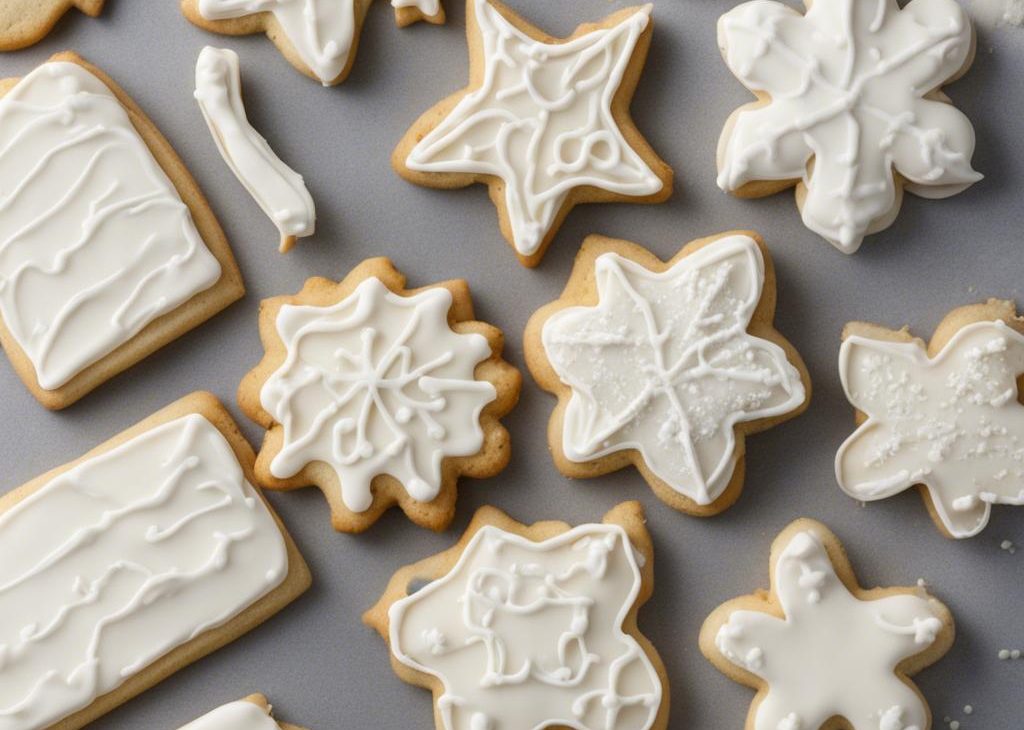

Using your choice of cookie cutters, you can enjoy these soft-baked vanilla bean sugar cookies as any shape you want. I’m showing shamrock-shaped cookies for St. Patrick’s Day! Without frosting, the vanilla bean cookies are lightly sweetened and fabulous with coffee or tea. But if you want to add some dazzling decoration, top with vanilla bean buttercream and a happy dose of sprinkles.
If you’re looking for a treat to serve on St. Patrick’s Day, these shamrock cookies are certainly festive by paying homage to the patron saint of Ireland. While I usually bake a batch of Guinness brownies on March 17th, I thought sugar cookies would be really fun this year because my oldest loves to decorate them.
These Vanilla Bean Shamrock Cookies Are:
- Easy to make and decorate
- Festive for St. Patrick’s Day
- Soft & thick if you don’t roll the dough too thin
- Wonderfully buttery
- Flavored with real vanilla bean
And there’s something to say about these shamrock cookies even without the buttercream—they’re so buttery, remind me of shortbread, and the vanilla bean flavor really shines through!
My Absolute Best Sugar Cookie Recipe
If you haven’t tried my sugar cookies yet, now is the time! I use that sugar cookie dough for nearly all of my shaped sugar cookies and you can find them all on the new Cut Out Cookies page. Loved by many, the sugar cookies are soft, thick, hold their shape in the oven, and have a flat surface ready for decorating. It’s a classic recipe that’s simple yet easily versatile, like vanilla cupcakes (another favorite!). Today’s recipe is the same as my sugar cookies recipe only you’ll add vanilla bean and we’re taking a small step away from traditional royal icing, too.
For today’s shamrock cookies:
- Vanilla Bean: Add the seeds scraped from 1 whole vanilla bean. If you can’t find vanilla bean in your grocery store, you can order some online. I use and love these exact vanilla beans—and they’re usually what I use for homemade vanilla extract and homemade vanilla sugar too.
- Optional Vanilla Sugar: Speaking of homemade vanilla sugar… have you ever used it in baking before? Today’s recipe is the perfect place for vanilla sugar because this type of sugar is best used in recipes where vanilla is the prominent flavor. Just use it as a 1:1 replacement for regular granulated sugar..
- Cookie Cutter: You can use today’s vanilla bean sugar cookie dough with any cookie cutter. For the shamrocks, I used the medium and small cookie cutters from this exact shamrock cookie cutter set. I know the store Michaels carries shamrock cookie cutters and if you want to purchase a single shamrock cookie cutter, this 3-inch size is a great option.
The Trick is the Order of Steps
After the cookie dough comes together, roll the dough out and chill the rolled out sections of dough. Cut the chilled dough into shamrocks or other shapes and then bake.
Notice how I roll out the dough BEFORE chilling it in the refrigerator?
That’s the trick and let me explain why it works. To prevent the cookies from over-spreading, the cookie dough must be refrigerated first. Roll the dough out right after you prepare it and then chill it. (At this point the dough is too soft to cut into shapes.) Don’t chill the cookie dough and then try to roll it out because it will be too cold and stiff to roll. I divide the dough in half before rolling it out and highly recommend you do the same because smaller sections of dough are a lot easier to handle.
I do this any time I make sugar cookies, for any occasion like these Valentine’s Day cookies, Easter cookies, fireworks cookies, and Christmas sugar cookies. (Same dough recipe.)
Another trick! Roll out the cookie dough directly on a silicone baking mat or parchment paper so you can easily transfer it to the refrigerator. Pick it up, put it on a baking sheet, and place it in the refrigerator. If you don’t have enough room for two baking sheets in your refrigerator, stack the pieces of rolled out dough on top of each other. (That’s what I do.)
After chilling the rolled out dough, it’s ready to shape and bake:
If you want to bust out your cookie decorating supplies for these vanilla bean shamrock cookies, you can use royal icing or easier cookie icing… The vanilla bean buttercream recipe below is similar to regular vanilla buttercream, but makes just enough to frost the batch of cookies whether you use a piping tip, knife, or icing spatula to decorate. And like the sugar cookies, the frosting includes vanilla bean.
We also love these with salted caramel frosting spread on top.
Decorating St. Patrick’s Day Cookies with Buttercream
- This frosting doesn’t really crust: Though the frosting somewhat sets, it doesn’t fully crust. If you prefer a crusting buttercream, you can replace half of the butter with shortening.
- You can tint this frosting: Feel free to tint the vanilla bean buttercream. So the buttercream maintains its consistency, I recommend gel food coloring. I used Americolor leaf green.. To do that, spoon 2 or more colors of buttercream into your piping bag. I used uncolored buttercream (white-ish) and green. When you pipe, the colors will swirl together and each frosted cookie will look different. Very pretty!
To easily fill a piping bag with frosting, fit the piping bag into a tall cup first. The cup holds the piping bag open and upright which makes it really easy to fill.
And don’t worry, if you totally mess up when decorating cookies with buttercream, sprinkles can hide your mistake. Let me know if you try these vanilla bean cookies—shamrock shaped, decorated, plain, however!
St. Patrick’s Day Shamrock Cookies Recipe
Description
Using your choice of cookie cutters, you can enjoy these soft-baked vanilla bean sugar cookies as any shape you want. You can leave them plain or decorate with the vanilla bean buttercream listed below or try royal icing or this easy cookie icing instead.
Ingredients You’ll Need
Instructions
- Whisk the flour, baking powder, and salt together in a medium bowl. Set aside.
- In a large bowl using a handheld or a stand mixer fitted with a paddle attachment, beat the butter and sugar together on high speed for 1 minute. Add the vanilla bean seeds and beat again until combined and butter is creamy, about 1-2 more minutes. Add the egg and vanilla extract and beat on high speed until combined, about 1 minute. Scrape down the sides and up the bottom of the bowl and beat again as needed to combine.
- Add the dry ingredients to the wet ingredients and beat on low speed until combined. Dough will be a bit soft. If the dough seems too soft and sticky for rolling, add 1 more Tablespoon of flour.
- Divide the dough into 2 equal portions. Place each portion on a piece of lightly floured parchment paper or a lightly floured silicone baking mat. With a lightly floured rolling pin, roll the dough out to about 1/4-inch thickness. Use more flour if the dough seems too sticky. The rolled-out dough can be any shape, as long as it is evenly 1/4-inch thick.
- Lightly dust one of the rolled-out doughs with flour. Place a piece of parchment on top. (This prevents sticking.) Place the 2nd rolled-out dough on top. Cover with plastic wrap or aluminum foil and then refrigerate for at least 1-2 hours and up to 2 days.
- Once chilled, preheat oven to 350°F (177°C). Line 2-3 large baking sheets with parchment paper or silicone baking mats. Carefully remove the top dough piece from the refrigerator. If it’s sticking to the bottom, run your hand under it to help remove it. Using a cookie cutter, cut the dough into shapes. Re-roll the remaining dough and continue cutting until all is used. Repeat with 2nd piece of dough. (Note: It doesn’t seem like a lot of dough, but you get a lot of cookies from the dough scraps you re-roll.)
- Arrange cookies on baking sheets 3 inches apart. Bake for 11-12 minutes or until lightly browned around the edges. If your oven has hot spots, rotate the baking sheet halfway through bake time. Allow cookies to cool on the baking sheet for 5 minutes and then transfer to a wire rack to cool completely before decorating.
- With a handheld or stand mixer fitted with a paddle attachment, beat the butter and vanilla bean seeds together on medium speed until butter is creamy, about 2 minutes. Add confectioners’ sugar, heavy cream, and vanilla extract. Beat on low speed for 30 seconds and then increase to medium-high speed and beat for 2 full minutes. Taste. Add a pinch of salt if frosting is too sweet. To color the frosting, divide the frosting between 2-3 bowls (or however many colors of frosting you want). Stir in 1-2 tiny drops of gel food coloring (or more, depending on your desired color).
- You can decorate the cookies with a knife, icing spatula, or use a piping bag and piping tip. Top with sprinkles, if desired.. Pipe hearts as the 3 leaves and a line as the stem.
- Frosting does not harden or crust very much, though you could gently stack 1 frosted cookie on top of another, but expect some slight squishing. Store frosted cookies covered at room temperature for up to 1 day or in the refrigerator for up to 1 week. Store unfrosted cookies covered at room temperature for up to 5 days or in the refrigerator for up to 1 week.
You may also like...