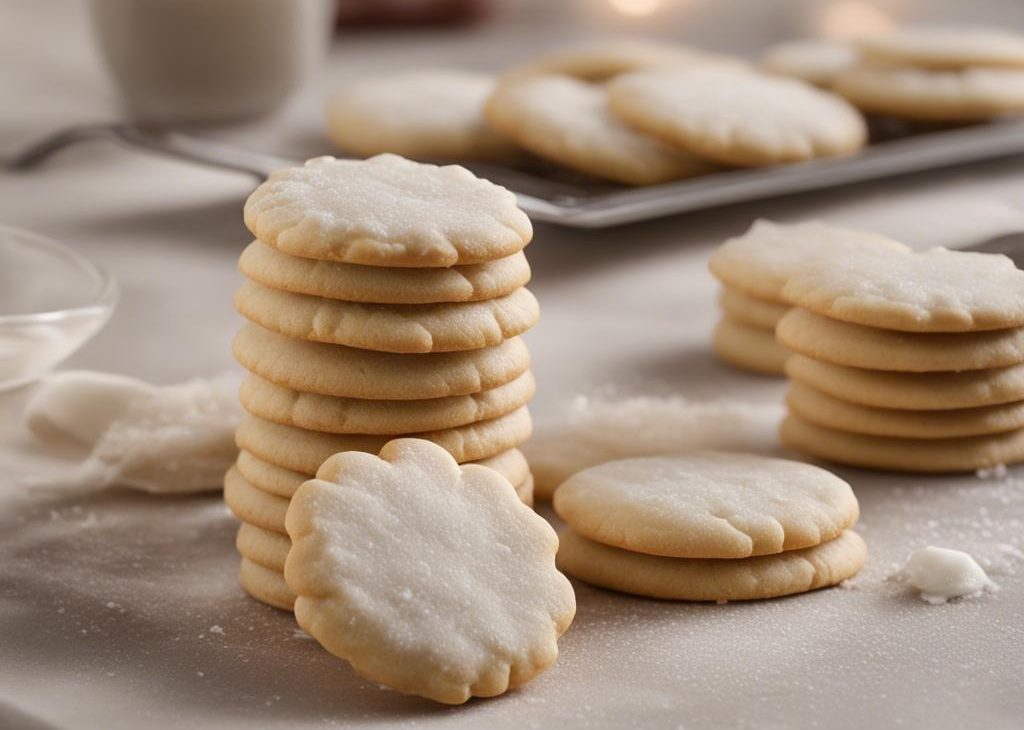

I make sugar cookies when I want cutouts that do not puff into mystery shapes. It is the kind of recipe I reach for when I want food that feels familiar but still needs a little attention. The payoff is soft, buttery, and sturdy enough for icing once the cookies cool, which is exactly why I keep it in my rotation.
The first time I worked through this version, I paid attention to the small moments: how the mixture looked before cooking, when the edges started to change, and how long it needed to rest. Those details are easy to skip, but they are usually what separate a decent batch from one I want to make again.
I kept the method straightforward and wrote the notes the way I use them in my own kitchen. If something can go wrong, I would rather say it plainly than pretend the clock fixes everything.
Why I keep coming back to this
- It gives me soft, buttery, and sturdy enough for icing once the cookies cool without asking for fussy restaurant tricks.
- The ingredient list is clear, and I can tell what each piece is doing.
- The timing is practical enough for a real kitchen, including interruptions.
- It scales nicely for sharing or for leftovers, which matters more than people admit.
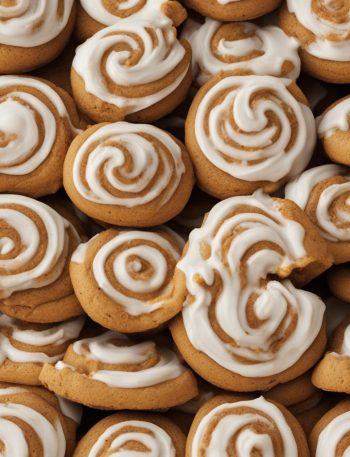
- I can serve it with royal icing, glaze icing, or cookie buttercream and call the meal handled.
- The recipe has enough built-in cues that I do not have to guess the whole way through.
What you need (and what each one is doing)
- 2 1/4 cups all-purpose flour (281g).This gives structure, so I measure it carefully.
- 1/2 teaspoon baking powder.
- 1/4 teaspoon salt.This keeps the flavor from tasting flat.
- 3/4 cup unsalted butter, softened (170g).This brings moisture, richness, or tenderness.
- 3/4 cup granulated sugar (150g).This sweetens and helps with browning or moisture.
- 1 large egg, at room temperature.This binds and helps the recipe set.
- 2 teaspoons pure vanilla extract.
- 1/4-1/2 teaspoon almond extract (optional).
- Royal Icing, Easy Glaze Icing, or Cookie Buttercream.This brings moisture, richness, or tenderness.
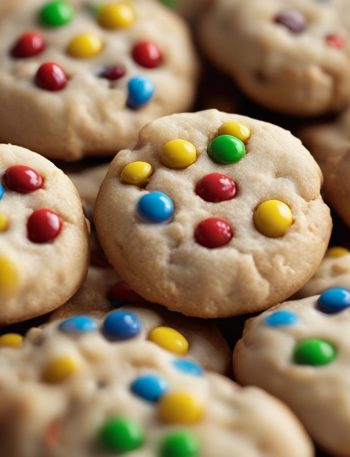
- assorted sprinkles.
How I make it
Step 1 — Whisk the flour, baking powder, and salt
I whisk the flour, baking powder, and salt together in a medium bowl. Set aside.
Step 2 — In a large bowl using a handheld
In a large bowl using a handheld or a stand mixer fitted with a paddle attachment, beat the butter and sugar together on high speed until completely smooth and creamy, about 3 minutes. Add the egg, vanilla, and almond extract (if using) and beat on high speed until combined, about 1.
Step 3 — Add the dry ingredients to the wet
I add the dry ingredients to the wet ingredients and mix on low until combined. Dough will be a bit soft. If the dough seems too soft and sticky for rolling, add 1 more Tablespoon of flour.
Step 4 — Divide the dough into 2 equal parts
I divide the dough into 2 equal parts. Place each portion onto a piece of lightly floured parchment paper or a lightly floured silicone baking mat. With a lightly floured rolling pin, roll the dough out to about 1/4-inch thickness. Use more flour if the dough seems too sticky. The rolled-out dough.
Step 5 — Lightly dust one of the rolled-out doughs
I lightly dust one of the rolled-out doughs with flour. Place a piece of parchment on top. (This prevents sticking.) Place the 2nd rolled-out dough on top. Cover with plastic wrap or aluminum foil, then refrigerate for at least 1-2 hours and up to 2 days.
Step 6 — Once chilled, preheat oven to 350°
I once chilled, preheat oven to 350°F (177°C). Line 2-3 large baking sheets with parchment paper or silicone baking mats. Carefully remove the top dough piece from the refrigerator.. Using a cookie cutter, cut the dough into shapes. Re-roll the remaining dough and continue cutting until all is used. Repeat with 2nd.
Step 7 — Arrange cookies on baking sheets 3 inches
I arrange cookies on baking sheets 3 inches apart. Bake for 11-12 minutes or until lightly browned around the edges. If the oven has hot spots, rotate the baking sheet halfway through bake time. Allow cookies to cool on the baking sheet for 5 minutes then transfer to a wire rack.
Step 8 — Decorate the cooled cookies with royal icing,
I decorate the cooled cookies with royal icing, easy cookie icing, or cookie decorating buttercream. Feel free to tint any of the icings with gel food coloring. See post above for recommended decorating tools. No need to cover the decorated cookies as I wait for the icing to set. If it’s helpful.
The small details I watch
With sugar cookies, I respect the resting and cooling steps. Hot food keeps cooking after it leaves the heat, and baked recipes keep setting as they cool. Serving too early is usually the easiest way to lose the texture I wanted.
I also taste where it makes sense. Salt, citrus, sweetness, and spice shift depending on brands and produce, so I adjust only after the base is ready to judge.
Tips from my kitchen
- I roll the dough before chilling so it is not rock hard later..I roll the dough before chilling so it is not rock hard later.
- Flour the parchment lightly, not heavily, or the cookies taste dusty..Flour the parchment lightly, not heavily, or the cookies taste dusty.
- Chill the cut shapes if the kitchen is warm..Chill the cut shapes if the kitchen is warm.
- Rotate pans halfway if the oven has hot spots..Rotate pans halfway if the oven has hot spots.
- Let icing set completely before stacking..Let icing set completely before stacking.
Variations I have actually tried
- Lemon:Lemon zest in the dough for a brighter cookie.
- Vanilla-only:Vanilla-only dough when I want a classic bakery flavor.
- Chocolate-dipped:Chocolate-dipped half moons instead of full icing.
- Colored:Colored sanding sugar before baking for simple sparkle.
- Tiny:Tiny cutters for gift boxes; I shorten the bake time.
Storing and reheating
I store sugar cookies in the way that protects its main texture. If it is crisp or baked, I cool it first so trapped steam does not soften it. If it is creamy, saucy, or blended, I use a covered container and keep strong-smelling foods away from it.
For reheating, I use gentle heat and stop as soon as it is warm. For cold recipes, I stir or blend briefly before serving. Leftovers are always better when I portion them before the refrigerator turns one large container into a guessing game.
Frequently asked questions
Can I make sugar cookies ahead?
Yes. I usually make the parts that hold well ahead and keep final garnishes or toppings separate. For best texture, I follow the storage notes and refresh the sugar cookies gently before serving.
What is the most common mistake?
Rushing is the mistake I see most often. I slow down at the step where moisture, cooling, or browning matters because that is where the texture is usually decided.
Can I change the add-ins?
Yes, within reason. I keep the base quantities steady, then swap add-ins with similar moisture and size so the recipe still cooks or chills the way it should.
How do I know it is done?
I look for the visual cue in the method instead of relying only on the clock. With sugar cookies, the timing gets me close, but the center, edges, and aroma tell me when to stop.
How should I serve it?
I like it with royal icing, glaze icing, or cookie buttercream. I keep the serving simple because the recipe already has enough flavor on its own.
If you make this sugar cookies, leave a comment with the variation you tried. I always like hearing what worked in another real kitchen.
Sugar Cookies
Description
I make sugar cookies when I want cutouts that do not puff into mystery shapes. The recipe gives me soft, buttery, and sturdy enough for icing once the cookies cool, and the notes below cover the practical cues I watch in my own kitchen.
Ingredients You’ll Need
Instructions
- I whisk the flour, baking powder, and salt together in a medium bowl. Set aside.
- In a large bowl using a handheld or a stand mixer fitted with a paddle attachment, beat the butter and sugar together on high speed until completely smooth and creamy, about 3 minutes. Add the egg, vanilla, and almond extract (if using) and beat on high speed until combined, about 1 minute. Scrape down the sides and up the bottom of the bowl and beat again as needed to combine.
- I add the dry ingredients to the wet ingredients and mix on low until combined. Dough will be a bit soft. If the dough seems too soft and sticky for rolling, add 1 more Tablespoon of flour.
- I divide the dough into 2 equal parts. Place each portion onto a piece of lightly floured parchment paper or a lightly floured silicone baking mat. With a lightly floured rolling pin, roll the dough out to about 1/4-inch thickness. Use more flour if the dough seems too sticky. The rolled-out dough can be any shape, as long as it is evenly 1/4-inch thick.
- I lightly dust one of the rolled-out doughs with flour. Place a piece of parchment on top. (This prevents sticking.) Place the 2nd rolled-out dough on top. Cover with plastic wrap or aluminum foil, then refrigerate for at least 1-2 hours and up to 2 days.
- I once chilled, preheat oven to 350°F (177°C). Line 2-3 large baking sheets with parchment paper or silicone baking mats. Carefully remove the top dough piece from the refrigerator.. Using a cookie cutter, cut the dough into shapes. Re-roll the remaining dough and continue cutting until all is used. Repeat with 2nd piece of dough. (Note: It doesn't seem like a lot of dough, but I get a lot of cookies from the dough scraps I re-roll.).
- I arrange cookies on baking sheets 3 inches apart. Bake for 11-12 minutes or until lightly browned around the edges. If the oven has hot spots, rotate the baking sheet halfway through bake time. Allow cookies to cool on the baking sheet for 5 minutes then transfer to a wire rack to cool completely before decorating.
- I decorate the cooled cookies with royal icing, easy cookie icing, or cookie decorating buttercream. Feel free to tint any of the icings with gel food coloring. See post above for recommended decorating tools. No need to cover the decorated cookies as I wait for the icing to set. If it's helpful, decorate the cookies directly on a baking sheet so I can stick the entire baking sheet in the refrigerator to help speed up the icing setting.
- I enjoy cookies right away or wait until the icing sets to serve them. Once the icing has set, these cookies are great for gifting or for sending. Plain or decorated cookies stay soft for about 5 days when covered tightly at room temperature. For longer storage, cover and refrigerate for up to 10 days. If decorated with cookie buttercream, cover and store decorated cookies at room temperature for 1 day, or in the refrigerator for up to 5 days.
Nutrition Facts
Servings 24
- Amount Per Serving
- Calories 119kcal
- % Daily Value *
- Total Fat 6g10%
- Saturated Fat 4g20%
- Trans Fat 0.2g
- Cholesterol 15mg5%
- Sodium 32mg2%
- Potassium 15mg1%
- Total Carbohydrate 15g5%
- Sugars 6g
- Protein 1g2%
- Calcium 10 mg
- Iron 0.6 mg
* Percent Daily Values are based on a 2,000 calorie diet. Your daily value may be higher or lower depending on your calorie needs.
Note
I roll the dough before chilling so it is not rock hard later..
Flour the parchment lightly, not heavily, or the cookies taste dusty..
Chill the cut shapes if the kitchen is warm..
Rotate pans halfway if the oven has hot spots..
Frequently Asked Questions
Yes. I usually make the parts that hold well ahead and keep final garnishes or toppings separate. For best texture, I follow the storage notes and refresh the sugar cookies gently before serving.
Rushing is the mistake I see most often. I slow down at the step where moisture, cooling, or browning matters because that is where the texture is usually decided.
Yes, within reason. I keep the base quantities steady, then swap add-ins with similar moisture and size so the recipe still cooks or chills the way it should.
I look for the visual cue in the method instead of relying only on the clock. With sugar cookies, the timing gets me close, but the center, edges, and aroma tell me when to stop.
I like it with royal icing, glaze icing, or cookie buttercream. I keep the serving simple because the recipe already has enough flavor on its own.
You may also like...