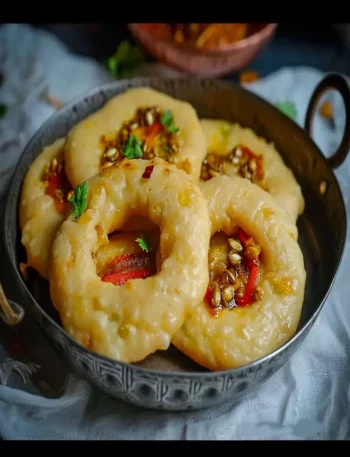

I make Ube Polvoron when I want a recipe that feels familiar but still asks me to pay attention. The ingredient list is straightforward, yet the small details matter: measured bowls, the right pan, and a little patience while it cools or rests.
This version keeps the original timing intact: 25 min prep, 10 min cook time. It serves 40, and I use that number when I portion it.
I wrote the method the way I move through the kitchen. I set out the ingredients first, watch for visual cues, and avoid rushing the final cooling step.
Why I keep coming back to this
- The timing is predictable: 25 minutes of prep and 10 minutes of cooking gives me a clear plan.
- The serving count stays at 40, so I know whether I am feeding a table or saving leftovers.
- The main heat cue is the heat in the method, which I write on a note before I start.
- The pan cue is the pan listed in the method, and I do not swap it unless I can adjust the timing.
- The recipe rewards measured ingredients more than fancy equipment.
- Leftovers hold up better when I cool them before covering.
What you need and why it matters
I measure everything into small bowls and group finishing ingredients separately. That simple habit keeps the last few minutes calm.
- All-purpose flour, 2 cups. It gives the recipe its structure; I spoon it into the cup rather than scooping to avoid packing.
- Ube powder, 2 cups.
- Sugar, 1 cup. It does more than sweeten—it helps browning and affects how tender the final texture is.
- Butter, 1 cup. I melt it gently so it blends into the batter without leaving greasy pockets.
- Baking powder, 2 teaspoons. It provides the lift that keeps things from turning dense.
How I make it
Step 1 — Prep the ingredients
I toast flour in a separate pan until light brown, stirring to prevent burning.
Step 2 — Mix the toasted flour
I mix toasted flour, ube powder, and sugar in a bowl.
Step 3 — Melt the butter
I melt butter in a saucepan over low heat.
Step 4 — Combine the ingredients
I gradually combine melted butter with the dry mixture until it forms a crumbly texture.
Step 5 — Add the remaining ingredients
I add milk one tablespoon at a time, mixing until it forms a cohesive ball.
Step 6 — Shape the cookies
I shape the mixture into polvoron using molds or by hand.
Step 7 — Chill
I refrigerate for about an hour to firm them up.
Step 8 — Finish and serve
I individually wrap polvoron in colorful cellophane paper once set.
Tips from my kitchen
- Measure first. I set every ingredient on the counter before heating the oven or stove.
- Watch the heat. I trust the visual cue over the clock when my pan or oven runs different.
- Cool before covering. Steam softens crisp edges and can
- Keep tools simple. A bowl, spatula, whisk, and small offset spatula handle most of the work.
Variations I have actually tried
- Variation 1: I toast nuts or seeds first when they are included.
- Variation 2: I keep a spoonful of garnish back for serving.
- Variation 3: I make smaller portions for snacks and watch the timing.
- Variation 4: I add citrus zest when the base flavor needs lift.
- Variation 5: I adjust seasoning after tasting, not before.
How I serve it
I serve Ube Polvoron after it has had enough time to settle. For sweets, I like clean slices or tidy pieces with coffee, tea, or cold milk. For savory dishes, I add something crisp, bright, or fresh on the side.
If I am taking it somewhere, I keep garnishes separate until the last minute. That small move keeps crumbs crisp, frosting cleaner, sauces brighter, and toppings from sliding around.
Storing and reheating
I cool leftovers completely, then cover them tightly.
For reheating, I use gentle heat. A short microwave burst works for single portions, while a low oven brings back better texture for pieces with a crust, crumb, or crunchy topping.
Small details that make a difference
I give Ube Polvoron a little extra attention because shorter recipes can trick me into rushing. When there are fewer steps, each one carries more weight. I check the texture before I move on, scrape the bowl or pan well, and keep the finishing ingredients close so the final result tastes intentional rather than hurried.
- I pause after mixing. A short pause lets dry spots hydrate and shows me whether the mixture needs a tiny adjustment.
- I use the same measuring tools each time. Consistency matters more here than speed, especially with small batches.
- I keep heat moderate. Gentle heat gives me more control and keeps sugars, nuts, sauces, or crumbs from tasting scorched.
- I finish cleanly. I wipe the rim of the pan, jar, or storage container before serving because presentation helps even simple food feel cared for.
Frequently asked questions
Can I make Ube Polvoron ahead?
I often do part of the work ahead, then finish close to serving so the texture stays fresh.
Can I change the pan size?
I try to use the listed pan. If I change it, I watch thickness and start checking early.
How do I know it is done?
I use the source time as a guide, then check color, set edges, and the cue at the listed heat.
Can I freeze leftovers?
I freeze sturdy portions after they cool completely, wrapped tightly and labeled with the date.
What mistake should I avoid?
I do not rush the cooling or resting step. Warm layers, crumbs, or fillings can shift if handled too soon.
If you make Ube Polvoron, I would love to hear what variation or garnish you used.
Ube Polvoron
Description
I make Ube Polvoron with the original prep time of 25 min and cook time of 10 min. The steps below keep the source quantities, pan cues, temperatures, and serving count intact while adding my practical kitchen notes.
Ingredients You’ll Need
Instructions
- I toast flour in a separate pan until light brown, stirring to prevent burning.
- I mix toasted flour, ube powder, and sugar in a bowl.
- I melt butter in a saucepan over low heat.
- I gradually combine melted butter with the dry mixture until it forms a crumbly texture.
- I add milk one tablespoon at a time, mixing until it forms a cohesive ball.
- I shape the mixture into polvoron using molds or by hand.
- I refrigerate for about an hour to firm them up.
- I individually wrap polvoron in colorful cellophane paper once set.
Nutrition Facts
Servings 40
- Amount Per Serving
- Calories 83kcal
- % Daily Value *
- Total Fat 5g8%
- Saturated Fat 3g15%
- Trans Fat 0.2g
- Cholesterol 12mg4%
- Sodium 27mg2%
- Potassium 8mg1%
- Total Carbohydrate 10g4%
- Sugars 5g
- Protein 1g2%
- Calcium 17 mg
- Iron 0.3 mg
* Percent Daily Values are based on a 2,000 calorie diet. Your daily value may be higher or lower depending on your calorie needs.
Note
Measure before heating. I set every ingredient for Ube Polvoron on the counter before I turn on the oven or stove.
Use the listed pan. A different size changes thickness, browning, and timing.
Cool with patience. Warm filling, frosting, or crumbs can shift if I cut too soon.
Season or garnish at the end. I taste and adjust once the main texture is set.
Frequently Asked Questions
I often do part of the work ahead, then finish close to serving so the texture stays fresh.
I try to use the listed pan. If I change it, I watch thickness and start checking early.
I use the source time as a guide, then check color, set edges, and the cue at the listed heat.
I freeze sturdy portions after they cool completely, wrapped tightly and labeled with the date.
I do not rush the cooling or resting step. Warm layers, crumbs, or fillings can shift if handled too soon.
You may also like...