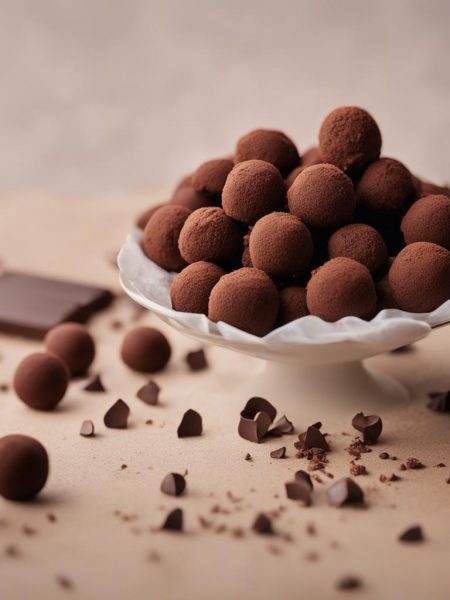

Oreo balls are one of the first no-bake treats I learned to make without second-guessing myself. Crushed cookies and cream cheese turn into a thick truffle center, then a chocolate shell makes them look like something from a candy case.
I make them most often in December, but they are not only a holiday thing in my kitchen. Different Oreo flavors, different coatings, and a few sprinkles can make the same method fit birthdays, bake sales, or a random Friday when I want something small and cold from the fridge.
The trick is patience between steps. The centers need to chill before dipping, and the melted chocolate needs a few minutes to cool so it coats instead of melting the filling. I learned that lesson after one batch slowly slid off the fork.
Why I keep coming back to this
- Only 4 main ingredients, plus whatever decorations I feel like using.
- No oven, no candy thermometer, and no complicated filling.
- The recipe makes 28 balls, which is a manageable tray.
- Regular, golden, or flavored Oreo cookies all work.
- They keep up to 2 weeks in the refrigerator.
- Decorating can be as plain or as festive as I want.
What you need (and what each one is doing)
- Oreo cookies, 36 cookies (14.3oz/405g).I use the whole cookie, filling included. The filling helps bind the crumbs and gives the center that familiar cookies-and-cream taste.
- Cream cheese, 8 ounces (226g).Softened cream cheese blends into the crumbs more evenly. Cold cream cheese leaves streaks and makes rolling harder.
- Chocolate, 12 ounces (339g).I use chopped chocolate or good melting wafers. White, semi-sweet, dark, or milk chocolate all work, as long as it melts smoothly.
- Vegetable oil or coconut oil, 1/2 teaspoon.This small amount loosens the melted chocolate so dipping is easier.
- Sprinkles, Oreo crumbs, or extra melted chocolate, optional.I add decorations while the coating is wet so they actually stick.
How I make it
Step 1 — Crush the cookies
Place all 36 Oreo cookies, including the filling, in a food processor or blender. Pulse until they are fine crumbs with no large cookie chunks left.
Step 2 — Mix with cream cheese
Beat or pulse the crumbs with softened cream cheese until fully combined. The mixture should look like a thick, dark dough.
Step 3 — Roll and chill
Scoop about 1 Tablespoon of mixture per ball, about 18-22g each, and roll between your hands. Place on parchment-lined plates or baking sheets. If sticky, chill the mixture for 15 minutes before rolling.
Step 4 — Firm the centers
Cover and refrigerate the balls for at least 1 hour and up to 3 days. If I am rushing, I freeze them for 30 minutes, then move on right away.
Step 5 — Melt the coating
Melt the chopped chocolate with the oil in 20-second microwave increments, stirring after each, until smooth. Let it sit for 5 minutes so it is warm, not hot.
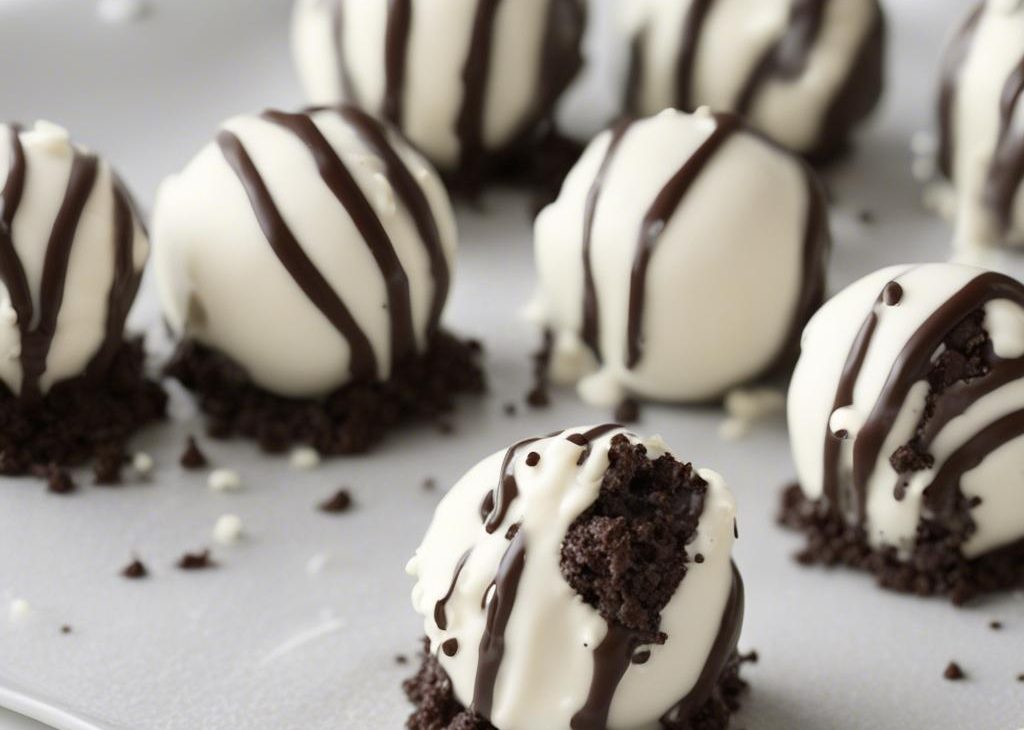
Step 6 — Dip and decorate
Dip one Oreo ball at a time, lift with a fork or dipping tool, tap off excess chocolate, and slide onto parchment. Add sprinkles or crumbs while wet, then refrigerate at least 1 hour to set.
Timing notes I rely on
I count on two chilling windows: at least 1 hour for the rolled centers, then at least 1 hour after dipping so the shell sets. The 30-minute freezer shortcut works for the first chill, but I do not leave them frozen much longer before dipping because condensation can make chocolate seize or streak.
Tips from my kitchen
- Use softened cream cheese.It blends faster and keeps the filling smooth.
- Make fine crumbs.Large cookie pieces make the balls crack when rolled.
- Chill before dipping.Room-temperature centers are too soft for warm chocolate.
- Let chocolate cool 5 minutes.Hot coating can melt the Oreo filling.
- Work one at a time.Decorations stick best while the coating is still wet.
Variations I have actually tried
- Golden Oreo balls:I use golden cookies with white chocolate for a vanilla version.
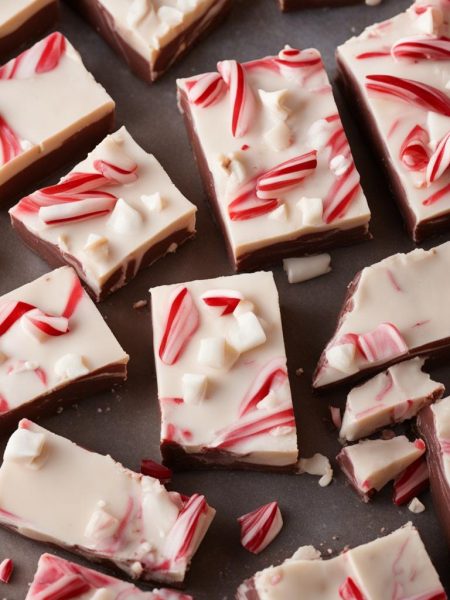
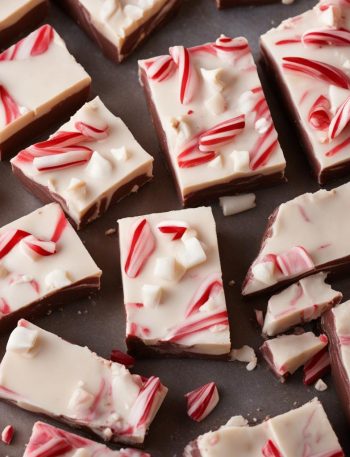
- Peppermint:I add crushed candy cane on top while the coating is wet.
- Dark chocolate:Dark coating balances the sweet filling nicely.
- Birthday style:Golden cookies, white coating, and rainbow sprinkles make cheerful party bites.
- Drizzled finish:I drizzle a contrasting chocolate over the set coating for a cleaner look than sprinkles.
Storing and reheating
Once the chocolate is set, store the Oreo balls in an airtight container in the refrigerator, layered with parchment or wax paper, for up to 2 weeks. I like them cold, straight from the fridge.
They also freeze well for up to 2 months. I thaw them overnight in the refrigerator, still covered, so moisture does not collect on the chocolate shell.
What I serve with it
I add these to cookie boxes, dessert trays, and birthday tables. They are rich, so one or two per person is usually enough, especially next to cookies, bark, or peanut butter balls.
Small details that make it work
The filling should hold together like soft modeling clay. If it crumbles when I squeeze it, the crumbs were not fine enough or the cream cheese was too cold. I keep mixing until the color is even and the dough leaves a slight mark on my fingers. That is when it rolls smoothly and does not crack.
For dipping, I prefer a narrow glass measuring cup because the chocolate stays deep enough to submerge each ball. A shallow bowl makes me chase the coating around the bottom. I tap the fork gently, not aggressively, because hard tapping can knock the center right back into the chocolate.
If I am making these for a party, I dip the plainest decorations first and the messier drizzle last. Sprinkles and crumbs can fall into the chocolate and make later pieces look bumpy. I keep a second sheet of parchment nearby as a landing zone for finished balls. Having that space ready keeps me from rushing with a fork full of chocolate.
I like to save a spoonful of Oreo crumbs before mixing in the cream cheese. Those crumbs make the easiest garnish, and they identify the flavor before anyone takes a bite. If I forget, I crush one extra cookie or use sprinkles instead. The garnish is optional, but it makes the tray look more finished with very little work.
Frequently asked questions
Can I make Oreo balls without a food processor?
Yes. Crush the cookies very finely in a zip-top bag with a rolling pin, then mix with softened cream cheese using a mixer or strong spoon.
Why are my Oreo balls sticky?
The filling may be warm. Chill it for 15 minutes before rolling, and wipe your hands as needed.
Can I use candy melts?
Yes. Candy melts coat neatly. I still add a tiny bit of oil only if the coating seems too thick.
Why did my chocolate crack?
The centers may have been too cold from the freezer or the coating too warm. I use chilled, not frozen-solid, centers.
How far ahead can I make them?
You can roll the centers up to 3 days ahead and store finished Oreo balls up to 2 weeks in the refrigerator.
If you decorate a batch, tell me your coating and sprinkle combination — I never get tired of seeing these dressed up.
4-Ingredient Oreo Balls
Description
Easy Oreo balls made with 36 Oreo cookies, cream cheese, melted chocolate, and a little oil for smooth dipping. Chill, dip, decorate, and store in the refrigerator for up to 2 weeks.
Ingredients You’ll Need
Instructions
- Place the Oreos, including the filling, in a food processor or blender and pulse into fine crumbs.
- Beat or pulse the Oreo crumbs with the softened cream cheese until combined into a thick dough.
- Scoop about 1 Tablespoon of mixture, about 18-22g each, and roll into balls. Place on parchment-lined plates or baking sheets. If the mixture is too sticky, refrigerate for 15 minutes before rolling.
- Cover and refrigerate the balls for at least 1 hour and up to 3 days. For a shortcut, freeze for 30 minutes, but do not freeze much longer before dipping.
- Melt the chopped chocolate and oil in 20-second microwave increments, stirring after each, until smooth. Let the warm chocolate sit for 5 minutes before dipping.
- Dip one Oreo ball at a time, lift with a fork or dipping tool, tap off excess chocolate, and transfer to parchment. Decorate while wet if desired.
- Refrigerate for at least 1 hour to set. Store in an airtight container in the refrigerator, layered with parchment or wax paper, for up to 2 weeks.
Nutrition Facts
Servings 28
- Amount Per Serving
- Calories 28kcal
- % Daily Value *
- Total Fat 3g5%
- Saturated Fat 2g10%
- Trans Fat 0.1g
- Cholesterol 9mg3%
- Sodium 26mg2%
- Potassium 11mg1%
- Calcium 8 mg
- Iron 0.1 mg
* Percent Daily Values are based on a 2,000 calorie diet. Your daily value may be higher or lower depending on your calorie needs.
Note
Use the whole cookie. The Oreo filling helps bind the crumbs.
Chill before dipping. Soft centers are hard to coat neatly.
Cool the chocolate 5 minutes. Hot chocolate can melt the filling.
Decorate immediately. Sprinkles and crumbs stick only while the coating is wet.
Frequently Asked Questions
Yes. Regular, golden, mint, or seasonal flavors all work with the same method.
Yes. Rolled centers keep up to 3 days before dipping, and finished Oreo balls keep up to 2 weeks in the refrigerator.
Yes, freeze for up to 2 months and thaw overnight in the refrigerator.
Use chocolate that melts smoothly: chopped baking chocolate, quality bars, wafers, or candy melts.
Condensation or overheated chocolate can cause streaks. Chill the centers, but avoid dipping frozen-solid balls.
You may also like...