
If you’ve been reading my blog for a few years, you may be familiar with my annual July 4th tradition. 🙂 Every year on or around July 4th, I share a new apple pie recipe. This year marks year 6! Apple pie, an American classic, is my all-time favorite dessert. I shared my first recipe back in 2013 and every year since then:
- 2013: Salted Caramel Apple Pie
- 2014: Apple Pie Bars (with Salted Caramel on top)
- 2015: Apple Crumble Pie
- 2016: Apple Slab Pie with Maple Icing
- 2017: Traditional Apple Pie
- 2018: Apple Hand Pies
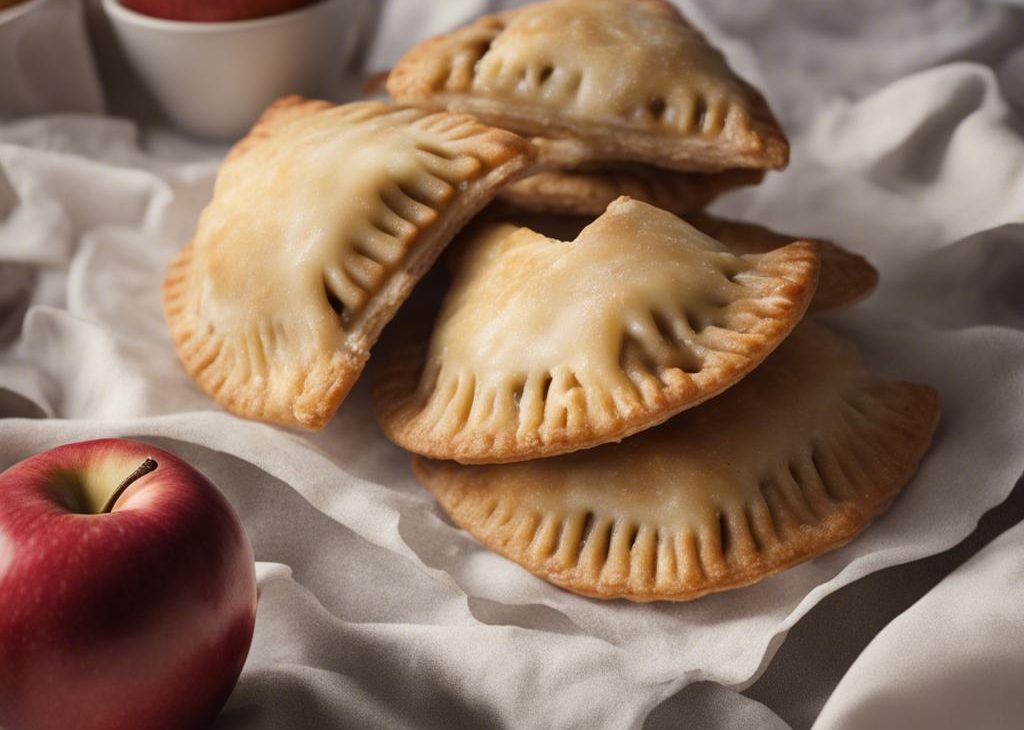
My recipe for homemade individual apple hand pies is really fun for summertime; hand pies are an easy grab and go dessert, so they’re great for summer picnics. Awesome portion control. No serving utensils or plates required. Can be served warm, room temperature, or cold and honestly taste great each way. Kids can help shape them and hand pies can be prepared days ahead or frozen.
And, best part of all, you literally have an apple pie just for yourself.
. I also include alternate filling suggestions just in case apple isn’t your thing. Lots to go over so let’s get started!
Homemade Pie Dough
First step is to make your pie dough. There’s a higher crust-to-filling ratio in hand pies, so we want a crust that tastes GOOD. I recommend using my homemade pie crust. This crust, prepared with a mix of butter and shortening, is sturdy enough to bake in different shapes and designs. Pie crust may intimidate you, so let’s go over my pie crust tips and tricks:
Here’s the full recipe for pie crust. More tips and troubleshooting assistance over that way. The recipe yields 2 crusts, and you’ll use both in this recipe to produce 10 hand pies.
Apple Pie Filling
Just apples, sugar, spices, and butter. What more could one want?* The hand pie bake time isn’t long enough to really soften the apples, so let’s get them started on the stove. The filling is buttery, pleasantly sweet, and filled with cinnamon spice. You can prepare it a couple days ahead of time (along with the pie dough!) so all you have to do is assemble and bake the hand pies for dessert.
*Salted caramel. One could also want salted caramel. That’s going on top!!
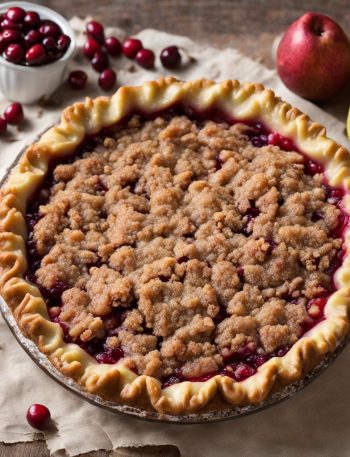
Whenever I make apple pie bars, apple pie, apple cranberry crumble pie, or even apple cake, I always use 2 different kinds of apples for more depth of flavor. (half sweet variety, half tart variety.) For a detailed list of my favorite apple varieties and when to use each, you can visit my post The Best Apples for Baking.
My only tip for the apple pie filling: cut the apples into small bite-size pieces. That way you can fit more into each hand pie.
Alternate Fillings
So many delicious options!
- Blueberry: Combine 2 cups of fresh blueberries (I don’t recommend frozen—too wet), 1.5 Tablespoons cornstarch, 1/3 cup granulated sugar, and a splash of lemon juice together in a saucepan. Cook the filling just like you would with the apple pie filling in the directions below.
- Strawberry: Follow blueberry instructions, but use 2 cups chopped fresh strawberries.
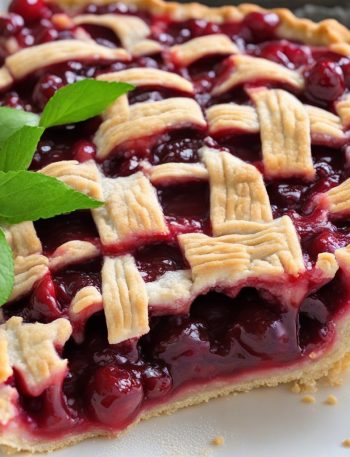
- Cherry: Simply follow the filling recipe + instructions for my cherry pastry pies (step 1 in that recipe).
- Jam: fill with a spoonful or 2 of your favorite jam or preserves.
- Brown sugar cinnamon: Just make my homemade brown sugar cinnamon pop tarts. They’re hand pies. 🙂
Alternate Shapes
You can shape the hand pies whatever shape you want. I use a 3.5-inch round cookie cutter. I don’t suggest anything smaller than 3 inches in diameter because you can’t fit enough filling in a pie that small. You can also shape into rectangles.. I use a ruler and cut into 3×4-inch rectangles. Bake time will be more or less depending on size—just bake until crust is golden brown. Use the same oven temperature.
Easy, right? After I cut the dough into circles, I pile it on a plate and refrigerate for about 15 minutes. Remember what I said above? The colder the pie dough is, the easier it is to work with. After the hand pies are assembled, crimp the pie crust edges, brush with a little egg wash to help the crusts brown, sprinkle with coarse sugar for added crunch and sparkle, then bake until golden brown.
Best served with salted caramel on top. Or try this maple glaze icing from my pumpkin hand pies. Maybe a dollop of whipped cream too? Or just bowl + spoon + vanilla ice cream is perfectly acceptable! Eat your heart out!
See Your Apple Hand Pies!
Apple Hand Pies Recipe
Description
Homemade apple hand pies with buttery flaky pie crust and a juicy cinnamon apple pie filling! Topped with salted caramel, these mini apple pies are both delicious and adorable.
Ingredients You’ll Need
Instructions
- Prepare my pie crust recipe through step 5. The dough must chill for 2 hours in the refrigerator. You can make pie dough ahead, see instructions below.
- Combine the diced apples, granulated sugar, butter, cinnamon, nutmeg, and allspice together in a medium saucepan or skillet over low-medium heat. While occasionally stirring, bring to a simmer. Allow to simmer for 2 minutes. Remove from heat and allow to cool uncovered at room temperature for 30 minutes. You can make filling ahead, see instructions below.
- . On a lightly floured work surface, roll out one of the discs of chilled dough (keep the other one in the refrigerator). Turn the dough about a quarter turn after every few rolls. At any sign of sticking, sprinkle some flour underneath then keep rolling. Roll out until it’s about 12 inches in diameter and about 1/8–1/4-inch thick. Using your cookie cutter, cut into circles. Re-roll any scraps and cut into circles. Place cut circles in the refrigerator to keep cold. The colder the shaped dough, the easier it is to work with. Repeat with 2nd pie dough and refrigerate cut circles for at least 15 minutes before filling the hand pies.
- Meanwhile, preheat oven to 375°F (191°C). Line two large baking sheets with parchment paper or silicone baking mats.
- Arrange half of the circles about 3 inches apart on prepared baking sheets. These are the bottom crusts. Using a sharp knife, cut slits into the remaining circles. These are the top crusts. The slits act as vents so that steam can escape as the hand pies bake. Place about 2 Tablespoons of filling in the center of each bottom crust. (Or however much fits while leaving the edges bare.) Place top crust on top. Press your fingers all around the edges to seal, then crimp the pie crust edges with a fork. If the hand pies lost some shape, use your hands to form a round circle again. It’s OK if some filling juice is leaking out. Lightly brush the top of the pie crust with egg wash mixture. Sprinkle with coarse sugar, if desired.
- At this point the hand pies can be baked, but if they don’t feel cool to touch anymore, freeze for 10 minutes before baking. The colder they are going into the oven, the better they’ll hold their shape.
- Bake for about 28–32 minutes or until they’re golden brown on top and around the edges. Rotate pans halfway through baking. Remove from the oven and allow the hand pies to cool on the baking sheets for 5 minutes, then transfer to a wire rack to cool until ready to handle. You can serve warm or at room temperature. If desired, serve with a drizzle of warm salted caramel.
- Cover leftovers and store in the refrigerator for up to 5 days.
You may also like...