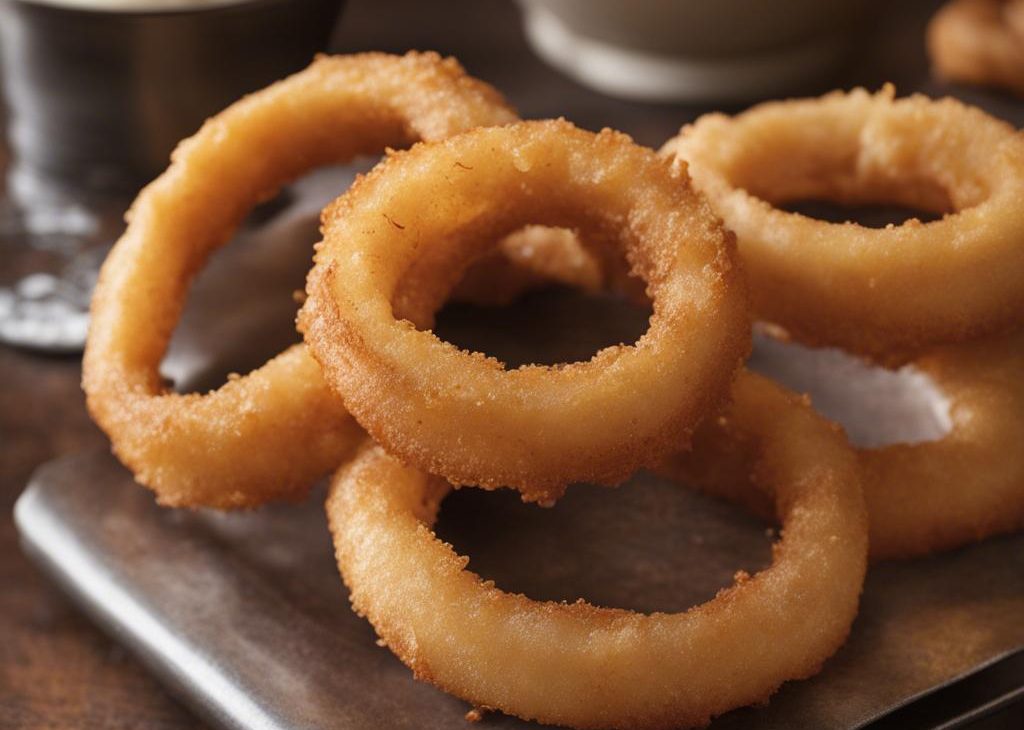

Onion rings are one of those foods I only make when I am willing to stand by the stove and pay attention. The payoff is worth it: sweet onion inside, crisp seasoned batter outside, and that first noisy bite while the rings are still hot.
This Bill Miller-style version keeps the ingredient list plain: onions, buttermilk, flour, paprika, garlic powder, salt, pepper, and oil. There is no complicated dredging line, just a thick batter that clings to thin onion rings.
I fry them in small batches because crowded oil gives soggy rings. The whole recipe moves quickly once the oil is hot, so I slice the onions, set out a draining plate, and make sure everyone is nearby before the first batch comes out.
Why I keep coming back to this
- Thin onion slices cook through in the same time the batter turns golden.
- Buttermilk gives the coating a little tang and helps the flour cling.
- Paprika and garlic powder season the batter without adding wet ingredients.
- A thick batter covers the rings more evenly than a loose one.
- Small batches keep the oil temperature steadier, which makes the crust crisper.
- They are best right away, so I treat them like a stove-side snack, not a make-ahead side.
What I use and what each part does
- Large onions, 4. I choose firm onions and slice them thin enough to cook quickly but not so thin that they collapse in the batter.
- Buttermilk, 4 cups. It makes a tangy batter and helps create a tender coating under the crisp surface.
- All-purpose flour, 4 cups. This is the structure of the batter. I whisk it well with the seasonings before adding liquid.
- Paprika, garlic powder, salt, and black pepper. The seasoning is simple but bold enough to stand up to frying.
- Vegetable oil. I use enough oil to let the rings float freely. A heavy pot helps the heat recover between batches.
How I make it
Step 1 — Heat the oil safely
I heat enough vegetable oil in a heavy pot to cover the onion rings. Bring it to medium-high heat while you slice the onions.
Step 2 — Slice and separate
I slice the 4 large onions thinly and separate them into individual rings.
Step 3 — Make the batter
In a bowl, whisk the flour, paprika, garlic powder, salt, and black pepper. Gradually stir in the buttermilk until a thick batter forms.
Step 4 — Coat the rings
I dip each onion ring into the batter and coat it completely, letting the extra drip back into the bowl.
Step 5 — Fry in batches
I carefully lower battered rings into the hot oil in batches. Fry for about 2-3 minutes per side, until golden brown and crisp.
Step 6 — Drain and eat
I lift the rings out with tongs or a slotted spoon and drain on a paper towel-lined plate. Serve immediately while warm and crisp.
What I watch for
The oil tells me how the batch is going. If the rings sink and sit quietly, the oil is too cool; if the batter darkens before the onion softens, I lower the heat.
I also keep an eye on the batter thickness. It should cling in a coat, not run off like milk. If it thins while I work, I whisk in a spoonful of flour.
My make-ahead rhythm
When I am making Bill Miller-Style Onion Rings on a busy day, I break the work into small jobs instead of trying to race through the whole recipe. I measure the ingredients, set out the bowls and pans, and handle anything that needs cooling, draining, chilling, or resting before I start the final mix. That little bit of order keeps me from rushing the step that actually decides the texture.
I also keep the key numbers where I can see them: prep time, cook time, serving count, pan size, oven temperature, and any chill time tucked into the directions. It sounds fussy until my hands are sticky or floury and I do not want to scroll with my knuckle. More than once, that habit has saved me from missing a short rest or pulling a pan too early.
If I am serving guests, I do one quiet taste or texture check before the dish leaves the kitchen. For a salad or sauce, I check salt and acid after chilling. For baked recipes, I check the center, not just the edges. For fried food, I taste the first piece and adjust the heat before committing the whole batch.
I would rather pause for five minutes than fix a rushed dish at the table. That pause might mean letting dough relax, giving a chilled salad one more toss, wiping moisture from a vegetable, or letting a hot pan settle before cutting in. None of those moves are dramatic, but they are the small kitchen habits that make the recipe taste deliberate instead of hurried. I also keep a clean spoon nearby for tasting, because guessing at the end is how I miss the one pinch of salt or splash of acid that would have made the whole dish clearer. I write any adjustment in the margin for next time, because future me never remembers as well as I think I will.
Tips from my kitchen
- Do not crowd the pot. Crowding drops the oil temperature and makes greasy rings.
- Keep the batter thick. If it runs off the onion, whisk in a little more flour.
- Use tongs gently. Rough handling can knock off the coating before it sets.
- Serve right away. Onion rings lose their crunch faster than fries.
Variations I have actually tried
- Smoky rings: use smoked paprika for half of the paprika.
- Spicy rings: add cayenne to the flour mixture.
- Extra crunchy: replace 1 cup of flour with fine cornmeal.
- Ranch-style: add dried dill and onion powder to the batter.
- Thicker steakhouse rings: slice the onions wider and fry a little longer, watching the color.
Storing and reheating
I do not pretend onion rings are as good later. If I have leftovers, I refrigerate them uncovered until cool, then store them in a container for 1 day.
To reheat, I use a 400°F (204°C) oven or air fryer until the coating sizzles again. The microwave makes the onions hot but the crust soft, so I avoid it.
How I like to serve it
I serve these with burgers, barbecue plates, or a simple dipping sauce made from ketchup and a spoonful of mayonnaise. They are also good stacked on a sandwich, but only if I add them at the last second so they stay crisp.
Frequently asked questions
How hot should the oil be?
The source uses medium-high heat. I look for batter that sizzles immediately and browns steadily, not violently. If the rings darken too fast, I lower the heat.
Can I make the batter ahead?
I prefer mixing it right before frying. As it sits, the flour hydrates and the batter can get heavy.
Why did my coating fall off?
The onions may have been wet, the batter too thin, or the rings moved before the coating set. Pat the onion rings dry and handle them gently.
Can I bake these instead?
This batter is designed for frying. For baking, I would use a separate crumb-coated onion ring recipe.
What onions work best?
Yellow onions are my usual choice because they turn sweet when fried. White onions give a sharper bite.
If you fry these, tell me whether you ate them as a side or stood at the counter taking the first batch straight from the plate.
Bill Miller-Style Onion Rings
Description
These Bill Miller-style onion rings use large onions, buttermilk, flour, paprika, garlic powder, salt, and pepper for a crisp fried coating. I keep the rings thin, fry in batches, and serve them while the crust is still crackly.
Ingredients You’ll Need
Instructions
- Heat enough vegetable oil in a heavy pot to cover the onion rings. Bring it to medium-high heat while you slice the onions.
- Slice the 4 large onions thinly and separate them into individual rings.
- In a bowl, whisk the flour, paprika, garlic powder, salt, and black pepper. Gradually stir in the buttermilk until a thick batter forms.
- Dip each onion ring into the batter and coat it completely, letting the extra drip back into the bowl.
- Carefully lower battered rings into the hot oil in batches. Fry for about 2-3 minutes per side, until golden brown and crisp.
- Lift the rings out with tongs or a slotted spoon and drain on a paper towel-lined plate. Serve immediately while warm and crisp.
Nutrition Facts
- Amount Per Serving
- Calories 603kcal
- % Daily Value *
- Total Fat 5g8%
- Saturated Fat 2g10%
- Trans Fat 0.0g
- Cholesterol 10mg4%
- Sodium 1220mg51%
- Potassium 786mg23%
- Total Carbohydrate 117g39%
- Dietary Fiber 7g29%
- Sugars 13g
- Protein 23g46%
- Calcium 331 mg
- Iron 8.0 mg
* Percent Daily Values are based on a 2,000 calorie diet. Your daily value may be higher or lower depending on your calorie needs.
Note
Do not crowd the pot. Crowding drops the oil temperature and makes greasy rings.
Keep the batter thick. If it runs off the onion, whisk in a little more flour.
Use tongs gently. Rough handling can knock off the coating before it sets.
Serve right away. Onion rings lose their crunch faster than fries.
Frequently Asked Questions
The source uses medium-high heat. I look for batter that sizzles immediately and browns steadily, not violently. If the rings darken too fast, I lower the heat.
I prefer mixing it right before frying. As it sits, the flour hydrates and the batter can get heavy.
The onions may have been wet, the batter too thin, or the rings moved before the coating set. Pat the onion rings dry and handle them gently.
This batter is designed for frying. For baking, I would use a separate crumb-coated onion ring recipe.
Yellow onions are my usual choice because they turn sweet when fried. White onions give a sharper bite.
You may also like...