
Savory, soft, and flaky, with a delicious dose of caramelized and nutty browned butter, these brown butter sage dinner rolls are a flavorful upgraded version of ordinary dinner rolls. Made from 9 simple ingredients, the rolls make a wonderful aromatic and herb-infused addition to any fall, winter, or holiday meal. (Try them with pumpkin chili!) See recipe Notes for make-ahead instructions.
This recipe is brought to you in partnership with Red Star Yeast.
Here’s Why You’ll Love These Sage Dinner Rolls
- 9 simple ingredients
- Browned butter adds depth of flavor, without adding too much prep time
- Rolls are super soft, buttery, & flaky
- Delicious earthy herb flavors from fresh sage & thyme; feel free to switch up the herbs
- Adjust prep time to your schedule—make-ahead options detailed in Notes below
Ingredients
- 1/2 cup (8 Tbsp; 113g) unsalted butter, cut into 8 pieces
- 3/4 cup (180ml) whole milk or buttermilk, warmed to about 110°F (43°C)
- 2 and 1/4 teaspoons Platinum Yeast from Red Star instant yeast* (1 standard packet)
- 3 Tablespoons (64g) honey, divided
- 1 large egg, at room temperature
- 1 teaspoon salt
- 2 teaspoons fresh chopped sage leaves, plus an extra pinch for topping
- 1 teaspoon fresh thyme leaves
- 3 cups (390g) bread flour plus more as needed*
- optional: sea salt for finishing
Key Steps in This Recipe
- Browning the butter: Browning butter gives a depth of flavor to an already delicious key ingredient. See How to Brown Butter if you’ve never done it before. (It’s easy!)
- Proofing the yeast: Proofing the yeast isn’t always necessary when you use instant yeast. However, I recommend doing it anyway to ensure the yeast dissolves and that it’s alive and active. Mix the yeast with warm buttermilk (or regular milk) and a little honey. Cover and let it sit for 5 minutes until foamy on top. Are you a bread-baking beginner? Reference my Baking with Yeast Guide for answers to common yeast FAQs.
- Making the dough: The dough comes together with milk, yeast, honey, egg, brown butter, salt, fresh sage and thyme, and flour. The honey feeds the yeast and tenderizes the dough. You can use all-purpose flour or bread flour in this recipe. You can use a stand mixer or a spatula to combine the dough ingredients.
- Kneading the dough: Knead the dough with your hands (or a stand mixer fitted with a dough hook) for 3 minutes..
- 1st rise: The dough rises in about 1.5–2 hours in a relatively warm environment.
- Shaping the rolls: Form the rolls into balls as if you were making regular dinner rolls.
- 2nd rise: Let the shaped rolls rise until puffy, which takes up to 1 hour.
- Baking: Bake until the rolls are golden brown, around 25 minutes.
- Finishing: Brush remaining brown butter, mixed with a little bit more chopped sage, on the warm rolls, and sprinkle some sea salt on top, if desired.
Let the dough rise until double in size and then punch it down to release the air:
After that, shape into 14–16 balls and arrange in a baking pan. Don’t worry if they’re not all uniform in size. A 9×13-inch pan is ideal for these brown butter sage dinner rolls, but you can bake them on a lined baking sheet or in two 9-inch round or square pans instead.
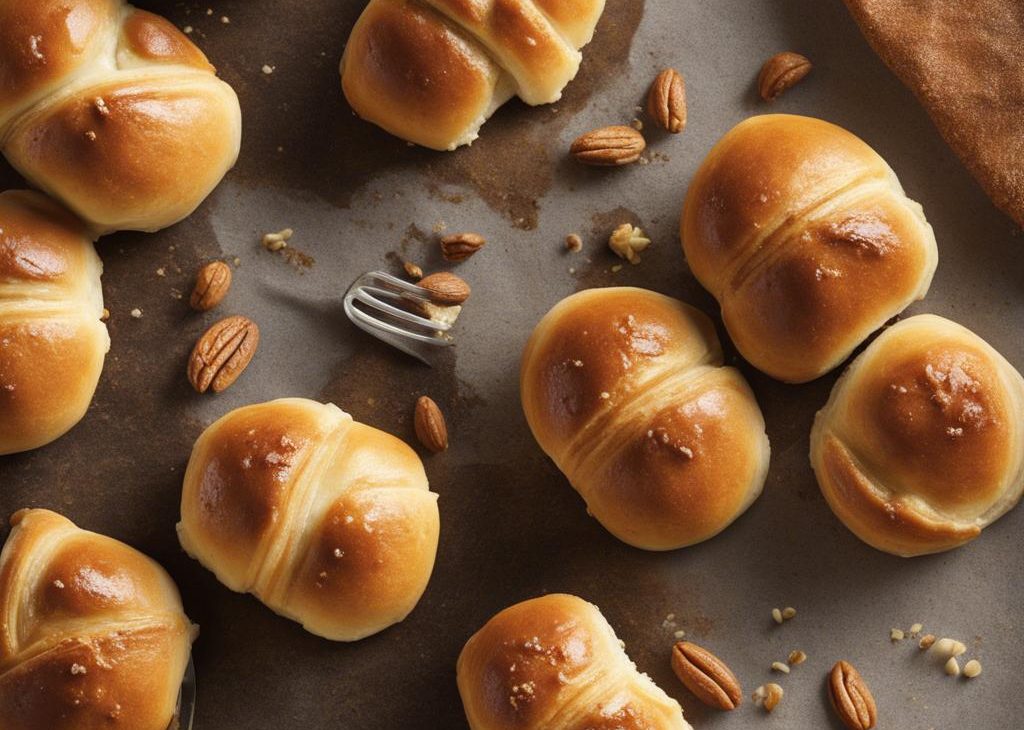
Let the shaped rolls rise before baking. Look how puffy they get after 1 hour of rising:
Thyme & sage work hand-in-hand to produce a deep herb flavor in today’s rolls. If you want to switch it up, substitute rosemary or parsley for one or both or try these garlicky herb skillet rolls instead. I have even more dinner rolls options if you’re looking for inspiration:
Serve brown butter sage rolls with cold weather favorites like your Thanksgiving dinner, creamy chicken noodle soup, lemon thyme chicken, sausage stuffed peppers, turkey pot pie, or minestrone soup.
Brown Butter Sage Dinner Rolls Recipe
Description
Savory, soft, and aromatic, with a delicious dose of the caramelized nutty flavor that comes from browning butter, these flavorful rolls make a wonderful addition to any fall, winter, or holiday dinner. See recipe Notes for make-ahead instructions.
Ingredients You’ll Need
Instructions
- Set out a medium heatproof bowl because you’ll need it at the end of this step. Place the sliced butter in a light-colored skillet or saucepan. A light-colored interior is crucial for determining when the butter begins to brown. Melt the butter over medium heat and stir or whisk constantly. Once melted, the butter will begin to foam. Continue stirring/whisking, keeping a close eye on it. After about 5–7 minutes, the butter will begin browning and you’ll notice lightly browned specks forming at the bottom of the pan. The butter will have a nutty aroma. The color will gradually deepen, from yellow to golden to golden-brown; once it’s a light caramel-brown color, remove from heat immediately and pour into the bowl, including any brown solids that have formed on the bottom of the pan. Cool for 10 minutes.
- Whisk the warm milk, yeast, and 1 Tablespoon honey together in the bowl of your stand mixer. Or, if you do not own a stand mixer, a regular large mixing bowl. Loosely cover and allow to sit for 5–10 minutes until foamy and frothy on top.
- Add the remaining honey, the egg, 6 Tablespoons (90ml) of the slightly cooled brown butter (reserve the rest for brushing on top of rolls in step 11), the salt, sage, thyme, and 1 cup bread flour. With a dough hook or paddle attachment, mix/beat on low speed for 30 seconds, scrape down the sides of the bowl with a silicone spatula, then add the remaining bread flour. Beat on medium speed until the dough comes together and pulls away from the sides of the bowl, about 2 minutes. If the dough seems too wet to a point where kneading (next step) would be impossible, beat in more flour 1 Tablespoon at a time until you have a workable dough. Dough should be soft and a little sticky, but still manageable to knead with lightly floured hands.
- Keep the dough in the mixer (and switch to the dough hook if you used the paddle) and beat for an additional 5 full minutes, or knead by hand on a lightly floured surface for 5 full minutes..) If the dough becomes too sticky during the kneading process, sprinkle 1 teaspoon of flour at a time on the dough or on the work surface/in the bowl to make a soft, slightly tacky dough. Do not add more flour than you need because you do not want a dry dough. After kneading, the dough should still feel a little soft. Poke it with your finger—if it slowly bounces back, your dough is ready to rise. You can also do a “windowpane test” to see if your dough has been kneaded long enough: tear off a small (roughly golfball-size) piece of dough and gently stretch it out until it’s thin enough for light to pass through it. Hold it up to a window or light. Does light pass through the stretched dough without the dough tearing first? If so, your dough has been kneaded long enough and is ready to rise. If not, keep kneading until it passes the windowpane test.
- Lightly grease a large bowl with oil or nonstick spray. Place the dough in the bowl, turning it to coat all sides in the oil. Cover the bowl with aluminum foil, plastic wrap, or a clean kitchen towel. Allow the dough to rise in a relatively warm environment for 1.5–2 hours or until double in size. (I always let it rise on the counter. Takes about 2 hours. For a tiny reduction in rise time, see my answer to Where Should Dough Rise? in my Baking with Yeast Guide.)
- Grease a 9×13-inch baking pan or two 9-inch square or round baking pans. You can also bake the rolls in a cast iron skillet or on a lined or greased baking sheet. (See recipe Note.)
- on-step-7">Shape the rolls
- When the dough is ready, punch it down to release the air. Divide the dough into 14–16 equal pieces. (Just eyeball it—doesn’t need to be perfect!) A bench scraper is always helpful for cutting dough. Shape each piece into a smooth ball. Arrange in prepared baking pan or a couple inches apart on a lined baking sheet.
- Cover shaped rolls with aluminum foil, plastic wrap, or a clean kitchen towel. Allow to rise until puffy, about 45–60 minutes.
- Adjust oven rack to a lower position and preheat oven to 350°F (177°C). (It’s best to bake the rolls towards the bottom of the oven so the tops don’t burn.)
- Bake for 23–27 minutes or until golden brown on top, rotating the pan halfway through. If you notice the tops browning too quickly, loosely tent the pan with aluminum foil.
- Remove rolls from the oven. Heat remaining browned butter to melt it since it has likely solidified (you can do this in the microwave for 10–20 seconds) and mix with a pinch of fresh chopped sage. Brush mixture all over warm rolls. If desired, sprinkle tops with coarse sea salt. Cool for a few minutes before serving.
- Cover leftover rolls tightly and store at room temperature for 2–3 days or in the refrigerator for up to 1 week.
You may also like...