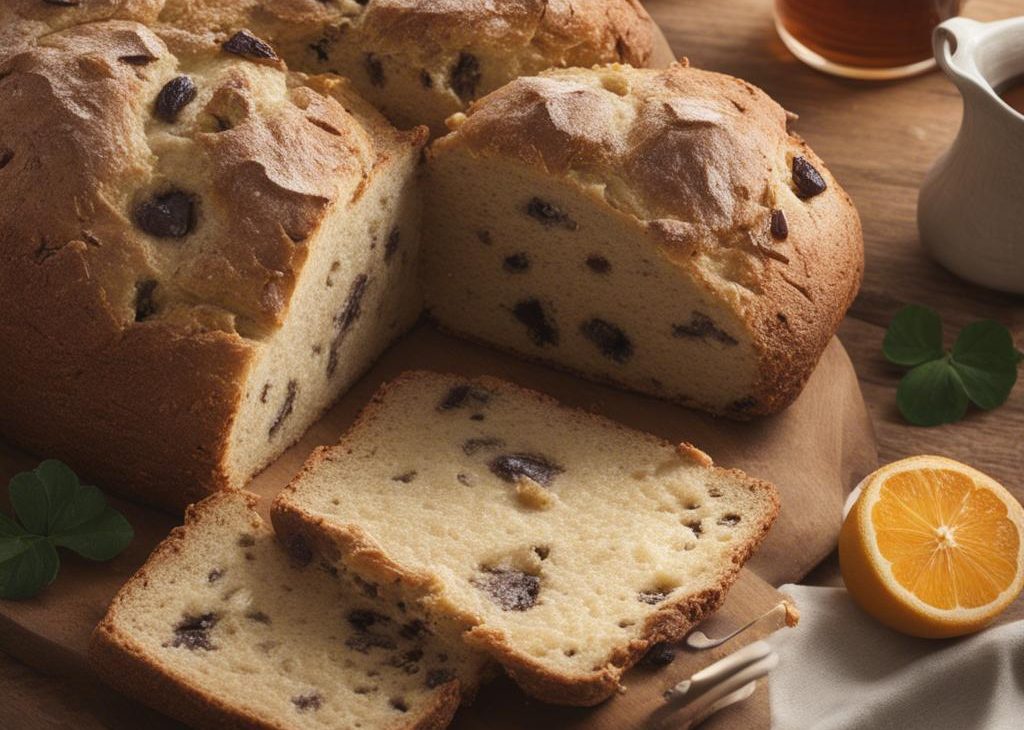

This Grandma’s Irish Soda Bread is the kind of recipe I keep for days when I want familiar food without making the kitchen feel like a project. I like recipes with a few honest signals: a clear smell when they are close, a texture I can test with a spoon or fingertip, and leftovers that still taste good the next day.
The ingredient list is straightforward once I write it in plain kitchen language: buttermilk, egg, all-purpose flour, granulated sugar, baking soda. I measure those pieces carefully, then use my eyes and nose for the final call. That combination is usually what keeps Grandma’s Irish Soda Bread from tasting either timid or overworked.
I also keep the equipment and heat the same. The pan cue I watch for is 12 inch. Small details like that make the difference between a tidy batch and one that cooks unevenly.
Why I keep coming back to this
- It uses familiar ingredients, but the finished Grandma’s Irish Soda Bread tastes like I paid attention.
- The timing is forgiving as long as I check texture instead of blindly walking away.
- I can prep most of the small pieces before the stove or oven really needs me.
- Leftovers behave well, which matters more to me than a fussy presentation.
- The recipe scales down nicely for a small table and still feels worth the effort.
- The recipe uses a 12 inch, and I stick with that size so the thickness stays right.
What you need (and what each one is doing)
- 1 3/4 cups buttermilk. This brings moisture and tenderness, and I like it close to room temperature when I remember.
- 1 large egg. Egg gives the batter structure and a softer middle.
- 4 1/4 cups all-purpose flour. This gives the loaf, cake, or pancake its structure, so I measure it instead of scooping loosely.
- 3 Tablespoons granulated sugar. This sweetens and also helps with browning, so I keep the amount steady.
- 1 teaspoon baking soda.
- 1 teaspoon salt.
- 5 Tablespoons cold unsalted butter. Fat keeps the crumb tender and carries the flavor.
- 1 cup raisins. This is the flavor I notice first, so I use fresh, good-smelling fruit or vegetables.
How I make it
Step 1 — Preheat the oven
Preheat oven to 400°F (204°C). There are options for the baking pan. Use a regular baking sheet and line with parchment paper or a silicone baking mat (bread spreads a bit more on a baking sheet), or use a seasoned 10-12 inch cast iron skillet (no.
Step 2 — Cut in the butter
I whisk the buttermilk and egg together. Set aside. Whisk the flour, granulated sugar, baking soda, and salt together in a large bowl. Cut in the butter using a pastry cutter, a fork, or the fingers. Mixture is very heavy on the flour, but do the best to cut.
Step 3 — Transfer
I transfer the dough to the prepared skillet/pan. Using a very sharp knife or bread lame, score the dough with a slash or X about 1/2 inch deep. (“Score” = shallow cut.) I scrape the bowl once or twice as I go so there are no dry pockets hiding at the bottom.
Step 4 — Bake and check the center
I bake until the bread is golden brown and center appears cooked through, about 45-55 minutes. Loosely tent the bread with aluminum foil if you notice heavy browning on top. For a more accurate test, the bread is done when an instant-read thermometer reads.
Step 5 — Transfer
I remove from the oven and allow bread to cool for 10 minutes, and then transfer to a wire rack. Serve warm, at room temperature, or toasted with desired toppings/spreads.
Step 6 — Store leftovers
I cover and store leftover bread at room temperature for up to 2 days or in the refrigerator for up to 1 week. I usually wrap it tightly in aluminum foil for storing.
How I keep the texture honest
I watch the batter or dough before I watch the timer. For Grandma’s Irish Soda Bread, the mixture should look evenly moistened but not beaten into submission. If flour is involved, I stop stirring as soon as the dry streaks disappear; if fruit or nuts are involved, I fold them in with a spatula so they stay scattered instead of sinking into one corner.
The second cue is the middle. A clean toothpick is useful, but I also look for edges that have pulled slightly from the pan and a center that springs back without wobbling. I would rather give a baked good five quiet minutes on a rack than slice too soon and blame the recipe for crumbs.
Tips from my kitchen
- Measure the odd amounts. Some of these amounts look quirky, but I keep them because the texture depends on the ratio.
- Pause before serving. Even a short rest lets juices, crumbs, or sauce settle instead of running everywhere.
- Taste where it makes sense. For raw batters I taste the add-ins only; for sauces and dressings I season at the end.
- Use the visual cue. Time gets me close, but color, smell, and firmness tell me when the dish is actually done.
- Do not overmix once flour goes in. I stop as soon as I stop seeing dry streaks, even if the batter is a little lumpy.
Variations I have actually tried
- Spicy: I add a small pinch of cayenne or red pepper flakes when the dish can handle heat.
- Herb-forward: I finish with fresh herbs so the flavor tastes fresher without changing the base recipe.
- Make-ahead: I prep the dry ingredients or chopped pieces the night before and cook as written.
- Brunch version: I serve smaller portions with fruit, salad, or eggs alongside.
- Dairy-light: When dairy is not central, I use the closest plain unsweetened substitute and keep the amount the same.
Storing and reheating
I cool Grandma’s Irish Soda Bread completely before wrapping it. Slices keep at room temperature for a day or two, but I move them to the fridge if the kitchen is warm. For longer storage, I wrap individual portions and freeze them; a quick thaw on the counter brings back the tender crumb better than blasting them in the microwave.
What I serve with it
I serve Grandma’s Irish Soda Bread with coffee, tea, or a spoonful of yogurt when it is breakfast-leaning. If it is dessert, I keep the plate simple because the crumb and sweetness already do enough work.
My final check is simple: I take one small bite the way I plan to serve it. Warm food should taste rounded, cold food should taste a little brighter, and anything sliced should hold together without being stiff. That bite tells me whether I need a pinch of salt, a squeeze of citrus, or just a few more minutes of patience.
My make-ahead rhythm
I do not always cook Grandma’s Irish Soda Bread from start to finish in one stretch. If the recipe has chopped ingredients, I handle those first and keep them covered. If it has dry ingredients, I measure them into one bowl. If it has a sauce or topping, I make that early so the last few minutes feel calm instead of crowded.
Right before serving, I look for the one thing that makes it taste freshly made: a warm slice, a quick stir, a crisp edge, a cold glass, or a small spoonful of sauce. That little reset is often enough to make leftovers or prepped pieces feel intentional.
Frequently asked questions
Can I make Grandma’s Irish Soda Bread ahead?
Yes. I usually prep the measured ingredients first and finish the recipe close to serving time. If it is a baked or simmered dish, I cool it completely before covering so condensation does not make the top soggy.
What is the biggest mistake to avoid?
Rushing the texture check. I use the listed time as a guide, then look for the cues in the recipe: set center, softened vegetables, thickened sauce, or a clean slice.
Can I double the recipe?
Usually, yes, but I use two pans or a wider pot instead of making one extra-deep batch. A deeper dish changes the cooking time and can leave the center underdone.
Can I change the salt or sweetness?
I adjust in small steps. A little extra salt can wake up a savory dish, and a small reduction in sugar is usually fine, but large changes can affect browning and texture.
How do I know it is done?
I trust the visual cue more than the clock. The recipe should smell finished, look set or glossy in the right places, and hold its shape when I test a small portion.
If you make this Grandma’s Irish Soda Bread, I would love to hear what little adjustment made it yours.
Grandma’s Irish Soda Bread
Description
This grandma's irish soda bread is written the way I make it at home: clear steps, honest texture cues, and practical notes for serving it well. I keep the listed amounts and timing intact while explaining what I watch for in the kitchen.
Ingredients You’ll Need
Instructions
- Preheat oven to 400°F (204°C). There are options for the baking pan. Use a regular baking sheet and line with parchment paper or a silicone baking mat (bread spreads a bit more on a baking sheet), or use a seasoned 10-12 inch cast iron skillet (no.
- I whisk the buttermilk and egg together. Set aside. Whisk the flour, granulated sugar, baking soda, and salt together in a large bowl. Cut in the butter using a pastry cutter, a fork, or the fingers. Mixture is very heavy on the flour, but do the best to cut.
- I transfer the dough to the prepared skillet/pan. Using a very sharp knife or bread lame, score the dough with a slash or X about 1/2 inch deep.
- I bake until the bread is golden brown and center appears cooked through, about 45-55 minutes. Loosely tent the bread with aluminum foil if you notice heavy browning on top. For a more accurate test, the bread is done when an instant-read thermometer reads the.
- I remove from the oven and allow bread to cool for 10 minutes, and then transfer to a wire rack. Serve warm, at room temperature, or toasted with desired toppings/spreads.
- I cover and store leftover bread at room temperature for up to 2 days or in the refrigerator for up to 1 week. I usually wrap it tightly in aluminum foil for storing.
Nutrition Facts
Servings 1
- Amount Per Serving
- Calories 3333kcal
- % Daily Value *
- Total Fat 73g113%
- Saturated Fat 41g205%
- Trans Fat 2.3g
- Cholesterol 410mg137%
- Sodium 3829mg160%
- Potassium 2546mg73%
- Total Carbohydrate 592g198%
- Dietary Fiber 20g80%
- Sugars 156g
- Protein 81g162%
- Calcium 704 mg
- Iron 28.8 mg
* Percent Daily Values are based on a 2,000 calorie diet. Your daily value may be higher or lower depending on your calorie needs.
Note
Measure the odd amounts. Some of these amounts look quirky, but I keep them because the texture depends on the ratio.
Pause before serving. Even a short rest lets juices, crumbs, or sauce settle instead of running everywhere.
Taste where it makes sense. For raw batters I taste the add-ins only; for sauces and dressings I season at the end.
Use the visual cue. Time gets me close, but color, smell, and firmness tell me when the dish is actually done.
Frequently Asked Questions
Yes. I usually prep the measured ingredients first and finish the recipe close to serving time. If it is a baked or simmered dish, I cool it completely before covering so condensation does not make the top soggy.
Rushing the texture check. I use the listed time as a guide, then look for the cues in the recipe: set center, softened vegetables, thickened sauce, or a clean slice.
Usually, yes, but I use two pans or a wider pot instead of making one extra-deep batch. A deeper dish changes the cooking time and can leave the center underdone.
I adjust in small steps. A little extra salt can wake up a savory dish, and a small reduction in sugar is usually fine, but large changes can affect browning and texture.
I trust the visual cue more than the clock. The recipe should smell finished, look set or glossy in the right places, and hold its shape when I test a small portion.
You may also like...